
How-To: Carburettor Maintenance
![]()
This content was originally published in issue #46 of Transmoto Dirt Bike Magazine in September, 2014.
![]()
The once ubiquitous Keihin FCR was the carby of choice for a whole generation of dirt bikes. Although EFI has largely displaced the Keihin in nearly all modern bikes, the humble carby can still be found on a few new models – as well as the majority of bikes that were produced over the past two decades. During that period of carby-fed dominance, the Keihin – in various FCR models – quickly cemented itself as the market leader, thanks to its reliable accelerator pump, high-tech four-wheel slide, and near infinite adjustability. But due to its complexity, there are parts that wear out or get gummed up over time. Sometimes you will even notice a dramatic drop in power or response. Other times, it may just fade slowly over time. To combat these issues, it pays to pull your carby down for servicing. Aside from just inspecting parts for wear marks, it’s a great opportunity to clean off dried fuel and blow out any blockages. This is particularly the case if the bike has been sitting for extended periods with fuel in the bowl. Over the following pages, Nick Dole from Teknik Motorsport explains how to properly pull down your carb and get it running like new again.
![]()
Tools You’ll Need
![]()
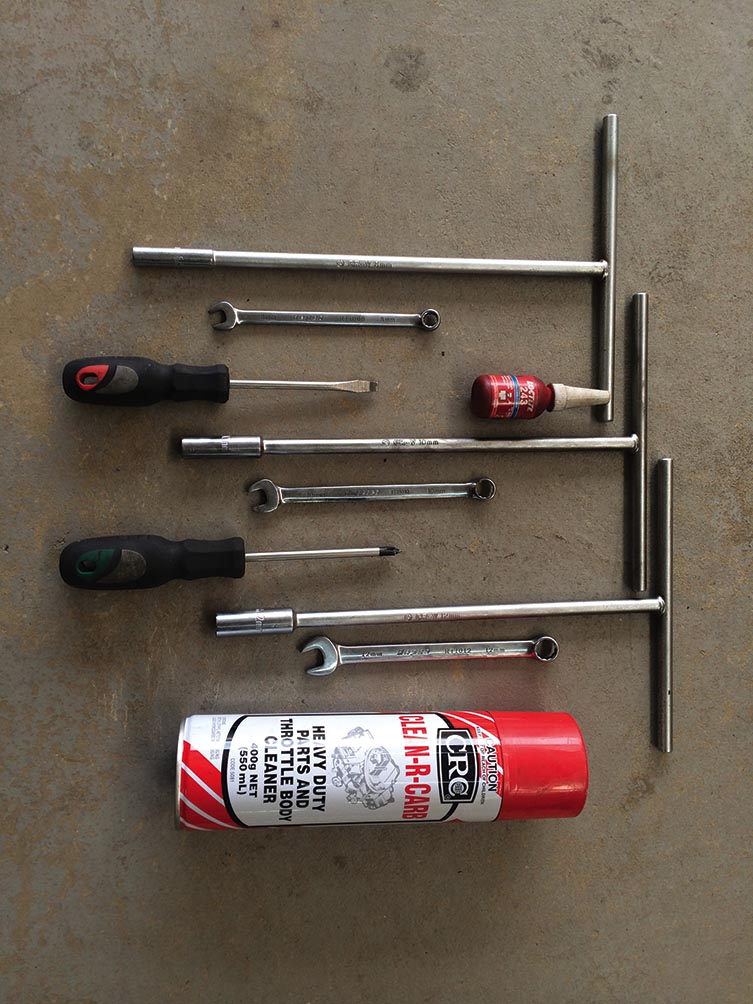
● Spanners, T-bars and Socket Set
● Screwdrivers
● Carby Cleaner
● Loctite
![]()
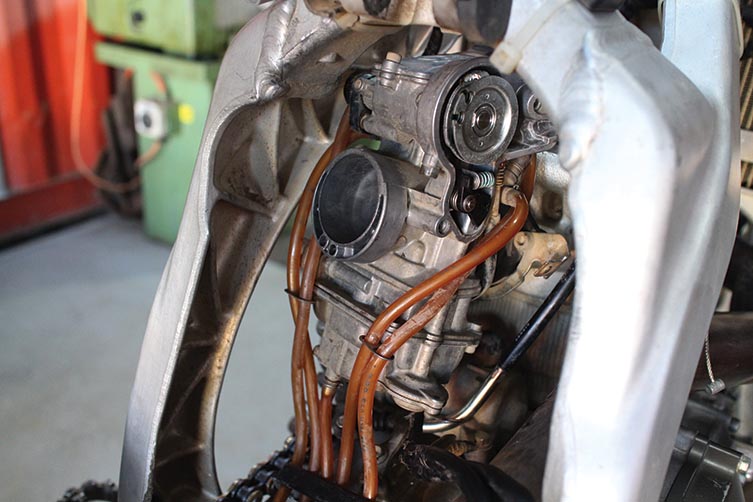
1. Remove The Carburettor
![]()
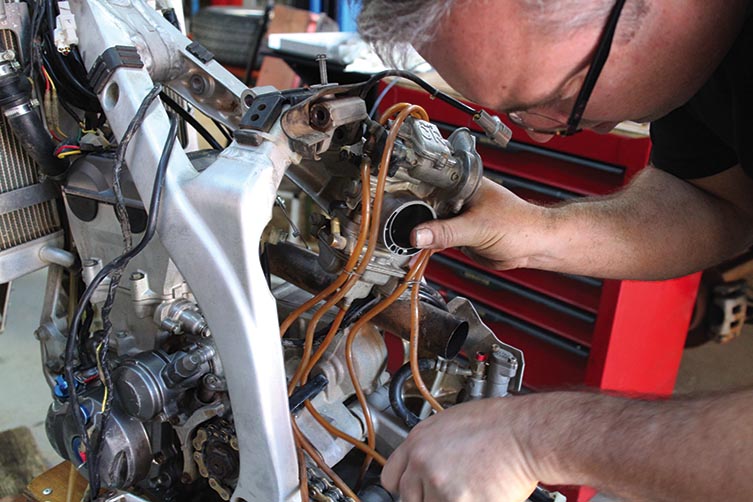
By simply loosening the pipe clamps at the front and rear of the carby, you should be able to twist it in each direction – check this first to see if this gives you enough clearance for the job. If the carby does need to come out, on most perimeter-framed bikes it is easiest to remove the subframe and the shock first. Disconnect the throttle cable, hot-start and fuel lines, and then ensure the vent hoses are loose before you remove the carb from the bike. Remember, you don’t need to remove the throttle position sensor (TPS) if your bike has one.
![]()
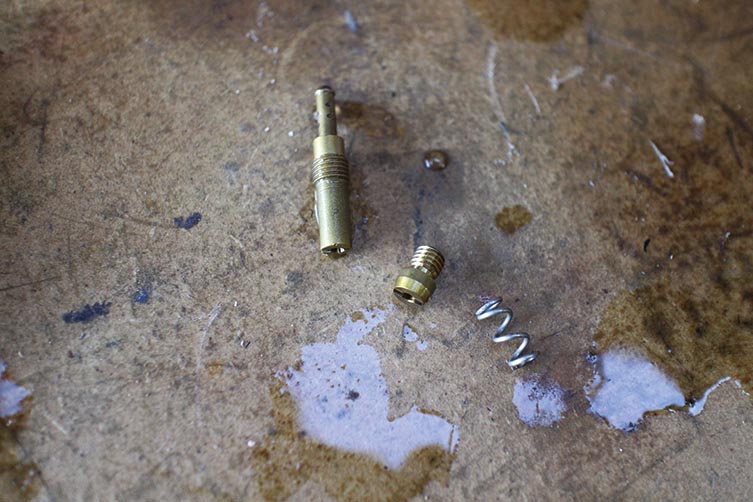
2. Remove & Clean the Fuel Screw
![]()
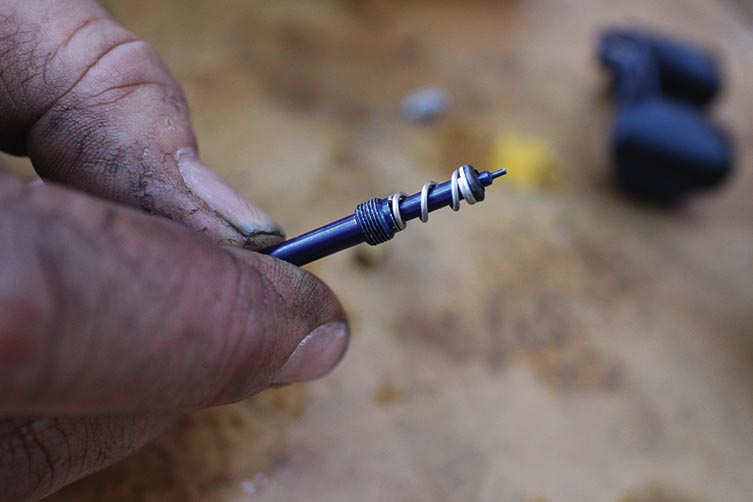
Once you’ve thoroughly cleaned the carby’s exterior, the next step is to remove the fuel screw. Take care to get the small spring, O-ring and washer together. Also make sure you clean any residue off the end of the screw. When reinstalling later, make sure you put the spring on first, followed by the washer and then the O-ring last. Remember, the screw should take between eight and nine rotations to tighten properly.
![]()
3. Remove the Slide & Pivot Shaft
![]()
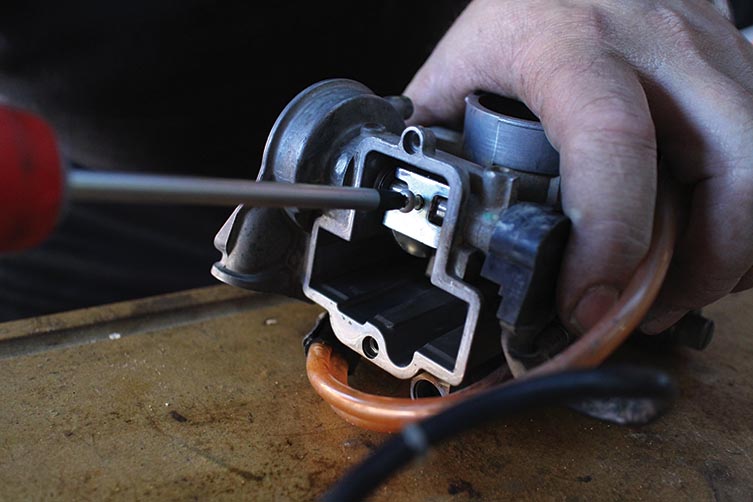
Once you have removed the top cap, extract the bolt that connects the throttle linkage to the slide. This may be a Phillips head, Torx screw or an Allen key. You can then rotate the throttle linkage up and the slide can be pulled out. Some carby slides have a wear plate that sits against the slide. Replacing this plate may assist with crispness and throttle response in the engine’s lower rev range.
![]()
4. Throttle Linkage & Accelerator Pump
![]()
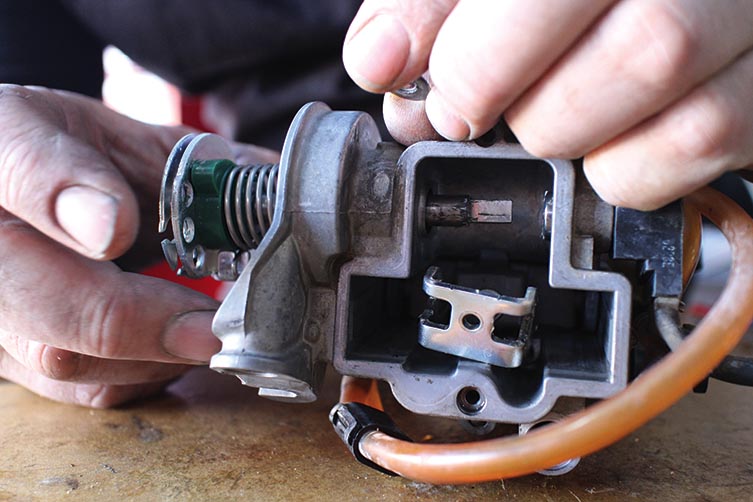
The accelerator pump is operated via a rod that is activated from the throttle pivot. Try to operate the rod by hand – if there is any restriction, remove it and give it a clean. While the needle and slide are out, you can pull the throttle pivot shaft out to clean the shaft, O-rings, spring and other parts.
![]()
5. Clean the Needle & Slide
![]()

Remove the needle from the slide, but be sure to make a note of which clip position the needle is in first. With the needle out, give all of the components a thorough clean with carby cleaner, including the slide wheels and shaft. To reassemble, reinstall the needle in the correct clip, then place the slide in the shaft. Reinstall the pivot shaft, and then use some Loctite on the bolt that connects the pivot shaft to the slide.
![]()
6. Remove the Bowl
![]()
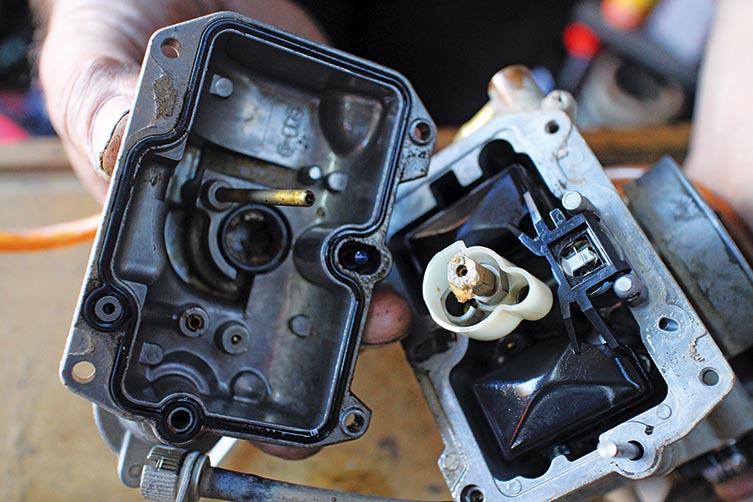
Remove the vent hoses, and then take the bowl off the bottom of the carb. Note – or photograph – where the idle adjustment bracket and any other brackets belong. With the bowl off, use a small drill or Allen key to push the pin out of the float pivot, allowing the float to come out. As you pull the float out, be sure to catch the float needle. The rubber tip of the float needle should be in good condition – if it’s not, replace it.
![]()
7. Clean the Jets
![]()
The mainjet is connected to the needle jet – remove them together. You should also unscrew the starter and pilot jet, using a flat-blade screwdriver. Clean all the parts using carby cleaner and compressed air, ensuring all residue and blockages are removed. Also, make sure that you clean the bowl and carby body thoroughly
![]()
8. Reassembly
![]()
Reassemble the bowl by putting the plastic spacer in place, and then installing the needle and mainjet, then pilot and start jets in that order. Don’t over-tighten them, as you’re working with brass and aluminium, which both warp easily. Reinstall the float needle and float, then the bowl. When putting the carby back into the bike, make sure you carefully install the rubber air boots to ensure a proper seal – as any gaps may lead to a dusted engine.
Related Content

HOW-TO: MAINTAIN YOUR BRAKE SYSTEMS

HOW-TO: REPLACE FOUR-STROKE VALVES
You might also like...

Boost Secures 2025 AUSX Naming Rights
The Australian Supercross Championship is set to launch into its biggest season yet.

TT Circuit Assen To Host 2027 MXoN
The 80th edition of the MXoN will see the legendary event return to Dutch soil in 2027.

First Look: Aus MXGP Battleground
The 2025 MXGP of Australia track design has been revealed.

Aussie Riders Join Aus Hall of Fame
Four new Aussie riders have been inducted into the Australian Motorsport Hall of Fame.

VIDEO: DAKAR RALLY 2025 – BIKE HIGHLIGHTS
Didn’t manage to keep up with the longest desert race in the world? We’ve got you covered.

FIVE REASONS TO RACE A 2025 TRANSMOTO EVENT
Need some convincing? We’ve got you covered.

2025 SMX World Championship Video Pass
SuperMotocross Video Pass season subscribers can enjoy 10 months of live event coverage, plus over 900 hours of archived Supercross & Pro Motocross races.

OCEANIA WOMEN’S MX CUP EXPANDS IN 2025
An expanded Oceania Women’s MX Cup promises to be real shot in the arm for female MX riders – in Oz and worldwide!
Be the first to comment...