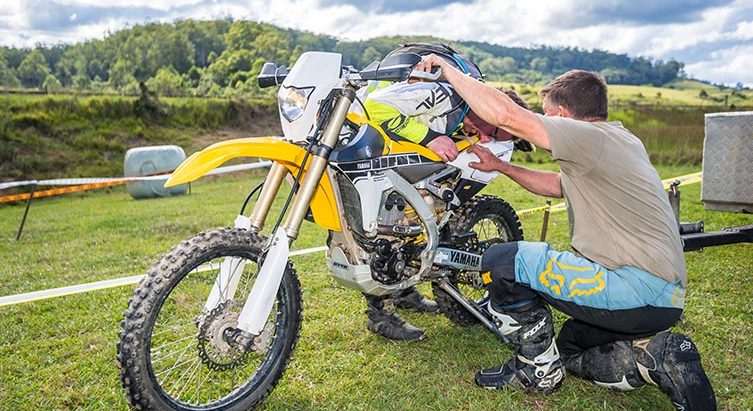
How-To: Maintain Your Brake Systems
When we talk about motorsports, we devote countless hours to debating and discussing the speed, style, horsepower and freedom enjoyed. It is easy to glamorize the poetic aspects of competitive sporting while neglecting a crucial feature, the stopping power of our machines. The faster the speed–and we are going faster than ever these days–the more important it is to have reliable stopping power.
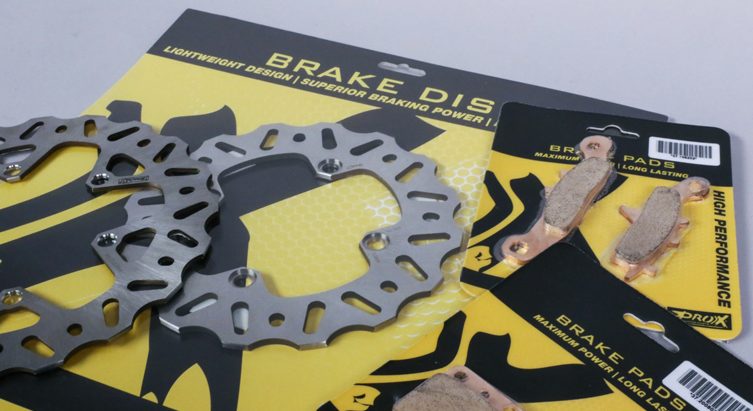
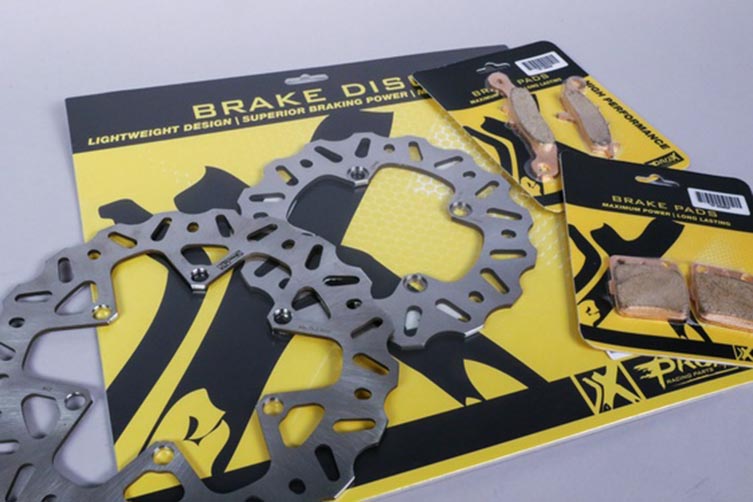
Braking systems have several moving parts that not only require maintenance but display considerable improvement with aftermarket pieces. Usually, we choose aftermarket parts for their affordability and greater quality when compared to the original engineered manufacturer (OEM) parts. ProX is a reliable example of an aftermarket company offering improved brake pad compounds, different discs, master cylinder rebuild kits and calliper rebuild kits.
![]()
Master cylinders, brake callipers, brake lines, and brake pads are critical and dependent on each other in a motorcycle disc brake system. Read on to learn more about how it works and the maintenance it requires.
![]()
In 1993 the Federal Government ended production of asbestos brake pads and ultimately forced their removal entirely from shelves and new vehicles by 1997. This removal became the catalyst for organic carbon pads that are now sold and used on all vehicles. While there’s no doubt organic pads are safer for the environment, they have an unfortunate consequence of wearing quickly.
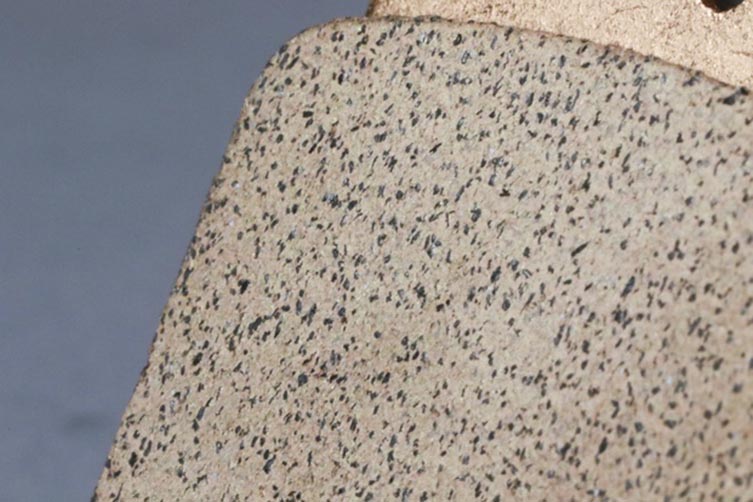
This unexpected result led manufacturers to develop sintered brake pads. Sintered brake pads are used almost exclusively on all motorcycles produced today, as they are useful in multiple riding conditions. The sintering process is the fusing of metallic particles under heat and pressure. This fusing creates a compound that becomes resistant to friction. Sintered pads have become the gold standard for performance and durability on motorcycles today.
ProX has committed time to develop and test, resulting in a successful formula to fuse under heat and pressure. These formulas are pressed onto the backing plate, creating the brake pad. ProX then compiles testing performed in the lab, on the track and additional endurance testing to ensure consumers are getting the best option for their bike.
![]()
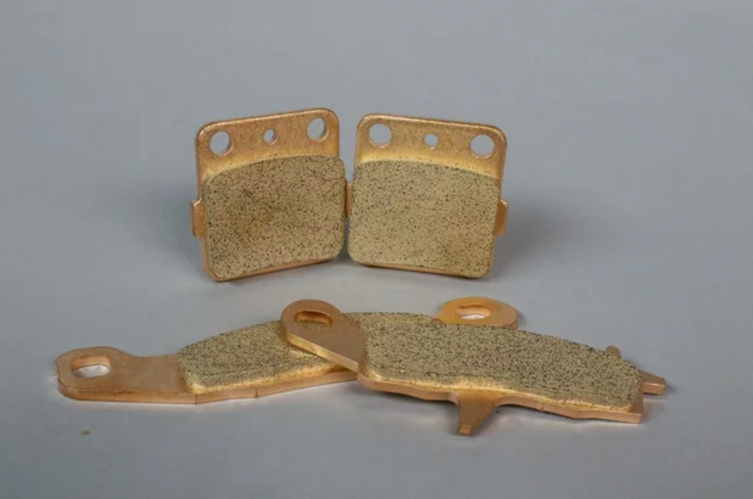
ProX brake pads feature sintered material, meaning metallic particles are fused under heat and pressure.
![]()
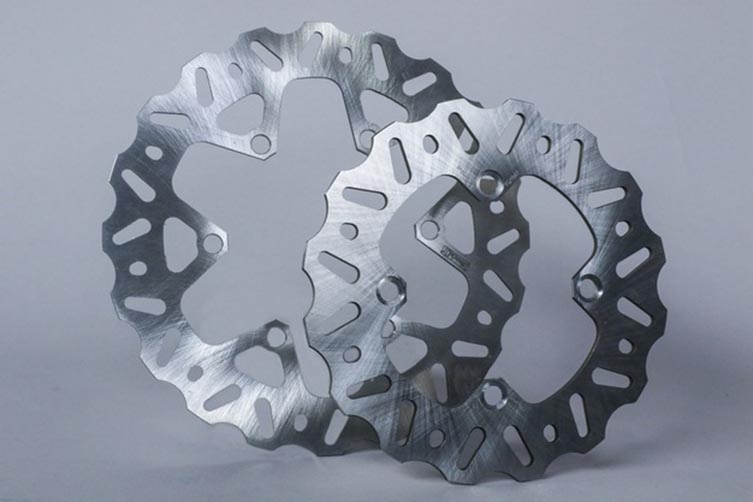
When dealing with brake discs, there are multiple factors to look into before choosing a rotor. The first thing to consider is the quality of metal used in the creation process, as different alloys respond differently to extreme heat and friction. Most rotors are formed from hardened stainless steel. Hardened stainless steel is strong, resistant to rust and tolerant to almost all brake pad materials, specifically sintered pads. Another option, although rarely used, is cast iron. While an advantage of using cast iron is the price point (it is inexpensive to produce), a disadvantage is the susceptibility to disc warping. ProX brake discs are manufactured from hardened stainless steel only.
Another key factor to consider when exploring brake rotors is their cooling properties. Overheating is the mortal enemy of a properly functioning braking system. A solid disc provides the largest surface for a brake pad to contact but is more susceptible to overheating. ProX rotors have been designed with CNC machined slots and holes, as well an outer diameter wave design, to optimize rotor cooling and maintain lighter weight. When a disc is exposed to too much heat and warps, it pushes the pads back into the calliper and creates inconsistent braking performance, which could possibly lead to a bad accident.

![]()
ProX rotors are hardened stainless, with machined vents and waves for better cooling and cleaning. Also notice the final surface finish, which helps ensure even pad contact.
![]()
Brake master cylinders are the first part of the system activated when the brake is applied. Once activated, you are effectively pushing the master cylinder piston to seal, preventing any fluid to retreat into the reservoir. Once sealed, the piston then forces brake fluid into the line which activates the brakes. The master cylinder requires seals, and like any seal, it is a wear item. The question then becomes; how do you know when it is time to replace the seal? The obvious answer would be a noticeable leak. Some additional symptoms include your lever or pedal beginning to feel mushy.
Many companies offer master cylinder rebuild kits, including ProX. The kits include all necessary gaskets and seals to rebuild your master cylinder. These gaskets and seals are all manufactured by OEM suppliers, so you know you’ll get OEM quality, and not have to worry about rebuilding again due to bad seals.
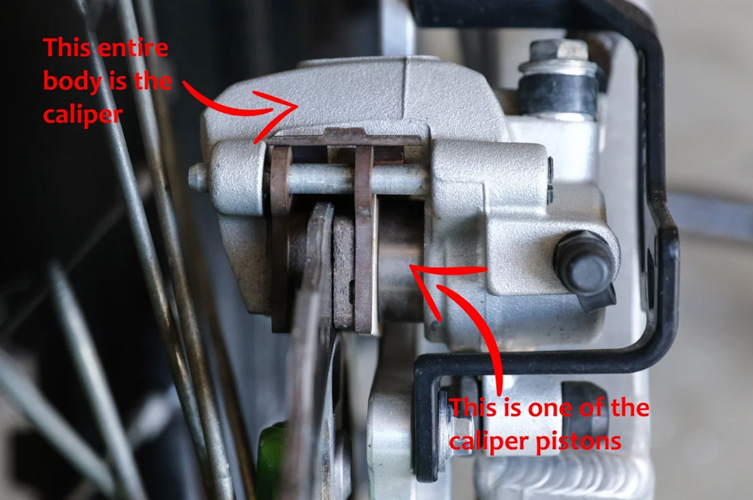
The final major component involved in the braking process is your caliper. Inside the caliper is a piston, or pair of pistons, that are forced outward as brake fluid is forced in via brake lines. The pistons force the brake pads to come in contact with the rotor surface. When the master cylinder piston is retracted, the fluid is then drawn back into the reservoir, where the caliper pistons retract the brake pads.
![]()
The pressure from the brake fluid pushes the pistons out and against the back of brake pads, forcing the pad surfaces into the surface of the rotor.
![]()
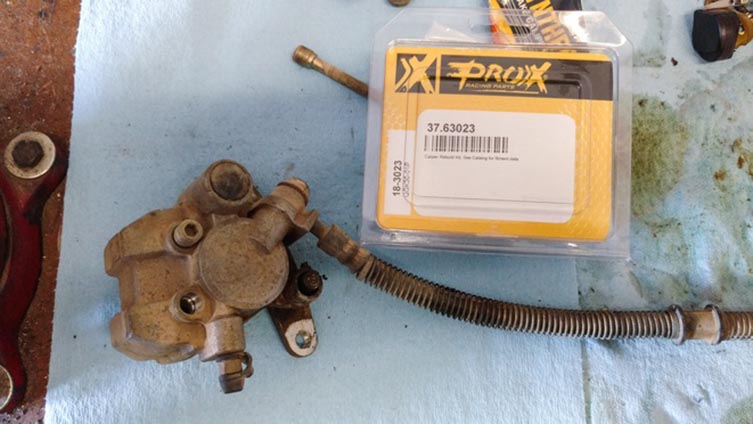
The symptoms of a bad calliper seal are similar to those of the brake master cylinder; visible leaks, the mushy feel of lever or pedal, and corrosion on the piston, among other possibilities. Calliper rebuild kits are also available through ProX, and they contain all boots, seals, washers, etc. that you need for a successful rebuild.
While brake systems are comprehensive, it is essential these parts are maintained. When broken down part by part, the system becomes less daunting, especially with high quality, affordable rebuild kits readily available. Having good brakes is similar to having a good helmet, it’s important to do what you can to prevent avoidable accidents and injury.
Click here to find your nearest ProX parts dealer.
Related Content
HOW-TO: REPLACE FOUR-STROKE VALVES
10 SIGNS YOUR 4-STROKE IS GETTING TIRED
You might also like...

2026 SMX WORLD CHAMPIONSHIP VIDEO PASS
The SMX Video Pass is back, and again providing live and on-demand access to all 31 rounds.

2026 ENDURO & CC MODELS: 7-BRAND PRICE COMPARO
A handy table of easy-to-compare prices for seven brands’ 2026 enduro and cross-country models.

HONDA CLAIMS EIGHTH AUSX TITLE
Dean Wilson sealed the deal for Honda with a dominant 2025 Australian Supercross season.
National Motorcycle Insurance
7 months ago
Ride Smart | Presented by National Motorcycle Insurance
Transmoto’s Simon Barratt covers some handy tips on how to protect your dirt bike, presented by National Motorcycle Insurance.
KTM
8 months ago
KTM DOMINATES 2025 AUSTRALIAN ENDURO CHAMPIONSHIP
The KTM DM31 Racing Team wrapped up four titles at the weekend’s AusEnduro season finale.

Boost Secures 2025 AUSX Naming Rights
The Australian Supercross Championship is set to launch into its biggest season yet.

TT Circuit Assen To Host 2027 MXoN
The 80th edition of the MXoN will see the legendary event return to Dutch soil in 2027.
First Look: Aus MXGP Battleground
The 2025 MXGP of Australia track design has been revealed.
Be the first to comment...