DIY Workshop: Throttle Maintenance
Maintaining your throttle so that it glides open and snaps shut – never jamming or binding in the process – is not only quick and inexpensive; it will also make your bike easier to control and help fend off arm pump. Riding with a sticky and poorly maintained throttle can make a 12-month-old bike feel like a 12-year-old hack. Set aside 30 minutes and follow our simple steps to achieving throttle-twisting bliss.
![]()
This content was originally published in issue #20 of Transmoto Dirt Bike Magazine in June 2012.
![]()
Lube or Replace?
Modern throttle cables have a special internal lining that greatly reduces the need to lubricate the lines. If you can feel the cables stiffening up, lubing them every now and then will certainly extend their lifespan. But if you’re going to the effort of pulling the cable ends out of the carby, you’re probably better off spending the coin to replace the lines and have the peace of mind that you don’t have to worry about it for another 18 months.
Reduce Friction
The chances are high that your dinner plate-sized mitts occupy most of the available real-estate on your grips, and that the rubber flange on the inside of your grip is pushed up against the throttle housing; thereby increasing friction when you turn the throttle. Fortunately, the fix is easy. Simply cut a donut-shaped circle from the side of a plastic milk bottle and slide it between the throttle tube and the grip to eliminate the friction or binding
![]()
Tools You’ll Need
![]()
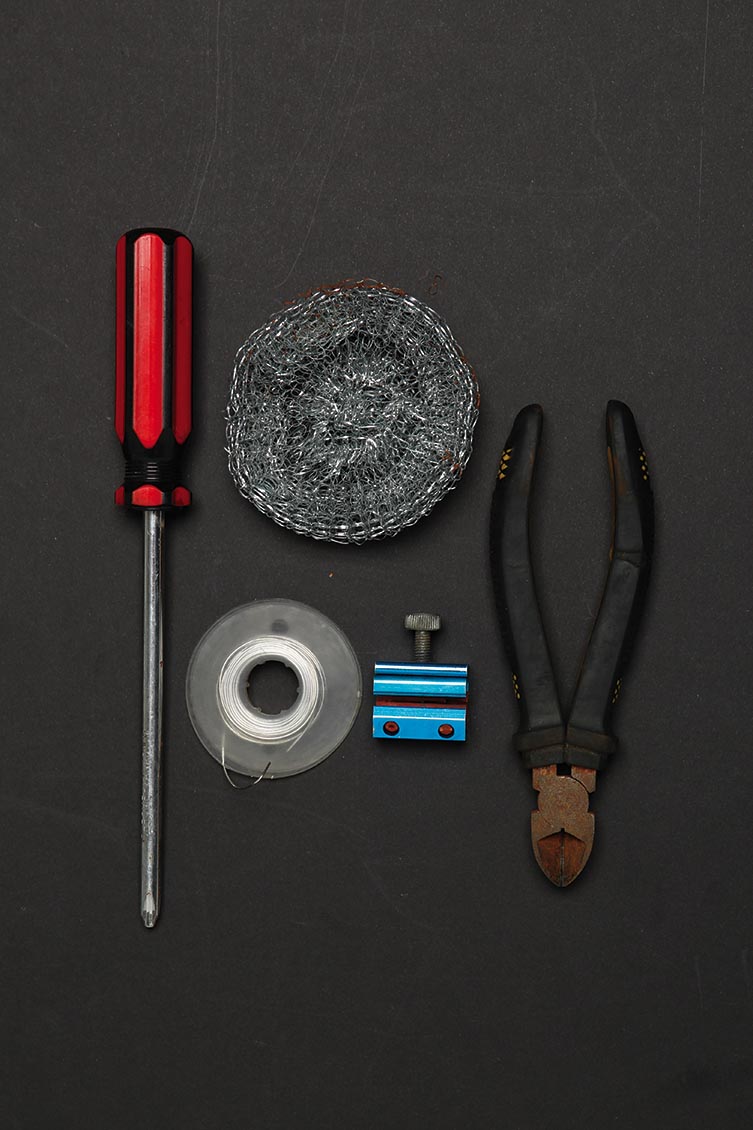
- Side-cutter pliers
- Phillips-head screwdriver
- Cable luber
- Steel wool
- Tie-wire
![]()
What It’ll Cost Ya
![]()
- Labour: 30 minutes
- Cable luber: $7.50.
- Throttle cable: $45.
![]()
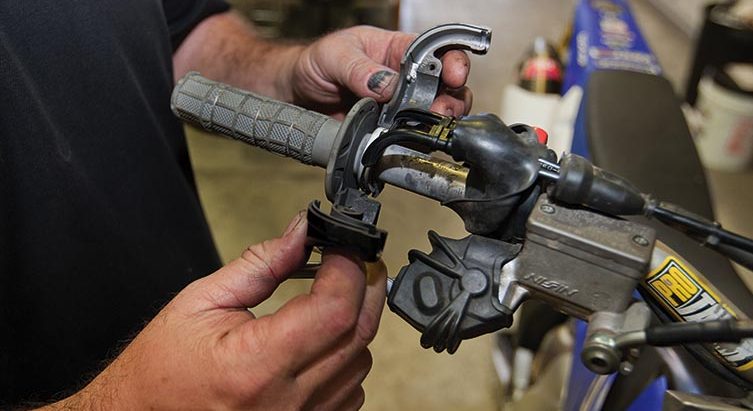
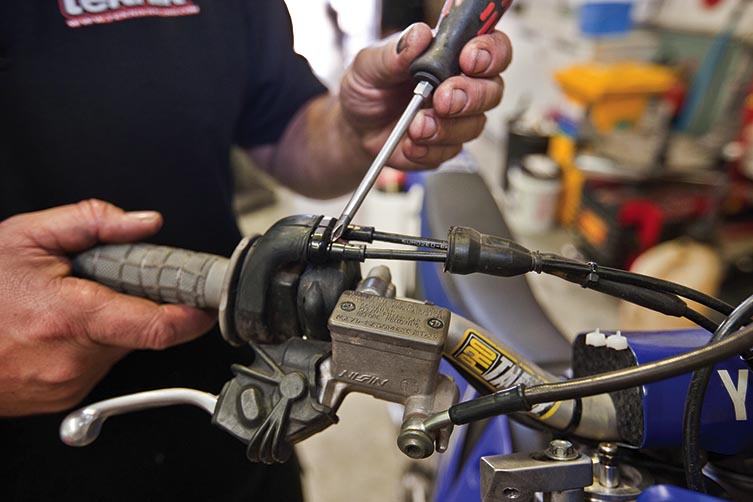
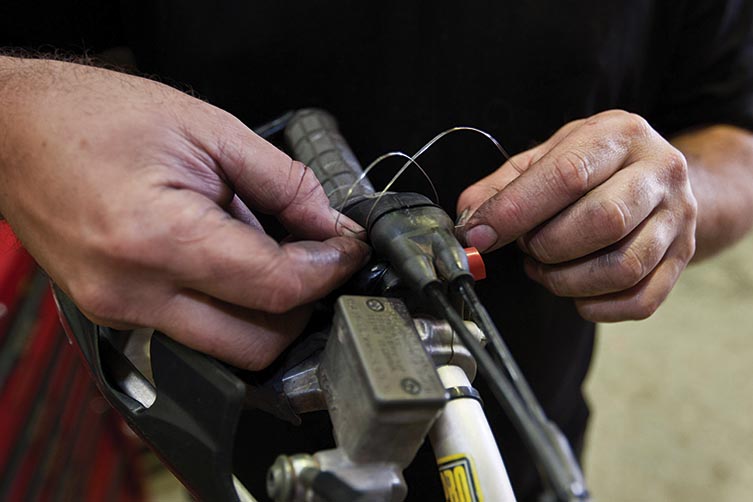
Step 1. Disassembly
![]()
Firstly, pull the rubber boot back over the throttle housing and remove the bolts clamping the assembly together – allowing the housing to be split in two. Then remove the cable ends from the throttle tube itself.
![]()
Step 2. Remove The Cables
![]()
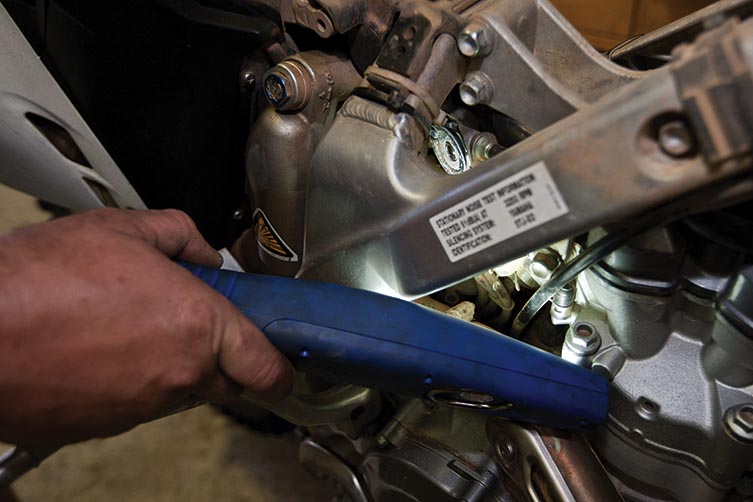
Now remove the seat and tank to gain access to the carburettor or EFI throttle body. The cable ends can then be accessed and inspected by removing the throttle cam’s cover and releasing the locking nuts.
![]()
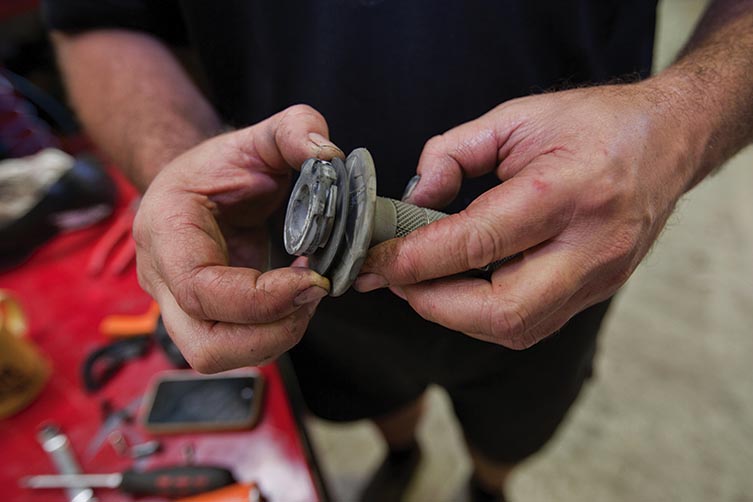
Step 3. Inspection Time
![]()
The plastic OEM throttle tube tends to wear quickly and can break easily in a crash, so check to ensure that it’s in good condition. Also, check for fraying or rust on the cable ends, and that the plastic nibs at the handlebar end of the cables haven’t snapped in half.
![]()
Step 4. Lubricate
![]()
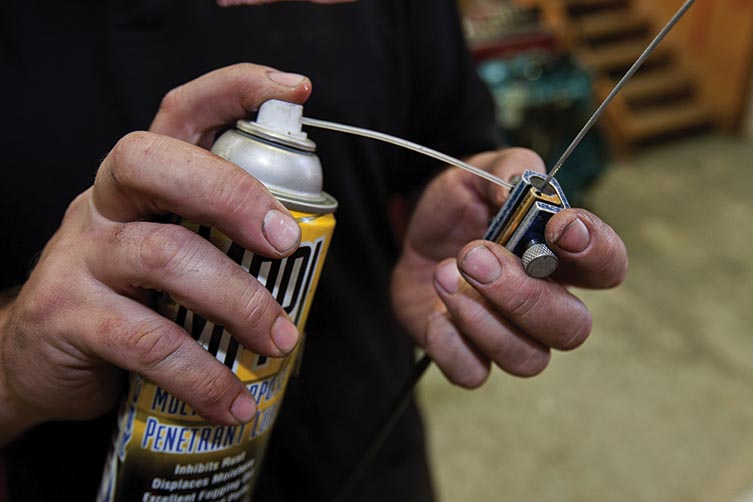
If you’ve decided to lube the cables and not replace them, spray a lubricant such as WD-40 or CRC 6-56 into the lines; using a cable luber from the throttle cam end until the spray appears at the handlebar end.
![]()
Step 5. Clean Me Up
![]()
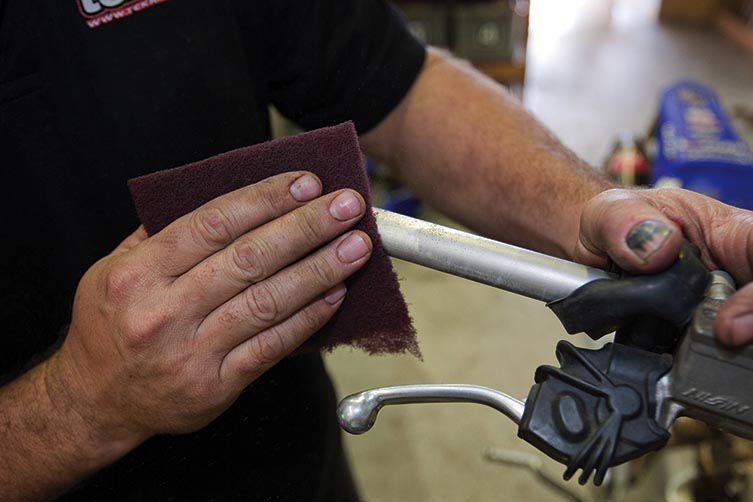
Give the bare handlebar a good scrub with steel wool to remove any build-up of grime. Also do your best to clean the inside of the throttle tube and assembly with a rag and some contact cleaner to help reduce friction.
![]()
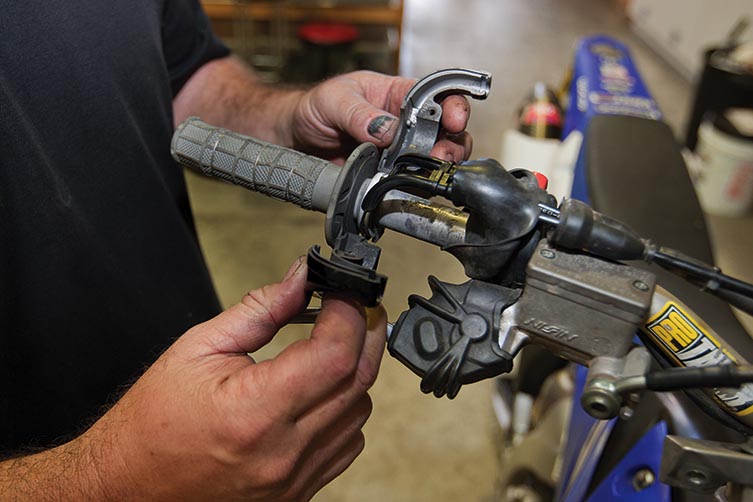
Step 6. Reassembly & Tie-Wire
![]()
Using a dry lubricant, such as graphite powder, give the handlebar and throttle tube a good covering before reinstalling. Any oil-based lube will only attract dust and turn into a sticky paste. It’s also a good idea to tie-wire the rubber boot to increase weather protection and add strength to the plastic cable ends.
More DIY Goodies

HOW-TO: FIX A FLAT TYRE

DIY WORKSHOP: LINKAGE MAINTENANCE
You might also like...
News
6 days ago
AUSENDURO ROUND 5 & 6 REVIEW
Yamaha’s Wil Ruprecht extends his perfect 2026 season at a brutal QMP double-header.
Interviews
4 weeks ago
Davies Eyes 250SX East Title In Philly
Catch Cole Davies’ thoughts on potentially wrapping up the 250SX East title this weekend in Philadelphia.
News
1 month ago
Ruprecht Dominates Dungog AusEnduro
Brutal conditions shook up the field across Round 3 and 4 of the AusEnduro Championship in Dungog, NSW.
Features
2 months ago
WATCH: JACK MILLER’S YZ450F DIRT TRACKER
This is Jack Miller’s Yamaha YZ450F like you’ve never seen it before.
Interviews
2 months ago
Get To Know Yamaha’s Souya Nakajima
The two-time Japanese IA2 champion joins Monster Energy Yamalube Yamaha for the 2026 ProMX season.
News
2 months ago
YAMAHA FLEX AT WONTHAGGI OPENER
Yamaha Australia’s motocross teams dominated Round 1 of ProMX, winning four classes and eight races.
Interviews
2 months ago
JUSTIN COOPER: MILD-MANNERED MAN IN THE MIX!
Yamaha’s Justin Cooper offers an insight into what it’s like to dice with the big dogs of the AMA Supercross’ premier 450SX class.
Yamaha
2 months ago
BUILDING CHAMPIONS WITH BRIAN DEEGAN
Brian Deegan reveals the commitment and sacrifices it takes to back his kids’ racing careers.
Be the first to comment...