How-To: Fix a Flat Tyre
When it comes to changing tyres in the garage or fixing flats out on the trail, one man’s tried and tested technique is another’s worst nightmare. While techniques differ between riders, some advice is better left alone. It really is a matter of gathering the best tips from the most experienced and sticking to that method until it becomes second nature. So what is the best technique? Well, honestly, we could give you an opinion drawn from the handful of lads in the office, but we’d still be arguing about it now. The smarter option would be to draw upon the walking encyclopedia of tyre changing that is Mr Geoff Ballard – a two-wheel legend, and founder of Ballard’s Off-Road. The Australian enduro stalwart is estimated to have changed well over 1000 tyres, with half of those under the pump in full-blown race conditions. Qualified for the task? You bet. Seeing as a good 90% of you out there settle for inflating your knobblies with conventional inner tubes, we’ll focus on just that. The following four pages will provide you with the inside line into GB’s world of technique, tools, lube, racks and talcum powder. The rest is, as you would guess, practice, practice practice.
This content was originally published in Issue #9 of Transmoto Dirt Bike Magazine, 2011.
![]()
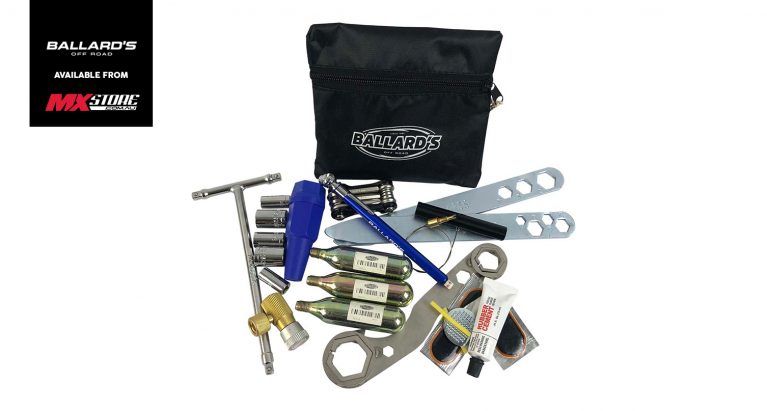
Bumbag Essentials
![]()
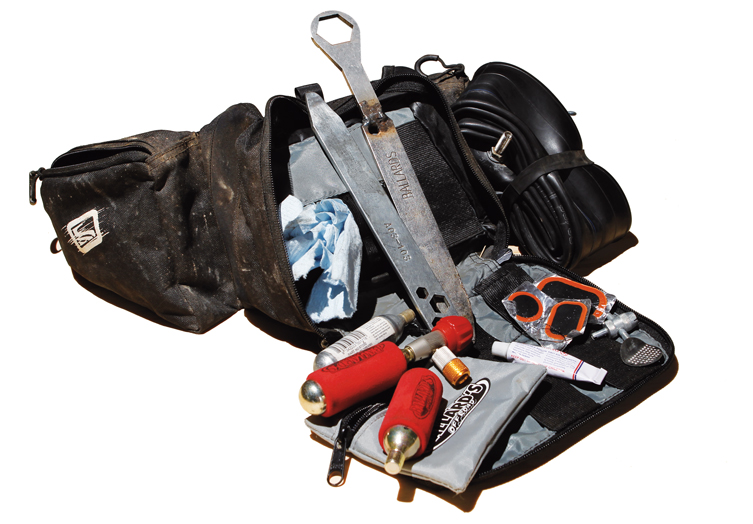
Like any trade, practice or profession, there are a basic set of tools and prep required to get the job done. Doctors don’t perform brain surgery with a toothbrush, so there’s absolutely no excuse for trying to change tyres with a set of spoons. Most of the time you’ll be changing those tyres or fixing flats in the shed. In which case, most of the tools you use in the shed are too cumbersome to wrap up in the bumbag, and you’ll need to be prepared for the potentially day-ending flat tyre on the trail. The bumbag requirements GB carries around with him for a tube repair in the line of duty consists of:
- A tube repair kit that contains at least three CO2 canisters with control valve
- rubber patches
- vulcanizing liquid
- valve tool and a rubber rasp
- A couple of tyre levers
- A lightweight 21” tube
- 8mm, 10mm, 12mm (13mm if you ride Euro) spanners
- Your favourite rag
![]()
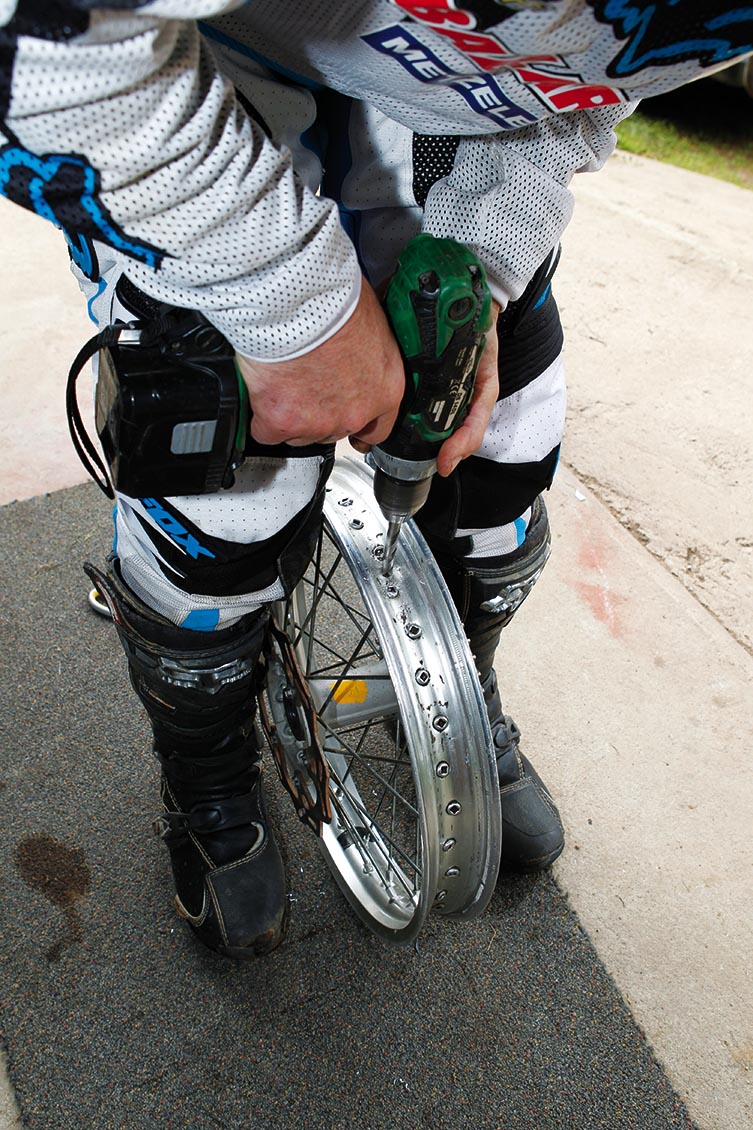
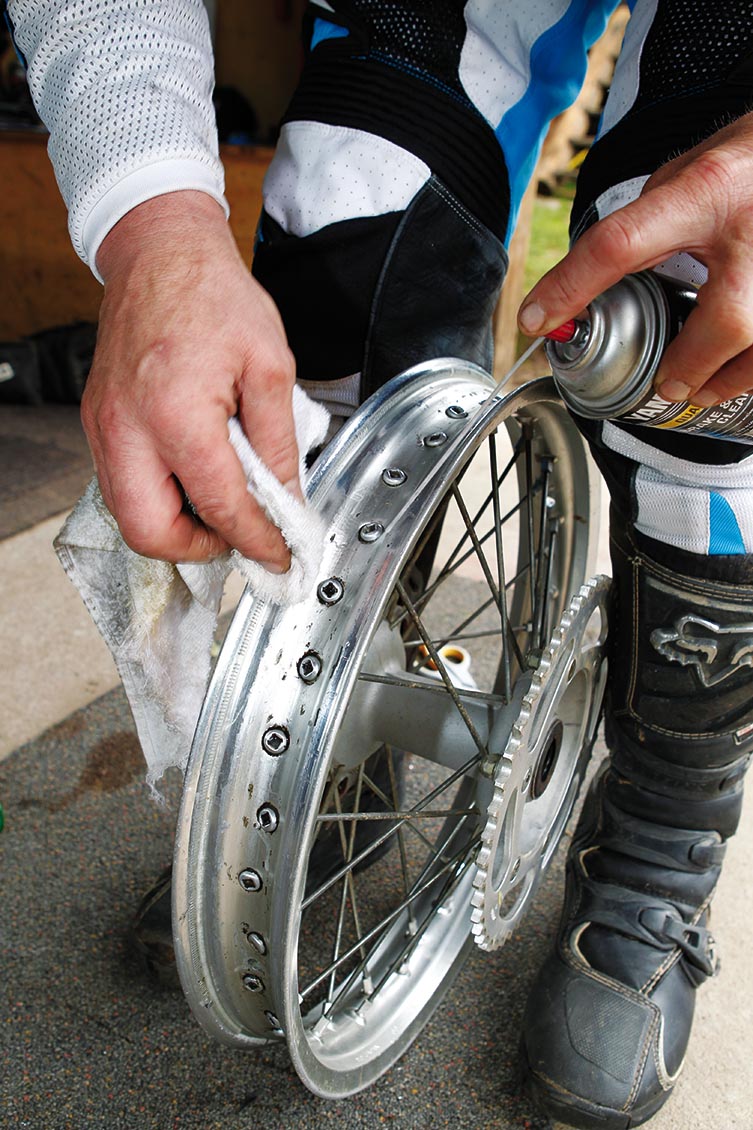
Prep The Rim
![]()
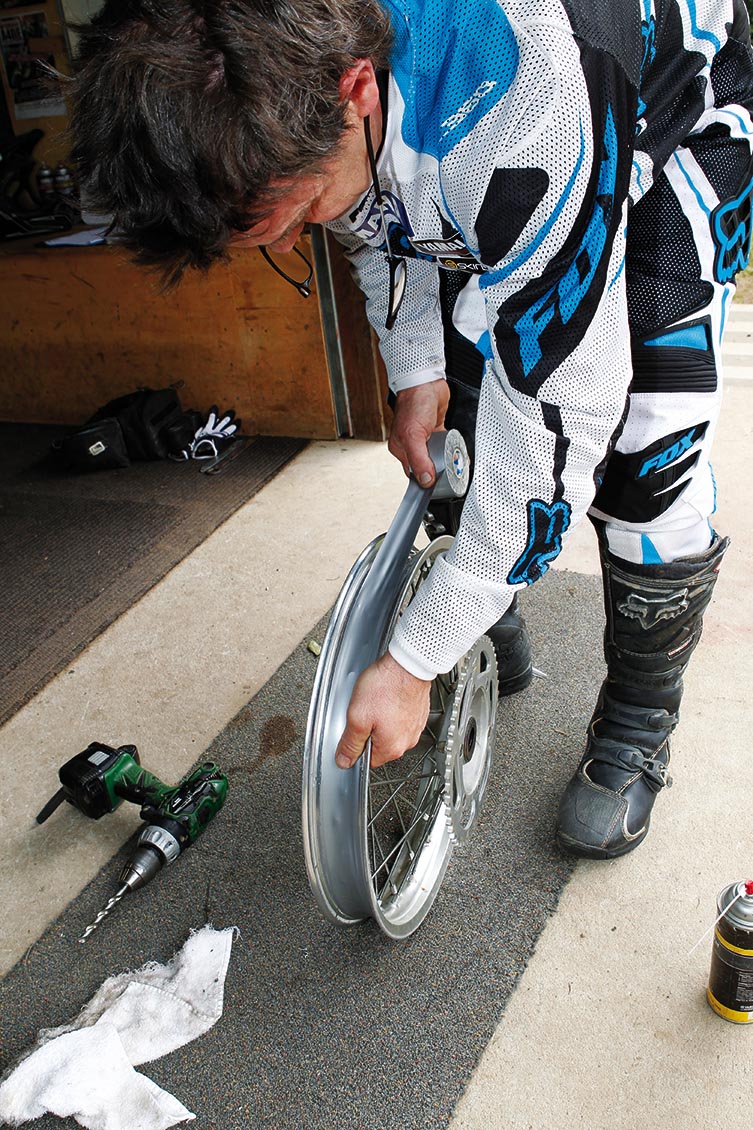
Stock wheels from the factory carry a thin rubber strip that lines the inside of the rim-well to protect the tube from the spoke nipples. While it provides some protection, they’re usually the first things to get in the way when you’re finger-deep inside the tyre, trying to slide the valve stem through the rim. A much better alternative to the rubber strip is a roll of industrial duct tape set up the same way GB prepares his wheels. As well as replacing the rubber rim-tape, it’s also important to set the valve stem hole up in the right position to the rimlock. Bikes used to come with two rimlocks, but now one lock is considered more than enough for you to slowly and safely ride your bike home even on a punctured tyre. Remove the rimlock that sits on the far side of the rim (opposite side to the valve stem hole). If your wheel only has one rimlock and it’s on the other side of the rim to the valve stem, you will need to reposition it. This involves bringing out the power tools and following GB’s advice to drill a fresh hole while taking care not to drill through the rim’s joining weld. Changing the rubber strip to duct tape, and repositioning your rimlock will ensure the tyre changing process is as easy as possible in the future.
Step 1
Remove the standard rubber rim-tape from the rim. Grab your power drill with a 10mm metal drill bit. Locate the valve stem hole and count four spoke nipples to the side (it can be either side). Locate the centre of the rim (both in the well and between spokes), and gently drill down until the drill takes a locating bite into the alloy. With the rim secured between your legs, drill as straight as possible through the rim.
Step 2
Grab a deburring tool or round file and gently smooth off the sharp edge left behind by the drill bit. Doing so will safeguard against the alloy slicing into anything soft. Then grab some contact cleaner and with a clean rag, wipe down the entire inner rim-well surface.
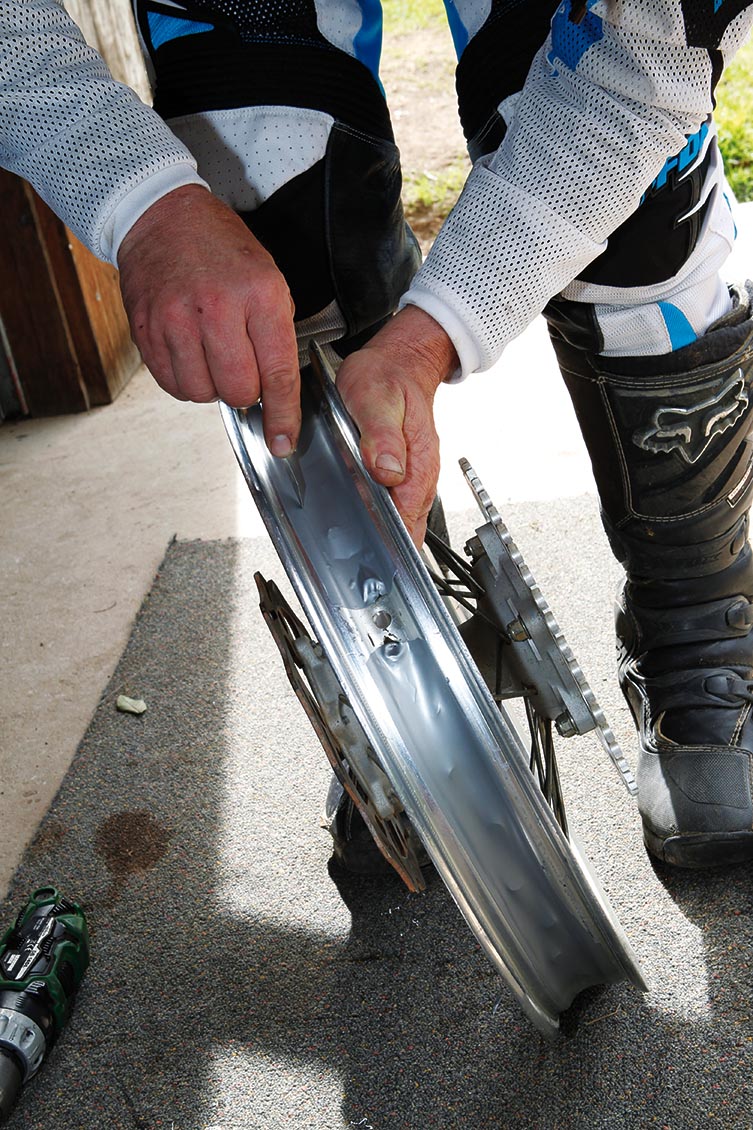
Step 3
With the rim-tape in the spares box, grab an industrial roll of duct tape. Carefully lay the tape into the well of the rim, pressing down as you go, and making sure the adhesive bonds tight.
Step 4
Once you have laid the tape around the rim’s well, slice away the tape around the hole you have drilled for the rimlock and valve (which makes it easier to locate), leaving enough to cover the spoke nipples. You will also need to trim the tape around the inside of the entire circumference of the rim on both sides, just below the lip where the tyre bead sits.
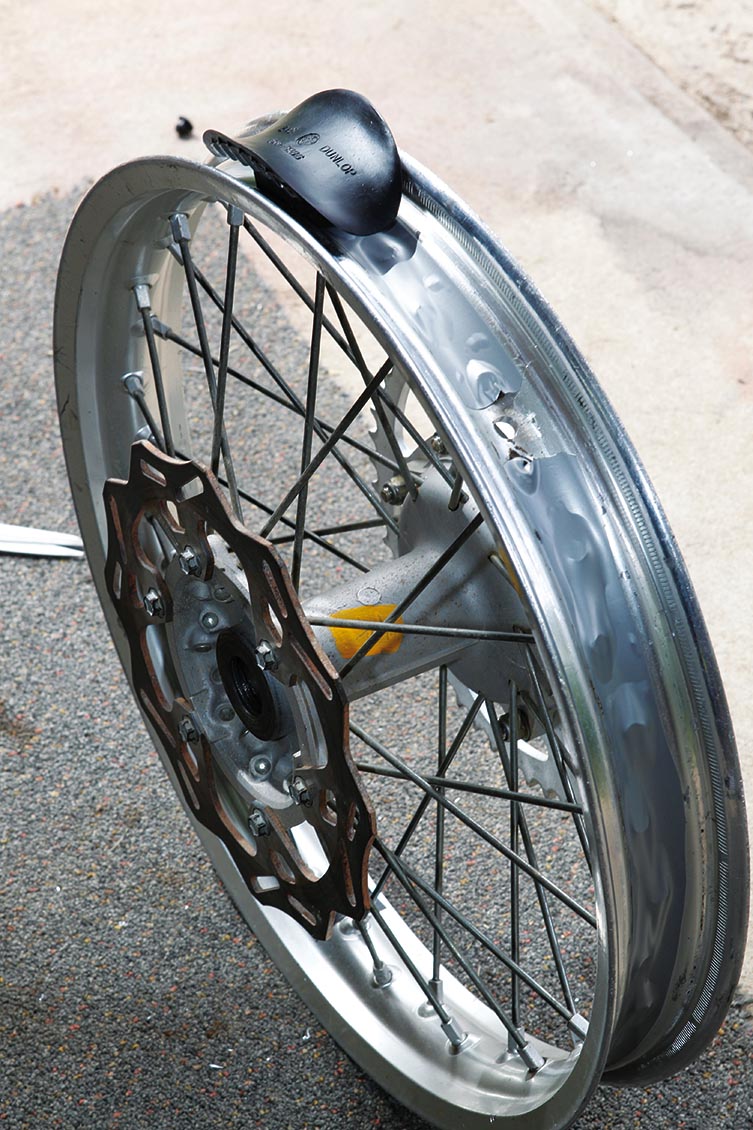
Step 5
Once you have trimmed the excess tape off both sides – leaving a smart-looking strip in the rim well – grab a new rag and run it over the tape around the whole rim to put pressure onto the tape, making sure it sticks around and in between the spoke nipples. You should also put the rim lock back into the freshly drilled hole and cut the tape covering the hole where the valve stem will be inserted.
![]()
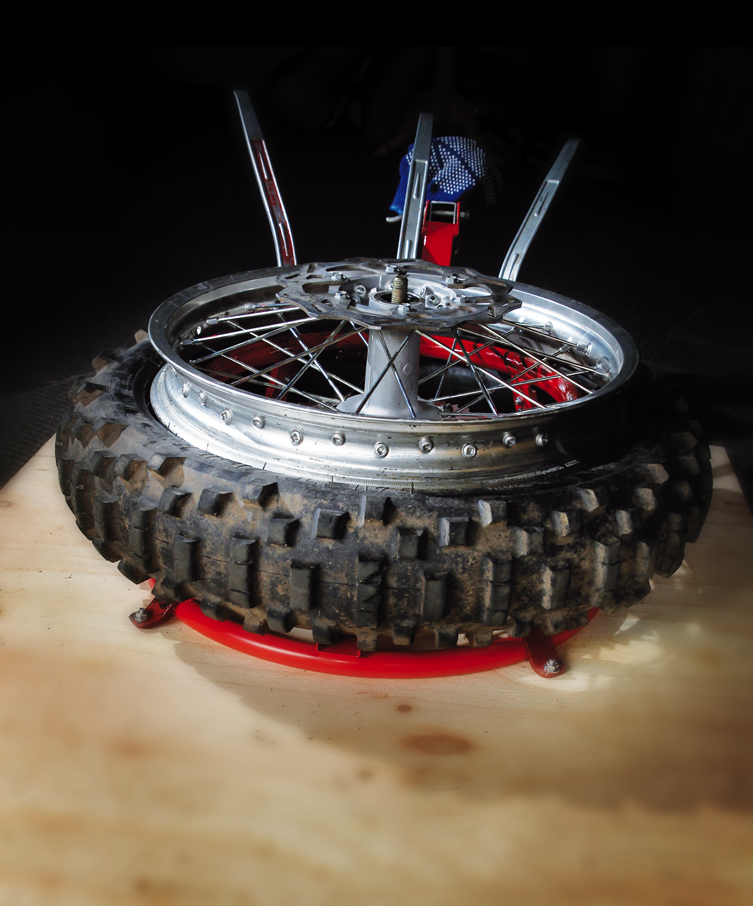
Tube It
![]()
Mounting a tyre – new or second-hand – with a tube is actually relatively easy once you’re accustomed to a set regime. Often overlooked during this critical process is the attention to detail, such as when the tube goes into the tyre carcass, what to put on the tube for protection, always working on the brake disc side, and most commonly, the fatal mal-practice use of tyre levers.
Step 1
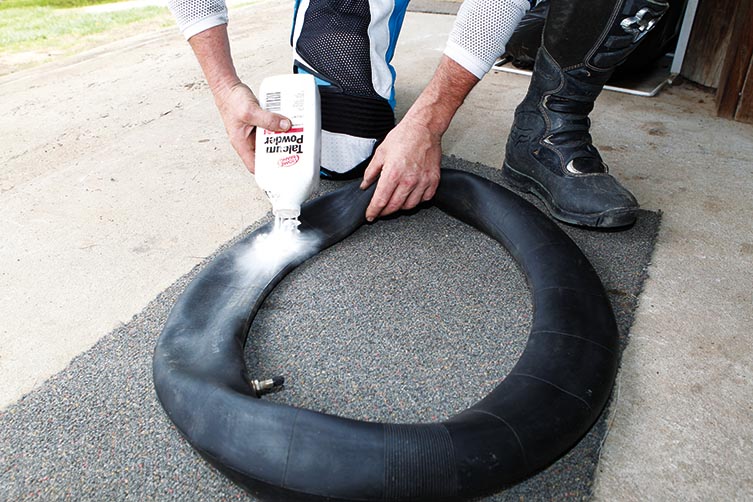
Before you ease the tube into the tyre carcass, throw a good dusting of talcum powder all over it. This helps lubricate the tube and prevents chaff that can lead to weak spots and eventually punctures. Slightly inflate the tube, close off the valve and feed the tube into the tyre carcass. New tyres may benefit from a bit of product on the bead lip (eg washing-up liquid or WD-40).
Step 2
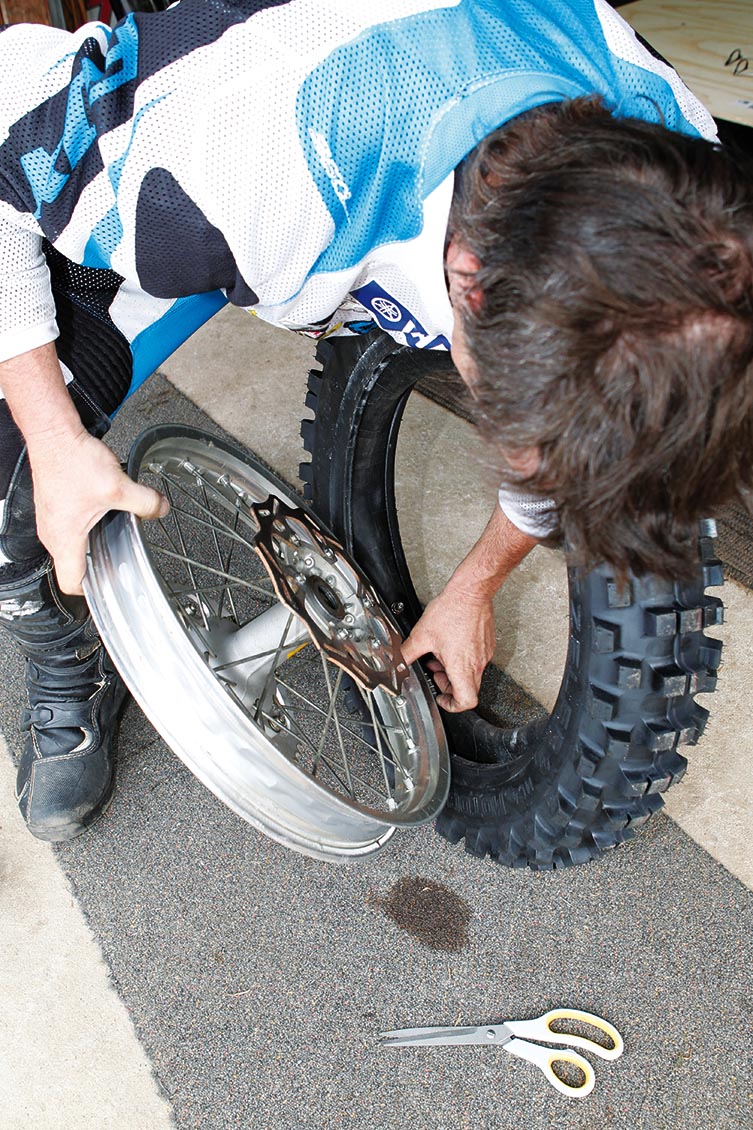
Locate the rimlock and insert it between the tyre’s sidewalls. Make sure to correctly place the rimlock wings between the bead wall and the tube. Also take note of where the tube’s valve stem is in relation to the correlating hole in the rim.
Step 3
With the right technique, you can pull and push a warm tyre onto the rim, by working your way around until one side is firmly mounted.
Step 4
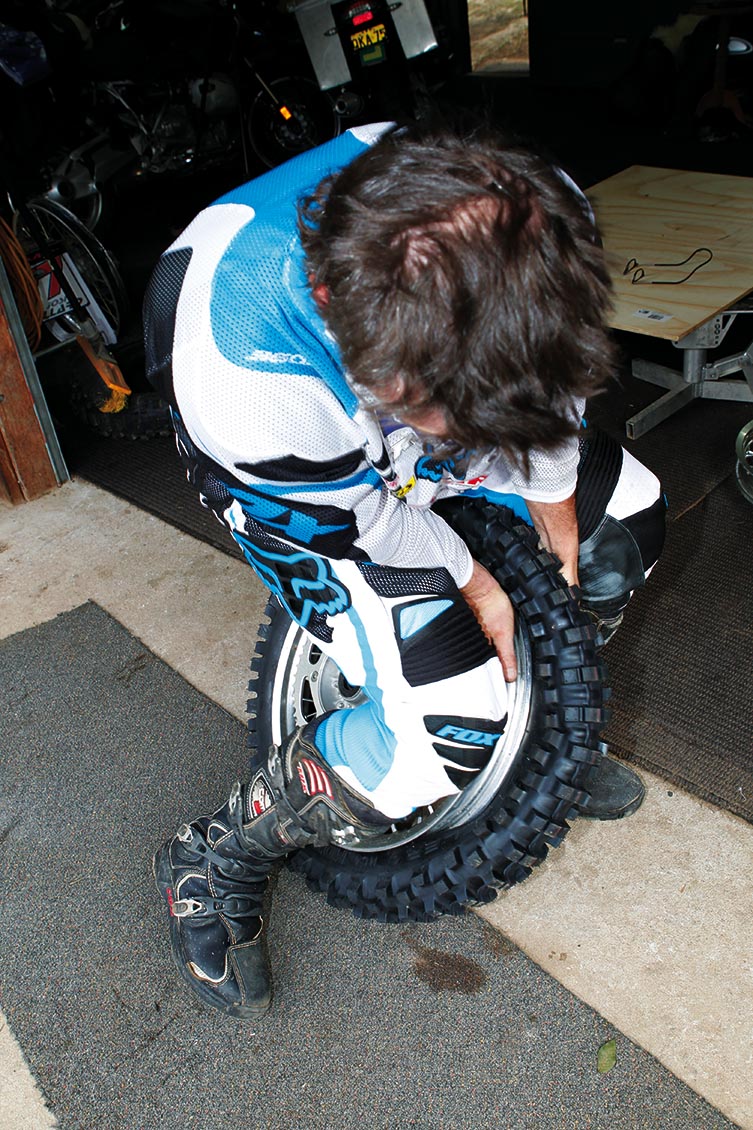
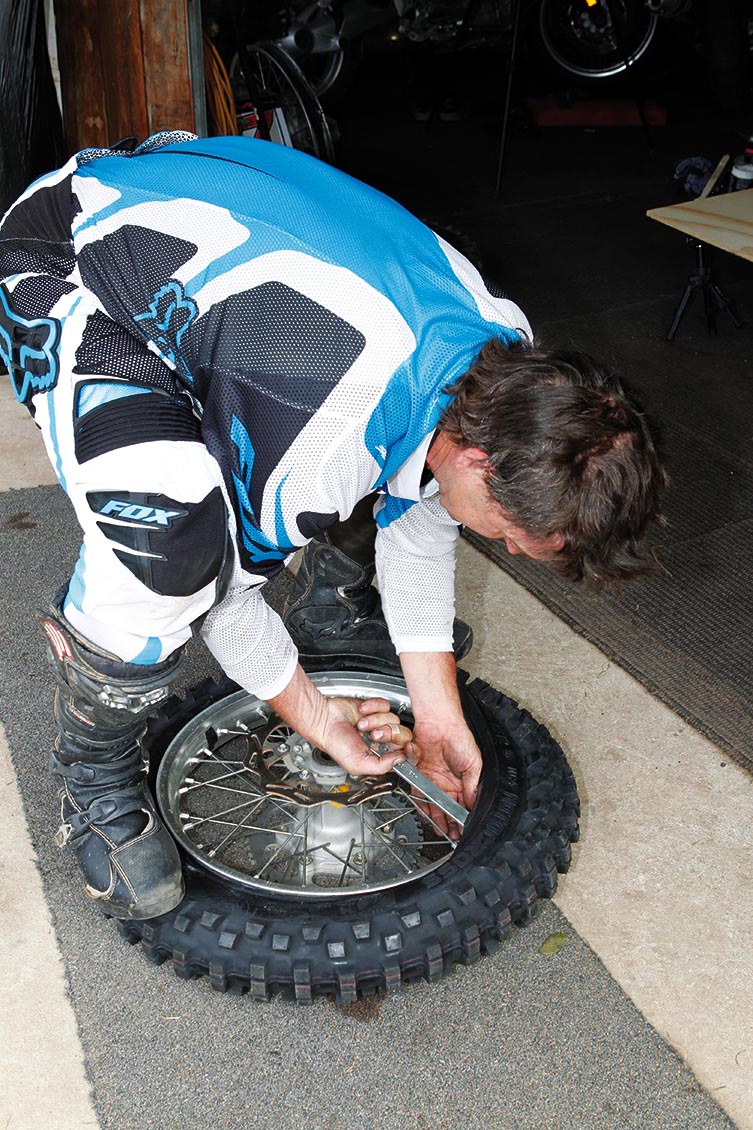
With the weight of your body, stand on the tyre sidewall opposite the rimlock and work around from both sides to finish at the rimlock. As you work around the rim you’ll need to take progressively smaller bites with the levers as the force needed increases. Just as you’re flipping the last chunk of bead over the rim-lip, push the rimlock inwards to guarantee the tube is clear of the rimlock wing and well inside the bead wall. Geoff recommends 13 to 15psi for average conditions.
![]()
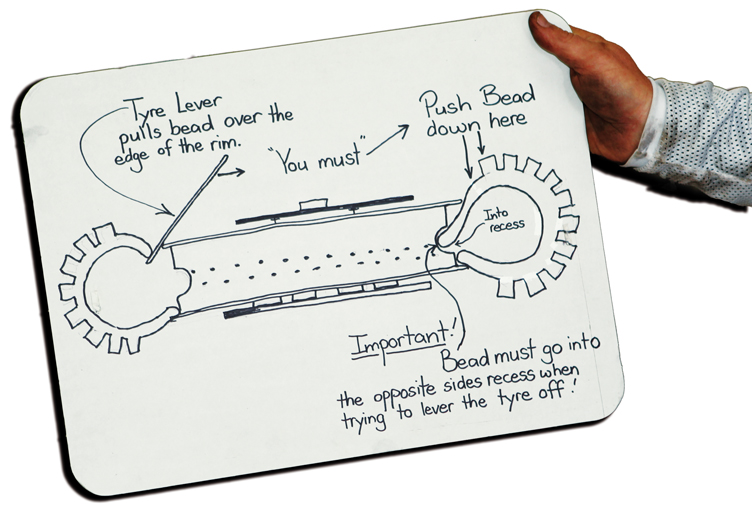
Geoff Ballard’s Bead Diagram
![]()
Before you wrench the bead off a rim, you must first push the bead on the opposite side down into the rim-well’s recess. This provides the minimal amount of lateral tyre movement needed in order to lever the bead on and off without damaging the bead or rim.
![]()
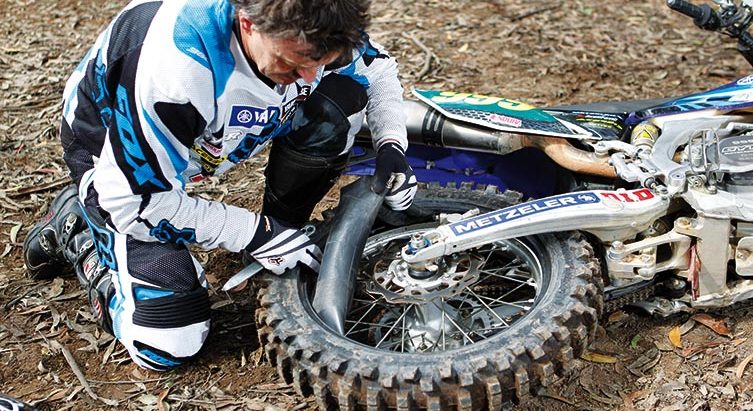
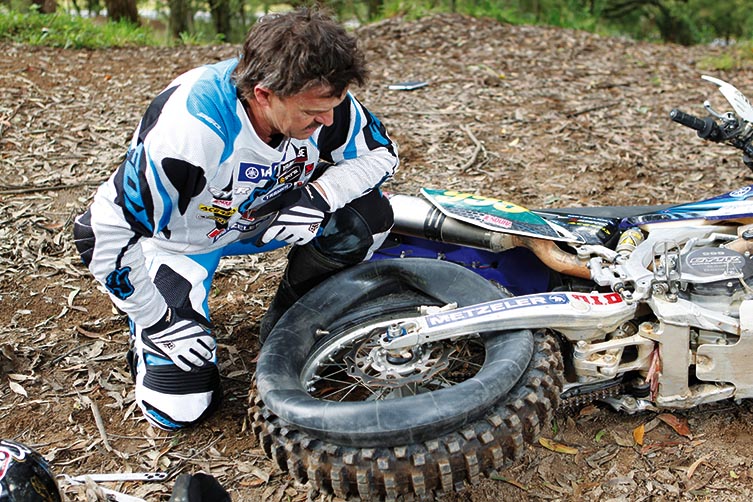
Fixing A Flat On The Trail
![]()
When you’re in the middle of nowhere and you suffer a dreaded puncture, a rider who is well set up and trained with the layout of his bumbag tools can use several techniques to get back on the trail in little time. Depending on what’s around you and the kit in your bumbag, there are several ways to remove the wheel from your bike in the middle of the bush.
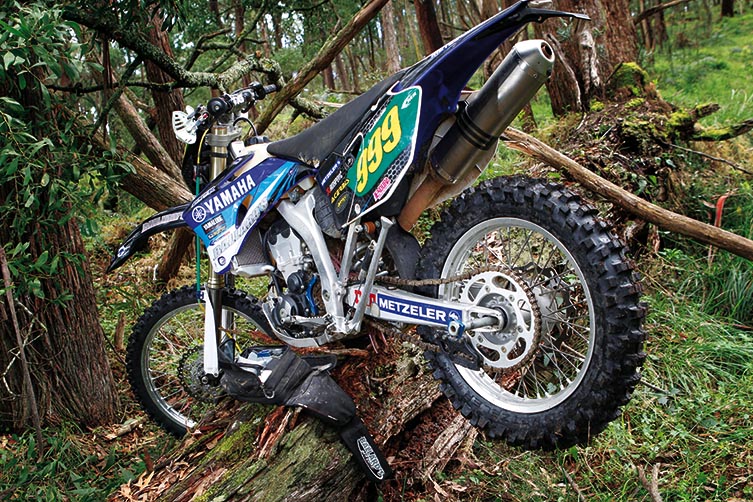
It’s pretty simply really; big logs make great dirt bike stands. Drop the clutch on that big girl of yours to pop the front over the log and prop the lower frame rails on top of the log, thus providing either the front or rear wheels with ample height off the ground for easy access and complete removal.
![]()
When No Logs Can Be Found
![]()
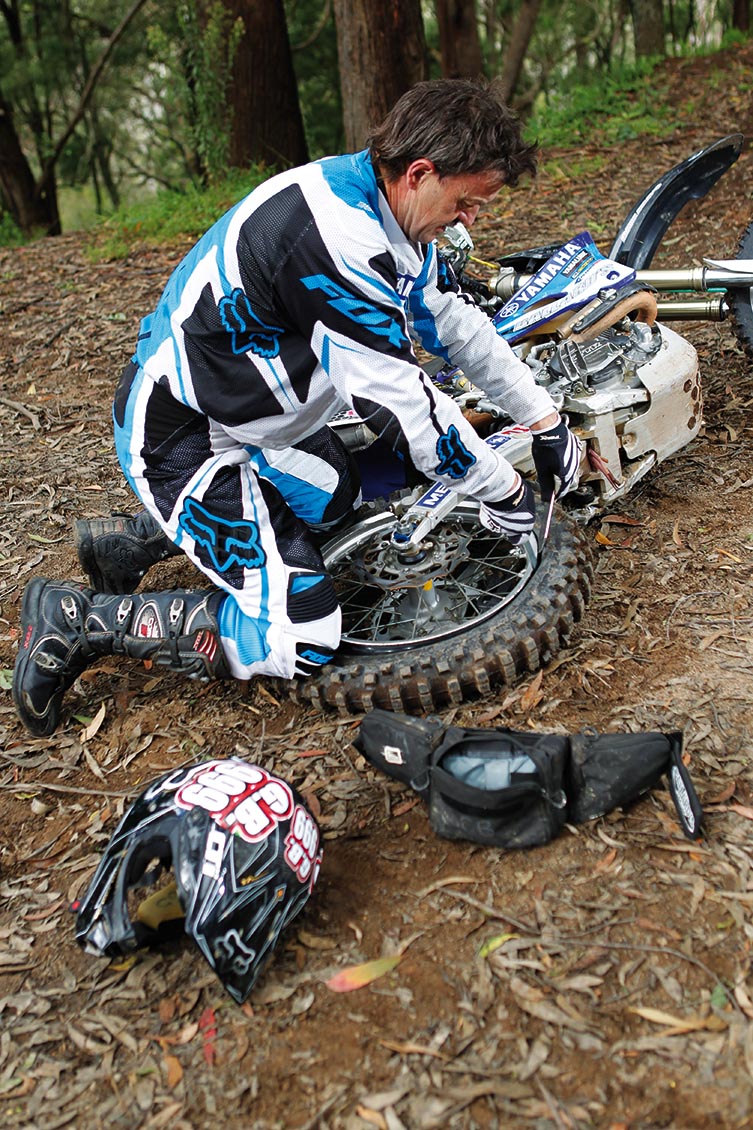
The other scenario exists when you’re stuck in a relatively flat area with inadequately sized logs or stumps in the direct vicinity. A scenario like this is Ballard’s preferred emergency mid-trail workstation. Following GB’s killer advice, simply lay the bike on its side and either work on the wheel still in the bike or remove it for access to the tube.
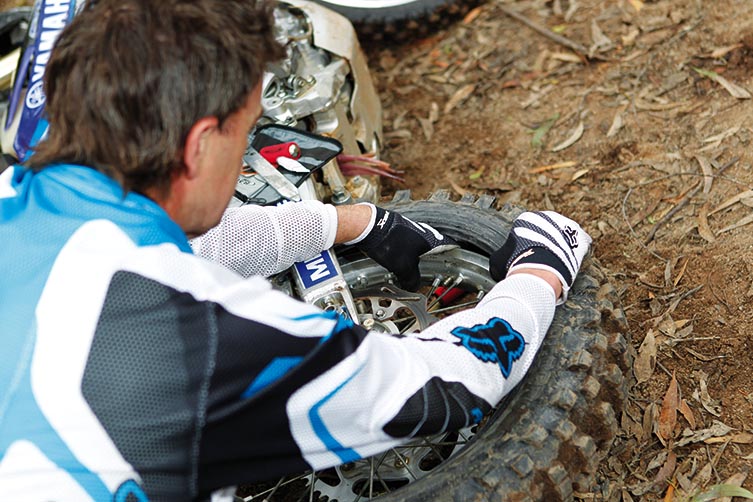
Step 1
If you need to remove the rear wheel completely, lay the bike on the right-hand side in order to slide the axle out (conversely, for the front wheel lay the bike with the disc facing downward). But here we show you how to fix your puncture without removing the wheel from the bike. If you’re repairing a flat in the rear tyre, lay the bike on its left-hand side so that the brake disc is facing skyward. Doing so allows more room for the tyre levers. Be careful of the hot exhaust and disc.
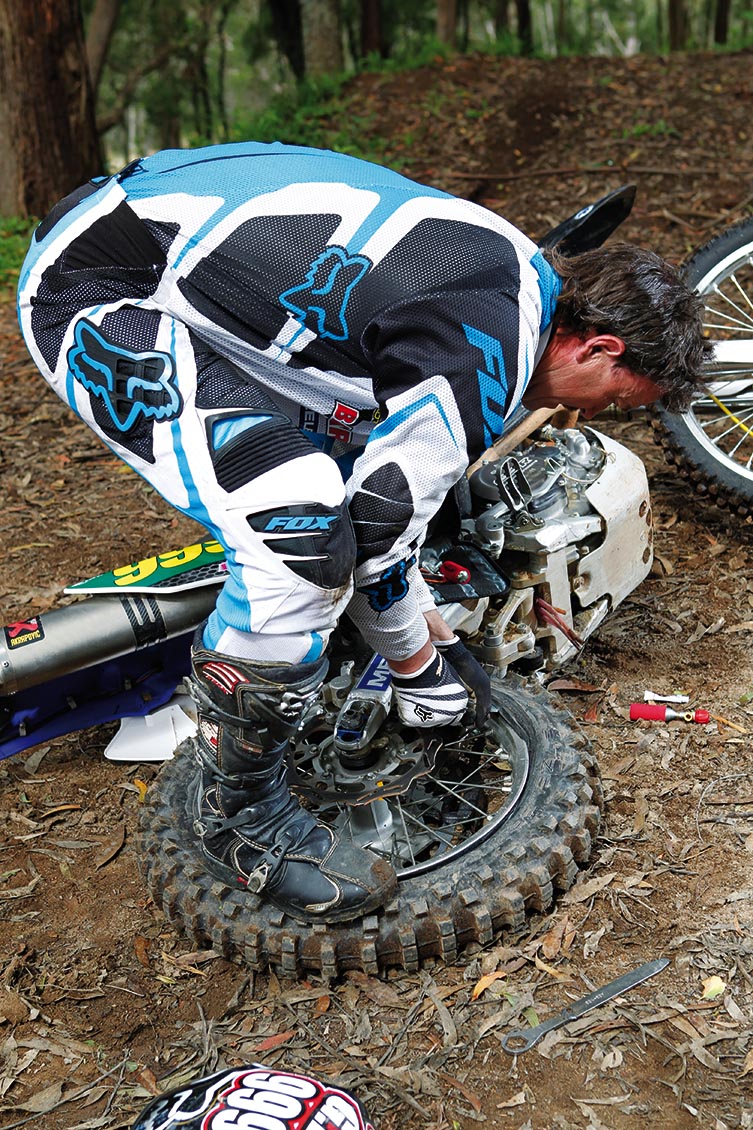
Step 2
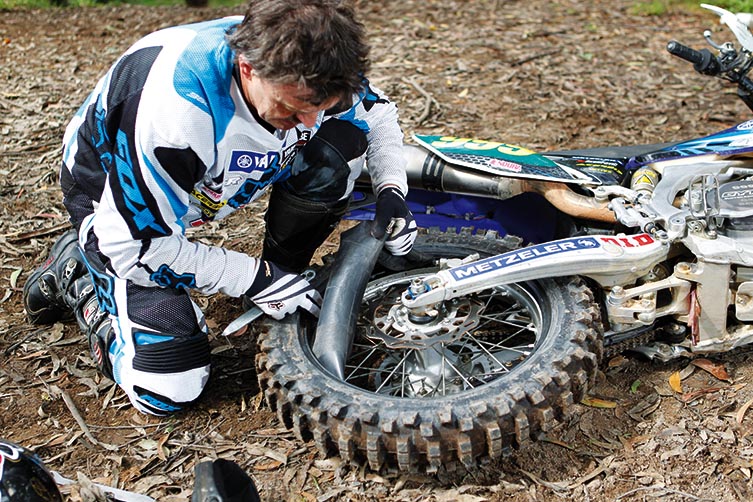
Unscrew the valve to release any air, break the bead by standing on the tyre wall (if it hasn’t been broken already while riding on the flat), grab your bumbag tyre levers and begin removing the bead, starting from one side of the rimlock and working around to the other.
Step 3
Pull the tube out of the carcass, taking care to watch for the location of the puncture and its relation to the carcass. You will have to inspect the carcass for any foreign objects that may have punctured the tyre itself. Once you spot the puncture, pull out your tyre repair kit, then clean, rasp and vulcanize the area before applying a suitably sized patch.

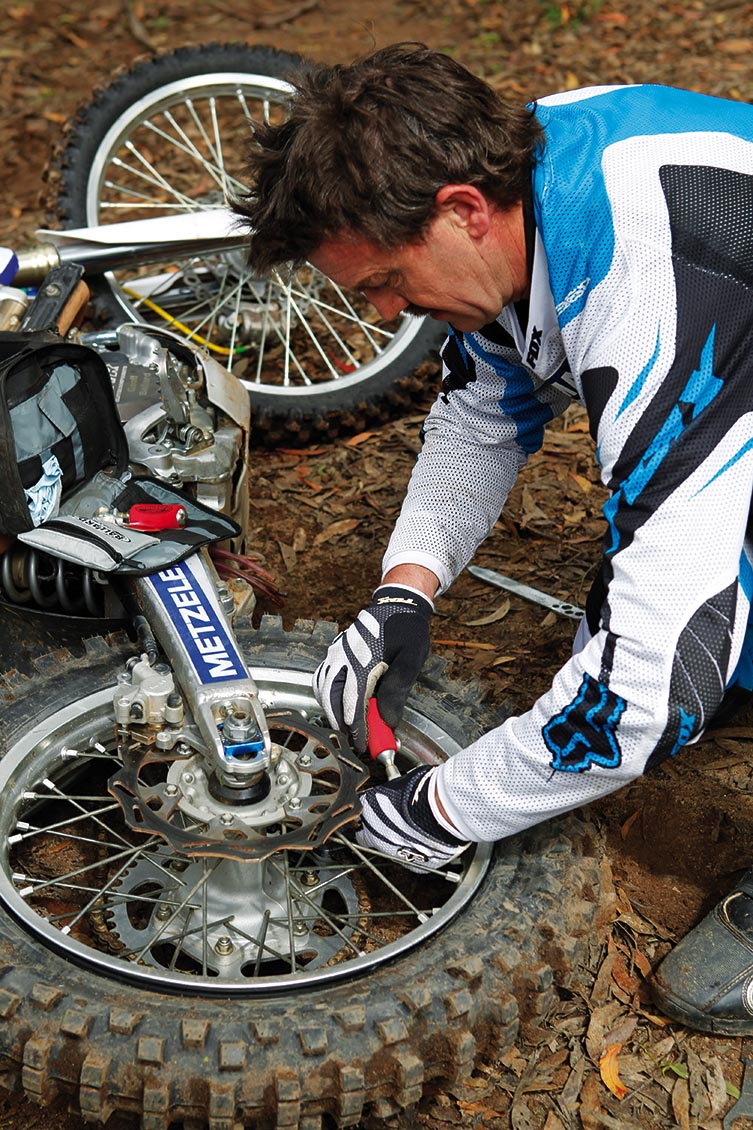
Step 4
Once the patch has set, feed the valve back through the rim and tighten the valve nut to keep it in place. Continue to feed the tube back into the tyre. Starting with the levers at one side of the rimlock carefully slide a tyre lever under the bead and along the rim to clear the tube. Lever the bead over the rim and repeat until the bead is completely remounted. Standing on the bead after each lever action helps to keep the tyre inside the rim-well to make the process easier and stops it from popping back off.
Step 5
Inflate the tube until it seats fully on the rim. This will probably take two CO2 bottles but if you only have one, it will be enough to limp home carefully. Don’t forget to tighten the rim lock and pump the brake lever to push the pads back onto the disc.
![]()
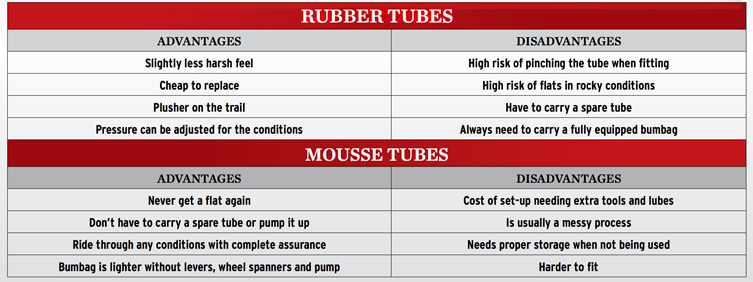
Tube vs. Mousse
![]()
For the majority of punters, sticking to conventional tubes is the easiest and most cost-effective option. Although when the trail gets rocky, mousse tubes offer a clear advantage. Getting set up for riding on mouse tubes requires an entirely new approach, technique and investment into tools for the job.
Related Content
PRODUCT: BALLARD’S BUM BAG TOOL PACK
You might also like...
Yamaha
3 days ago
BEATON & TURNER TRIUMPH IN TRARALGON
The wet and windy Traralgon round saw Yamaha lead three classes heading into the final two rounds.
Yamaha
1 week ago
DAVIES TO RACE AUSX AUCKLAND & GEELONG
Cole Davies joins Ken Roczen and Jo Shimoda for select appearances in the 2026 AUSX Championship.
Yamaha
2 weeks ago
FIRST LOOK: YAMAHA’S ALL-NEW 2027 YZ250F
Yamaha confirms widespread speculation by revealing details of an all-new YZ250F for 2027.

HIGHLIGHTS: 2026 TRANSMOTO 8-HOUR AT NARRABRI, POWERED BY KTM
Check out the highlights video from the 2026 Transmoto 8-Hour at Narrabri, NSW, powered by KTM.
Yamaha
4 weeks ago
JUSTIN COOPER: IT’S TIME TO WIN
Cooper talks his Pala opener, title ambitions, and plans for the season – before his Hangtown concussion.
News
2 months ago
2026 AUSSIE FLAT TRACK NATS CALENDAR
The 2026 Yamaha Aussie Flat Track Nationals calendar is confirmed – here’s where, when and who’s racing.
News
2 months ago
BEATON TIGHTENS HIS GRIP AT TOOWOOMBA
Yamaha’s Jed Beaton goes 1-1 at Echo Valley to extend his ProMX lead to 40 points at the halfway mark.
News
2 months ago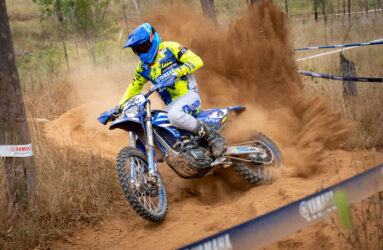
AUSENDURO ROUND 5 & 6 REVIEW
Yamaha’s Wil Ruprecht extends his perfect 2026 season at a brutal QMP double-header.
Be the first to comment...