How To: Replace Wheel Bearings
We’ve gone back to basics with our new DIY series, aimed squarely at the keen, but green, home mechanic. Never pay for the simple stuff again. This week, we teach you how to tackle wheel bearing replacement, and how to un-wobble a wobbly wheel…
Wheel bearings are one of those parts that you forget about until they fail. And guess where you’ll be when that happens? Paddles and creeks come to mind… To avoid finding yourself plumb deep in a tidal turd torrent, make a quick side-to-side wobble of the wheels part of your oil change/minor service checklist. Even better, replace wheel bearings on an hours or km basis. Every 5000km (or 80 hours) is plenty long enough, though decrease these figures if you race or play in sandy or muddy conditions often.
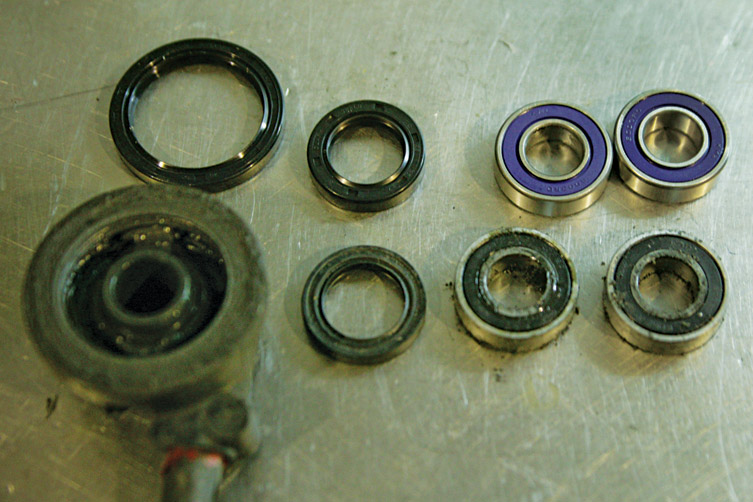
In this feature, we have used an aftermarket kit that comes complete with seals. There are other options available – your local bike shop will have “match-up” bearings available individually, or you can buy bearings/seals as an OEM part.
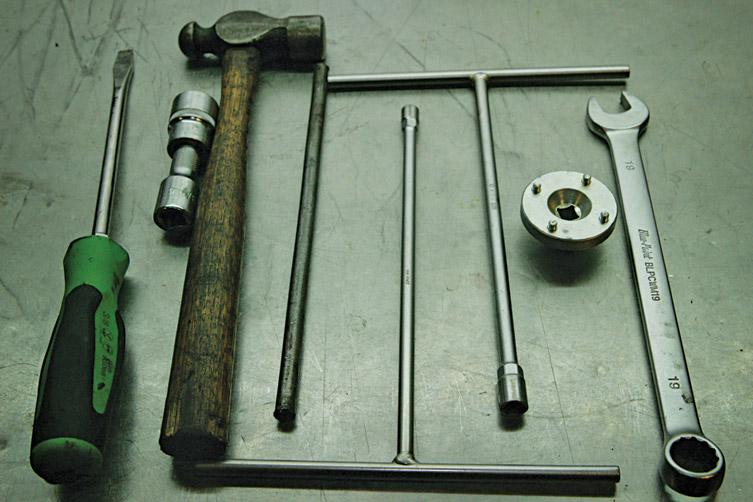
Tools You’ll Need
- Hammer
- Oil seal prising tool (can be a screwdriver)
- Long metal drift/punch (8-10mm diameter)
- Circlip pliers or a Honda wheel bearing retainer tool
What It’ll Cost Ya
- Bearings: $5 – $10 each (NTN LLU’s $25 each)
- Seals: $10 each
- Labour: $50/set
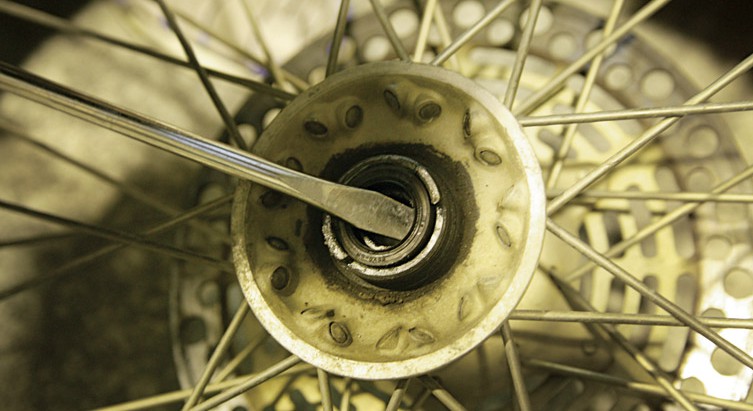
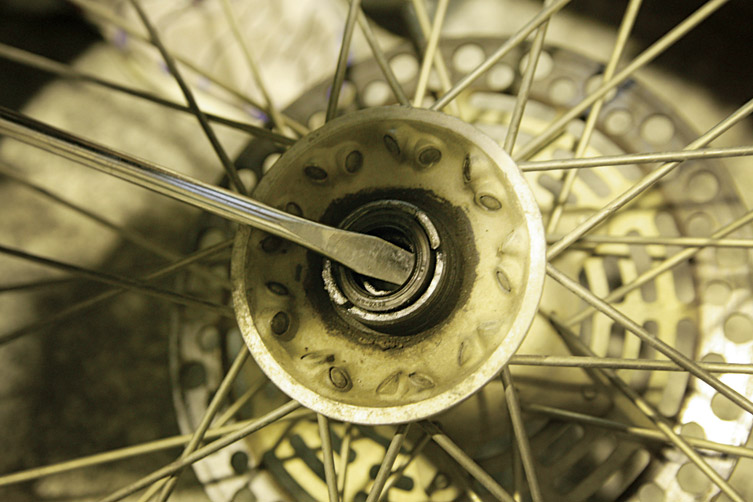
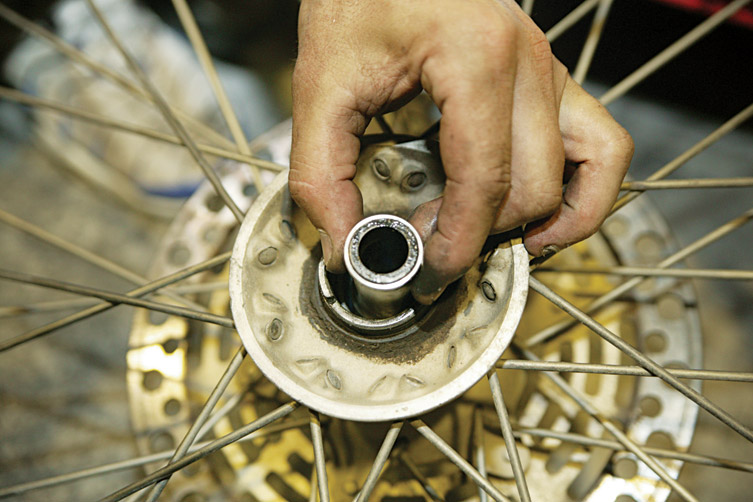
1. Out With The Old
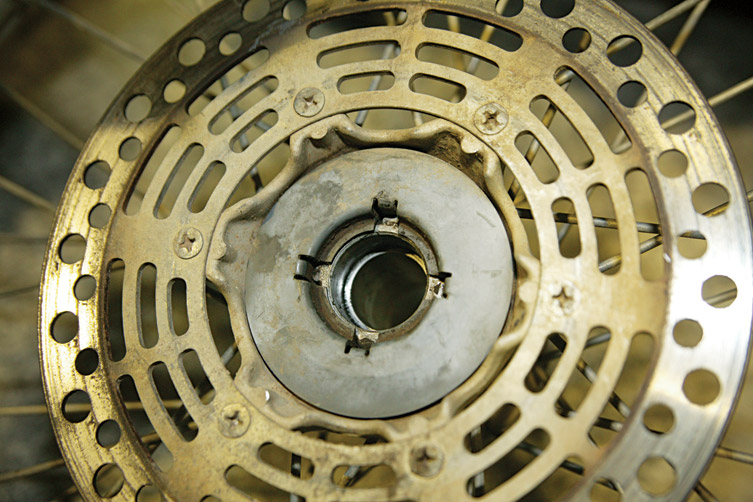
So, it’s bearing replacement time as we’ve done the side-to-side check and found play. The first step is to get the wheel out and remove the spacers. The seals can then be removed with a reasonably sized screwdriver. Clean out the crud and have a good look for a retaining circlip or a collar. Typically, Honda’s have a retaining collar on the rear wheel bearings that you will need a special tool for. Yamaha’s often have a circlip, too. Most rear hubs will run two bearings on the drive (sprocket side), meaning that there will be three in total to replace at the back.
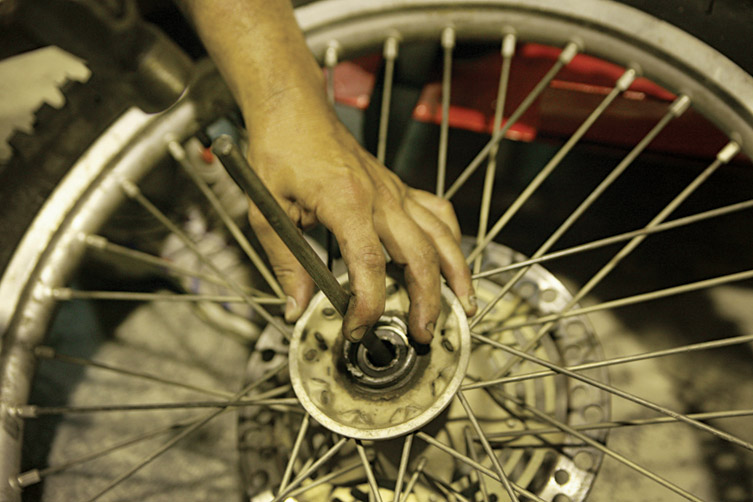
2. Just Drifting Along
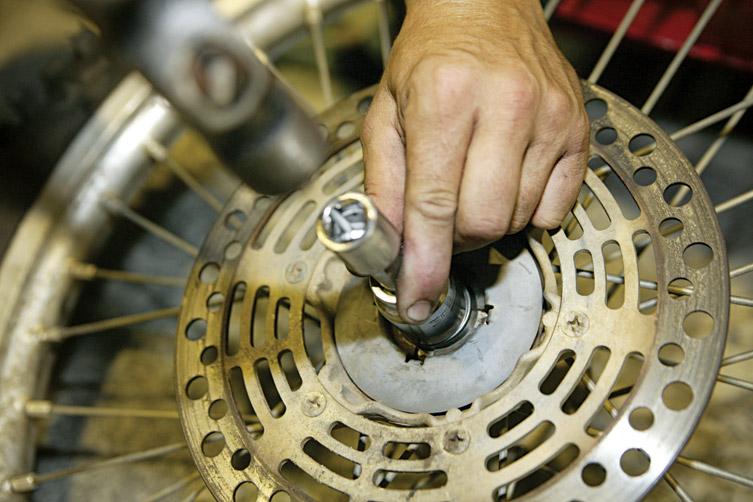
Once the circlips have been removed, the bearings can come out. If you look between the bearings, you will see the alloy crush tube. This has to be pushed to one side so your drift can get an edge on the lower bearing. As the bearings are interference fit (tight mechanical fit) in the hub, you will need to work the bearings (side-to-side)with the drift to get them out as squarely as possible. If you get the bearing too far out of alignment as you try to drift it out, you will damage the hub. If the bearings are loose and almost fall out on their own, the problem is worn hubs.
3. The Usual Suspects
With both (or all three) bearings, the seals and the crush tube out, it’s time to inspect the new components. Lay the new parts out against the old and compare the sizes – is everything correct? Look on the side of the bearings’ dust seals for the part number. It will be 6004, 6002 or some four-digit number starting with six. Examine the metal crush tube for signs of wear against the ends of the bearings. Tolerance is very important here; if you think the tube is worn, then replace it. A worn tube will cause the bearing inners to be compressed more than they can stand, collapsing them when the rear wheel is tightened.
4. Gluing The Old Guys Back Together
If the bearings were loose, have a good look in the bearing bore. In theory, there is only one option when faced with a worn hub – throw it out. There are a few tricks to save a worn hub, though. Get a centre punch (a sharp one) and strike the bearing bore to raise metal up so the bearing has something to bite into. While this works okay, it’s not a great answer. If the hub is badly worn, you can mix up some JB Weld (two-part epoxy) and glue the little suckers in. Only get this desperate on old bikes where it’s probably the last set of bearings they will ever see. If you ever need to remove the glued-in bearings, you can with a little heat.
5. The Usual Suspects
To refit the new bearings, clean all the parts with contact or brake cleaner. Use some low- to medium-strength Loctite on the bearings to make sure they don’t move in their bores. You can use Loctite bearing strength if you have a mildly loose bore. As the bearings need to be driven in straight, it’s easiest to find a socket that’s slightly larger than the bearing bore to drive the new bearing in. Never hit or push on the inner part of the bearings, as they will be damaged and need replacing before they’ve turned a wheel. Always push on the outer casing of the bearing only. Make sure the bearing sits fully home onto the mating surface.
6. Has A Snappy Ring To It
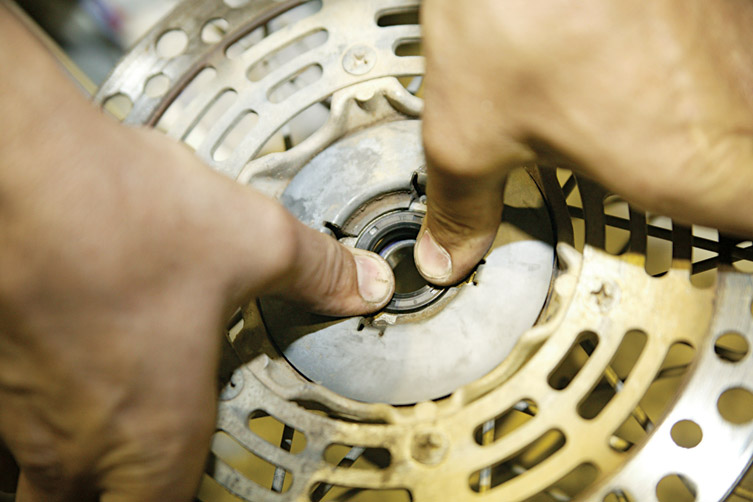
Once one bearing is fully in, don’t forget to replace the crush tube before you fit the other bearing. Refit the snap ring/threaded collar and you are nearly done, just the seals and refitting the wheel to the bike to go. It’s worth noting that the Honda lock-ring often comes out pretty second hand, so it’s good policy to always replace it. They come in some kits, but are cheap enough to buy OEM.
Expert Tips With Teknik’s Nick Dole
- All wheel bearings are a 6000-series deep-groove, ball bearing. Your local bearing shop is the best place to buy, but not for price (unless you’re trade). My preference is NTN LLU bearings because they run a seal that is impervious to mud and dust. While the seal drag is a little higher – as is the price – the bearings tend to last many times longer.
- Yamaha’s have run an open bearing in their front wheels for years and they wear out prematurely. I would advise against fitting open bearings and go for the sealed type.
- You can also flick the seals out of the bearings carefully and repack them with some waterproof grease. Always wash the old grease out first. Good greases to use are Maxima, Silkolene, Bel Ray (an old favourite) and Motorex.
For more from Teknik, click here.
—
Want to view this article in magazine form? Pick up a print of digital edition of Transmoto’s April Issue (#30).
You might also like...
Features
3 weeks ago
VIDEO: WHY GASGAS KEPT WP’S XPLOR FORK
WP’s XPLOR fork has evolved in recent years, but how does it compare with the XACT closed-cartridge fork?
Features
3 weeks ago
VIDEO: GASSER’S FIRST LE ENDURO MODEL
Just how different is GASGAS’s first limited-edition enduro model – the EC300 GP two-stroke?
Ducati
3 weeks ago
TESTED: DESMO450 MX FACTORY EDITION
Ducati’s race-ready Desmo450 MX Factory edition – how its premium components translate into performance.
Cassons
1 month ago
GIVI: ITALIAN SUCCESS STORY
A deep dive into the motorcycle luggage market with Givi’s Overseas Operational Director, Joseph Perucca.
Features
1 month ago
WATCH: Billy Bolt The Documentary 3
Bolt’s latest doco follows his sixth SuperEnduro title and the mindset driving his continued dominance.
Features
1 month ago
NEW 2027 KTM SX MODELS ANNOUNCED
KTM’s 2027 motocross range arrives with an updated nine-model line-up.
A1
1 month ago
TECH BREAKDOWN: 3D BY EK CHAINS
3D by EK Chains’ tech forges stronger chains that run smoother and last longer.
Features
1 month ago
DAKAR DELIGHT: ’27 KTM 450 RALLY REPLICA
Derived from the Dakar-winning machine, the 2027 KTM 450 Rally Replica arrives in extremely limited numbers.
Be the first to comment...