
How-To: Technical Ruts
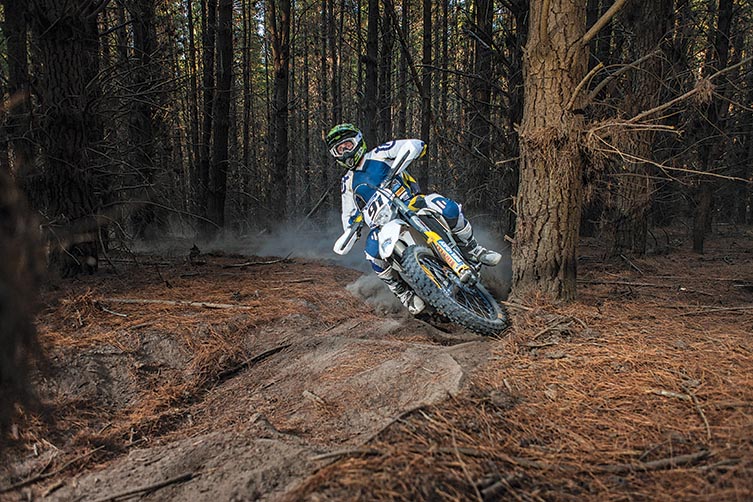
Railing ruts is one of the coolest feelings you can get on a dirt bike. But not every rut is a perfectly smooth arc that lets you to drag the bars and wave to the ladies. Pro rider, Scott Keegan, explains how to maintain your rut speed, even when the terrain gets technical.
This content was originally published in issue #44 of Transmoto Dirt Bike Magazine in June, 2014.
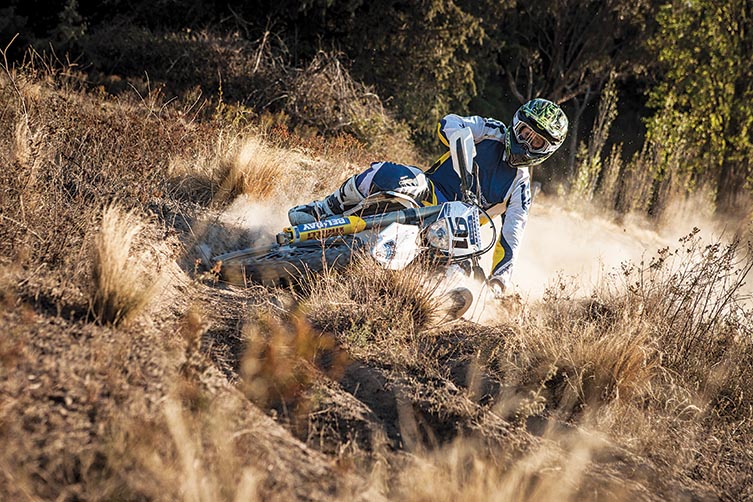
If you ride a dirt bike off-road, sooner or later you’re going to encounter a rut. For the initiated, ruts can add to the technical difficulty of a corner – and with all the stories of riders wrecking their knees in ruts, the things can be downright intimidating. But once you learn the fundamental techniques required to get through ruts efficiently, you’ll come to understand that they help you get through the corner much faster. In fact, you’ll find yourself hunting the things out. And once you’ve railed a rut perfectly, it’s an addiction that lasts for life. In dirtbike circles, being an accomplished rut-rider is a badge of honour. But not every rut is a perfectly smooth, loamy arc that allows you to drag the bars and simultaneously wave to the ladies. In fact, a majority of ruts are ‘molested’ by rocks, roots, uneven walls or other inconsistencies that interrupt your flow through the turn. Given that Scott Keegan has already proven himself to be one of the most accomplished and stylish rut-riders in the Australian off-road scene, we pressed him to divulge the techniques he uses to get through ruts quickly, safely and efficiently – even when they’re littered with technical obstacles. Over to you, Scotty Scando…

Vision
If you’re unfamiliar with a rut (which will usually be the case when you’re trailriding) or you know that the rut’s likely to have changed since the last time you went through it, you can’t afford to look too far ahead. That said, the mistake most people make in ruts is looking just over their front guard the whole way around. This isn’t a big issue for 180-degree ruts, which are normally slower, but it’ll hinder your speed and ability to anticipate problems in faster, 90-degree ruts. As I’m usually standing up on the way into a turn, I always try to get a feel for the overall shape and length of a rut beforehand. On the entry, I sight the point of the corner where I plan to start to crank the bike over hardest. This’ll be where the rut starts to deepen and where it has a firm edge. I will have also scanned ahead a few metres to make sure there’s nothing in the rut that’ll upset the wheels’ traction, and nothing inside the rut’s arc that’ll snag my inside leg. Once I’ve got the bike settled and cranked over in the rut, I start to look a little further ahead. This is so I can anticipate any bumps or obstacles that might affect my drive on the exit, and the direction the track takes after the rut.
Body Position
As you’ll get taught at all dirt-bike schools, weighting the outside peg around flat and off-camber corners helps give the tyres more traction. And while it’s true that you do tend to lean a little more with the bike through a rut, it’s still very important to weight the outside peg to make sure your wheels stay locked into the rut. This is done by tilting the bike underneath you, so your arse-crack clenches the outer seam of the seat. If you lean with the bike – road bike style, with no downward pressure on the tyres – then there’s little chance of recovery if you do lose traction. For the entry, you need to be sitting right up the front of the seat, but once I get the bike locked into the rut, I allow my arse to slide back a little.
This assists with rear wheel traction for when I get on the gas, and also creates a little more room under the bars for my inside leg – which is one of the most critical elements in riding ruts well. Your inside foot should be as close to the fork leg as possible in ruts where you need to be cranked over, and held up high enough so it doesn’t snag on the ground and get pulled backwards. And it’s important to keep a slight bend in your knee so it can absorb any hits, rather than hyperextend. The deeper and more solid the rut’s wall, the more aggressive you can be with dropping the bike into it, and the higher you’ll need to carry that inside leg. I also find that it’s important to keep my outside elbow high, as this gives me more leverage over the frontend, and allows me to react quicker to any loss of traction or obstacles.
Control Use
In an ideal world, you will have done all your braking before cranking the bike over into a rut. I often drag the front brake slightly through the first half or even two-thirds of the rut to keep the front wheel more planted. But I stay off the rear brake once I’m in it because, if you lock the rear while cranked over, your back wheel will pop out of the rut in an instant. The key is to be smooth with your throttle application – especially if the rut is shallow or soft. Most people are way too aggressive with their throttle in ruts – if I possibly can, I simply trail the throttle through the majority of a rut. Throttle also plays a much more important role than people realise in adjusting the bike’s lean-angle in a rut. If the bike drops too low, more throttle will help pick it up, and vice versa. I keep a finger on the clutch to help ensure my throttle application remains smooth. For ruts that turn through 120 or 180 degrees, you need to stay even smoother on the controls because: one, they’re generally slower and, two, the chance of the rut-wall becoming shallow at some point is much greater.

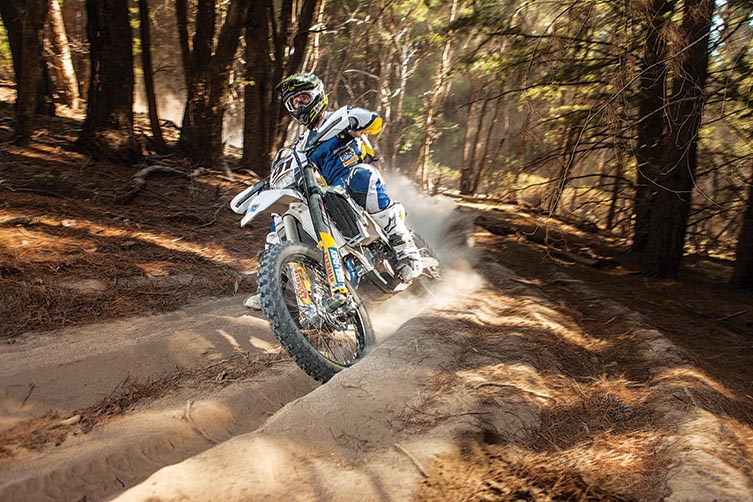
Obstacles on Exit
It’s always important to make sure that, before you enter a rut, you select the gear you’re going to use right around it, and for the exit. And when there are obstacles to deal with on the exit – such as the square-edged roots in the two shots on the left page here – it’s even more critical that you’re in the right gear. I’ve selected second gear before this rut on my 250 as I knew I’d need some punch to loft the front-end and clear these two roots. If I’d simply let the front wheel slam into them while the bike’s still leant over, there’s a good chance the front-end will want to push wide or even tuck under. At best, it’ll upset the chassis balance, which will delay where I can start getting on the gas.
So, what I’ve done here is take it a little easier through the mid-part of the rut, which has allowed me to sit the bike up earlier and use a combination of throttle and clutch to help pop a wheelstand. By the time the rear wheel comes into contact with the roots, I will have backed off on the throttle to reduce the chance the rear-end will kick out. Once the rear wheel’s back on the ground, I can then get on the throttle hard. Notice also that, even though I’ve had my inside leg forward right around the rut, I’ve quickly brought it back to the peg to help deal with these roots, and I’m sitting a little further back on the seat at this point. Having both feet on the pegs for when I hit the bumps gives me more control over the bike as I can grip the frame and tank between my legs. This body position also gives me the option to either drive the rear wheel through the bumps, or preload the suspension so I can jump off the first root to clear the second. Whichever technique I use, it’s way faster because it lets me predict what the bike’s going to do. It also uses less energy than if I’d tried to wrestle the front wheel across the roots.
Off-Camber Ruts
Because off-camber ruts are often pretty shallow and seldom perfectly shaped, you need to be more gentle with them – first, because shallow ruts don’t have a lot to hold your wheels in place and, second, because if you do blow through (or pop over) an off-camber rut, you’re likely to run a long way off-line. And that’s going to cost you a lot of time … or lead to a nasty crash. As you can see in the above shot, I haven’t got the bike cranked over as far as I did in the previous spread, and I’m using my inside leg differently.
Rather than having my leg up by the front guard, my foot is flatter so it can slide along the ground, which lets me use it as more of a ‘triangulated’ stabilising influence. This helps me keep the bike at the correct angle; it helps me stand the bike up a bit if needs be, so it doesn’t push through this soft, fluffy off-camber rut wall. You can also see in this off-camber shot that, because it’s a faster and less hooked rut, I’m looking further through it. But that doesn’t mean I’m any more aggressive with the throttle. In fact, it’s really important to remain composed and patient in offcamber ruts because the consequences of screwing it up are generally bigger. I often sacrifice a little entry speed to make sure I remain locked into the rut as it heads back up the hill, and then get smoothly on the power when there’s no longer any risk I’m going to push through the rut wall.

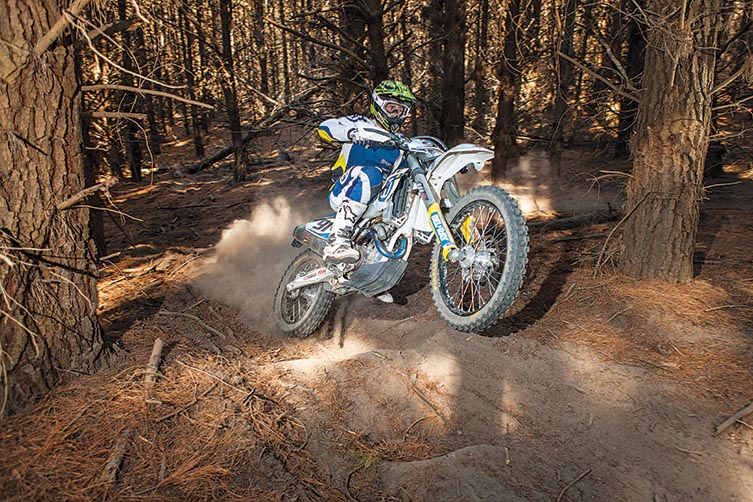
Mid-Rut Obstacles
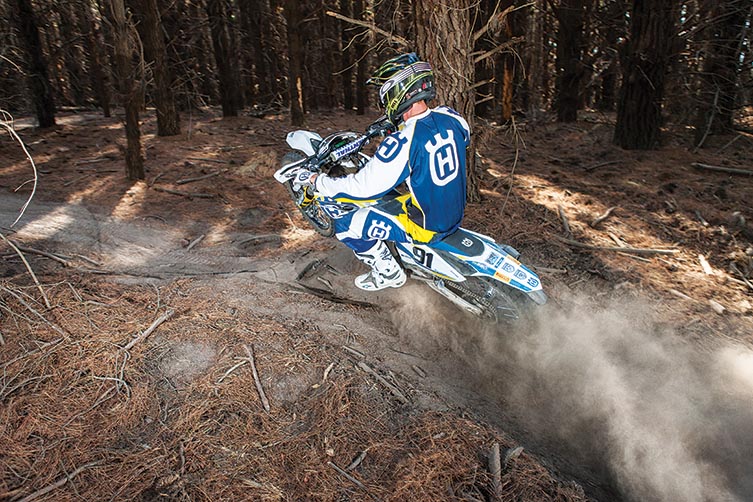
This particular rut had a really secure wall to hold both wheels in place, but because there was a cluster of roots halfway around it – not to mention a solid tree at about the same spot – I’ve had to adjust my technique accordingly. Not having access to the rear brake on the entry to this right-hander added to its difficulty. As a result, I’ve adjusted my mental approach to it more than anything, as I know I’ve got a lot more to lose than gain by attacking a rut like this too hard. Rather than trying to make up a couple of tenths, it makes much more sense to take a slightly more conservative approach to technical ruts like this one, and get through them safely. You sacrifice a little mid-turn pace to get yourself set up for a more efficient exit. In the photo shot from the rear here, you can see that my attention is focused down on the roots immediately in front of the bike. I’ve loaded the suspension up harder on the entry to the corner where the rut wall is solid and smooth.
Then, after the suspension unloads a little ( just before the tree), it’s allowed me to back off the throttle so I’m kind of coasting across the section where the angled roots are. This technique means the front wheel is light and skims over the roots easier. I’m also a lot more mindful about holding my inside leg off the deck so I don’t jam my heel into the roots. Aside from the injury risk, this would push me back on the saddle instantly, which would really unsettle the bike and mess up the turn. In fact, it’d probably mean my shoulder would collect that tree pretty damn hard! You can actually see that, between these two shots, I’ve quickly brought my inside leg back onto the peg for the exit. Not only does this keep it out of harm’s way; it also gives me more control over the bike by gripping the fuel tank between my knees – which stops it slapping around over the bumps. If the wall of this rut was softer (that is, not as firm and stable), it wouldn’t last much longer before you’d have to stop using the thing. With a bit more traffic though it, the rut would be blown wider, meaning the tree would pretty much be in the middle of it. At which point, you’d need to change to an inside line.

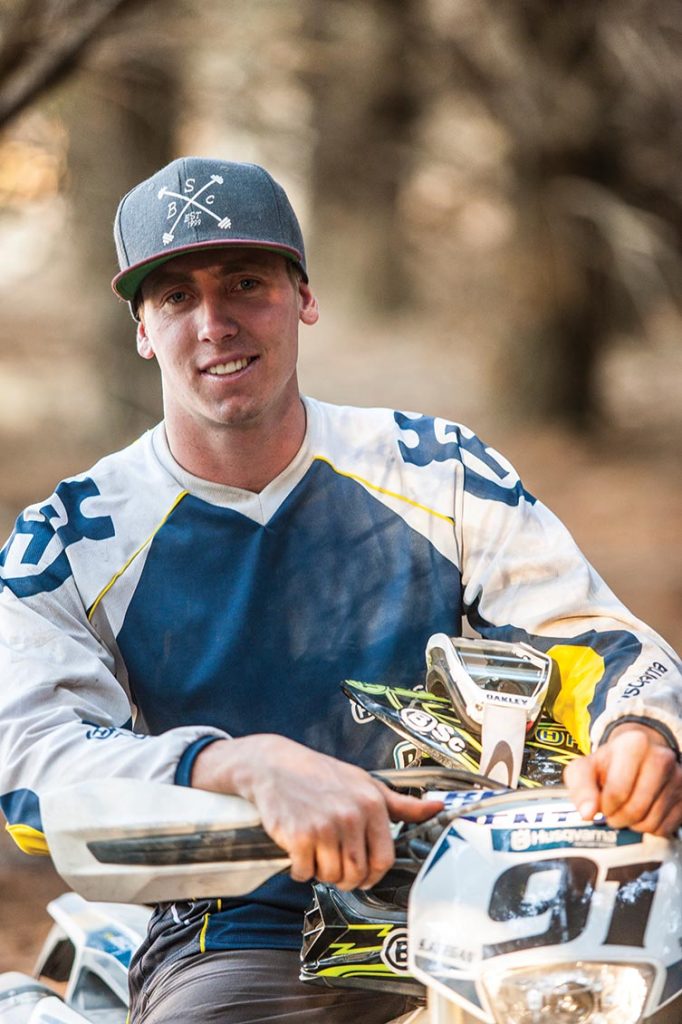
Scott Keegan
If, like Scott Keegan, you grew up with the Watagan State Forest behind your house and enduro legend Damian Smith around the corner, chances are you’d take up enduro racing, too. But add to the equation the fact that Keegan’s family is in the turf-growing business, and it’d be downright criminal if the bloke didn’t embrace enduro. Having run top-10 Outright in last year’s AORC and top five in his class for a couple of years now, Keegan recently signed on as the Husqvarna Enduro Racing Team’s Pro E1 class rider – and he’s already bagged a couple of AORC podiums this season. And while the Jilliby-born rider might look the goods around a grasstrack, it’s in tight and rutted terrain where he really shines. The 23-year-old consistently blows our minds with his rut-riding prowess, so “ Scando” is perfectly placed to explain the techniques he uses to such good effect in all sorts of ruts.
Related Content

HOW-TO: ENDURO MASTERCLASS

HOW-TO: CORNER SPEED
You might also like...

2026 SMX WORLD CHAMPIONSHIP VIDEO PASS
The SMX Video Pass is back, and again providing live and on-demand access to all 31 rounds.

2026 ENDURO & CC MODELS: 7-BRAND PRICE COMPARO
A handy table of easy-to-compare prices for seven brands’ 2026 enduro and cross-country models.

HONDA CLAIMS EIGHTH AUSX TITLE
Dean Wilson sealed the deal for Honda with a dominant 2025 Australian Supercross season.
National Motorcycle Insurance
4 months ago
Ride Smart | Presented by National Motorcycle Insurance
Transmoto’s Simon Barratt covers some handy tips on how to protect your dirt bike, presented by National Motorcycle Insurance.
KTM
6 months ago
KTM DOMINATES 2025 AUSTRALIAN ENDURO CHAMPIONSHIP
The KTM DM31 Racing Team wrapped up four titles at the weekend’s AusEnduro season finale.

Boost Secures 2025 AUSX Naming Rights
The Australian Supercross Championship is set to launch into its biggest season yet.

TT Circuit Assen To Host 2027 MXoN
The 80th edition of the MXoN will see the legendary event return to Dutch soil in 2027.

First Look: Aus MXGP Battleground
The 2025 MXGP of Australia track design has been revealed.
Be the first to comment...