How-To: Enduro Masterclass
The key to going fast in most situations is keeping up momentum and planning ahead. Pros such as Motorex KTM Off-Road’s Chris Hollis spend countless hours in the saddle; learning from the terrain, their mistakes and from guys who are faster than them. All of that experience provides them with the skillset and know-how to effortlessly ride through conditions and over obstacles that would leave your lower jaw flapping in the breeze. But there’s no reason that, with a nudge in the right direction and guidance in situation-specific techniques, you can’t do the same. In this edition of Enduro Masterclass, Chris Hollis calls upon his AORC, 4-Day and EWC experience to explain three fundamental areas of off-road riding he believes are key to riding smoother and faster: we’re talking grasstrack, drop-offs, and rocky terrain.
This content was originally published in issue #17 of Transmoto Dirt Bike Magazine in March, 2012.

Approach
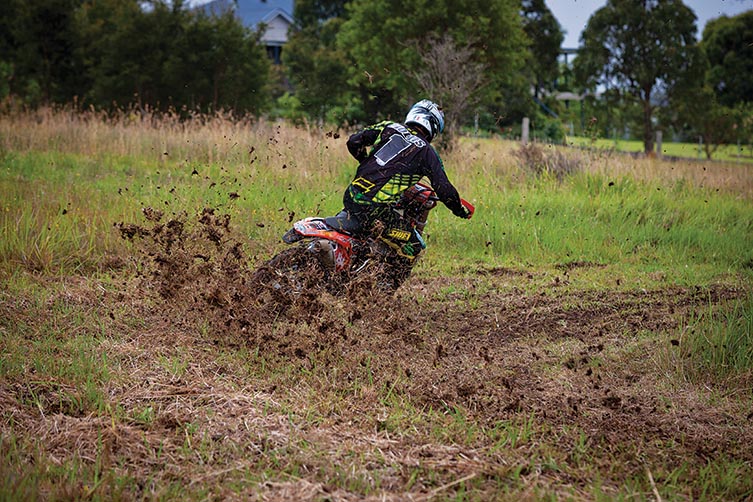
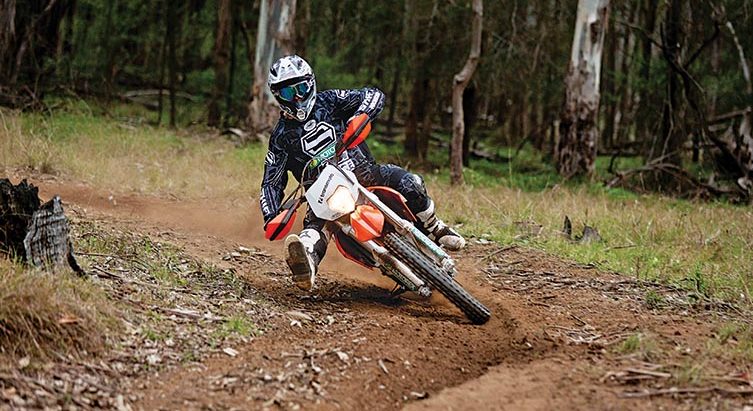
Learning how to attack slippery grass turns in flat track-style is a vital skill to break out every time you’re faced with sweeping corners. They’re not hard to nail, but there’s a few secrets you have to get right. First and foremost, when the grass is icy-wet and the terrain is relatively flat, it’s important to approach the corner smoothly with little weight transfer to disturb the bike.
Racing in and jamming on the brakes only upsets the machine and will kick the rear-end out prematurely, making the art of creating a sweeping arc so much harder and more energy-sapping to perform. Enter the corner standing central on the bike to evenly distribute your weight between the front and rear wheels, and because of your slightly lower entry speed, only apply the brakes lightly. My head is up high and my eyes are locked on the apex.
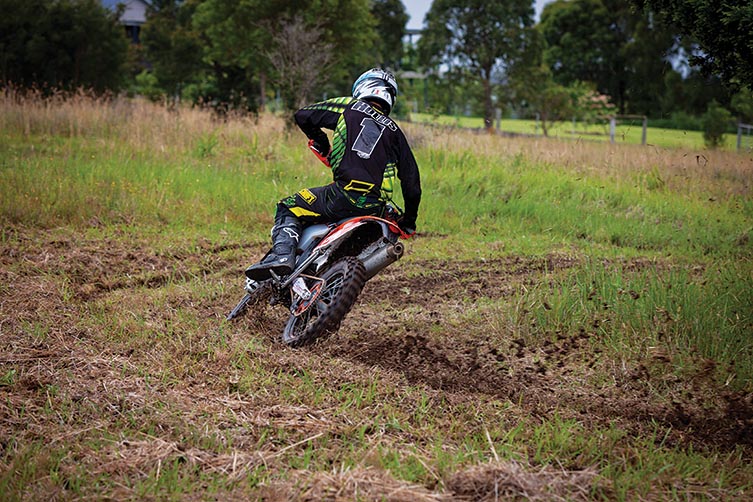
Transition
Well before the apex of the corner, you’ll need to make the transition from standing to the seated attack position. As your butt hits the seat, blip the throttle slightly, add some inside leg pressure and gently feed the rear wheel out into a slide.
Getting the bike to step out is the easy part. Keeping it there will take some balance between weight and throttle control; but at all times, you need to make sure the bike stays as upright as possible to make use of the middle knobbies on your tyres. As you crack the throttle to control the power-slide, weight your outside peg and then bring your inside heel up beside the front wheel to gently slide it along the ground to assist your balance and stability.
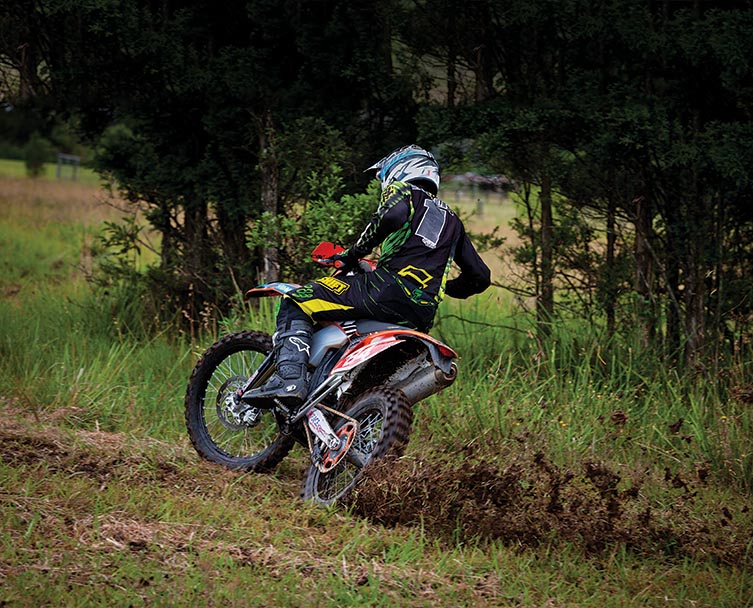
Roosting Exit
As you past the apex, you need to refocus on your exit point. Physically lifting your head and looking down the next straight or into the next corner really helps to control the direction of the arc you’re sliding through. Once you initiate the head movement, your inside leg will naturally find its way back onto the peg and you’ll begin applying more power.
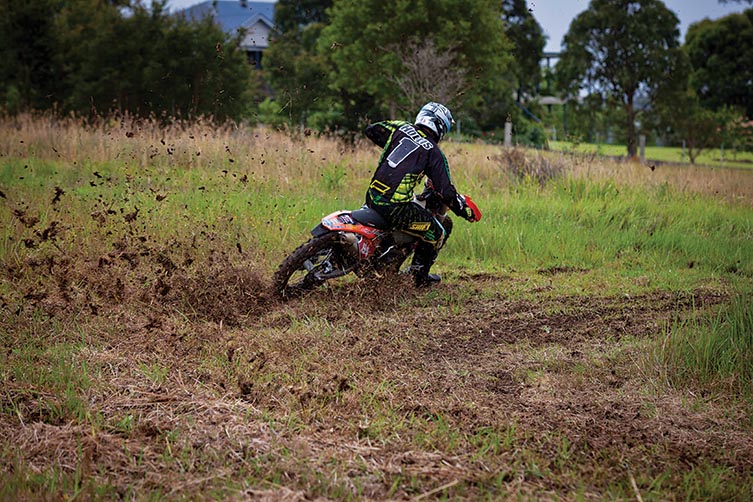
From the image, you’ll notice the increase in throttle application through the amount of roost I’m throwing off the rear wheel. As I gradually near the end of the turn, I’m feeding the engine more and more throttle, and gripping with my outside leg to pull the bike back into line and exit the power-slide.

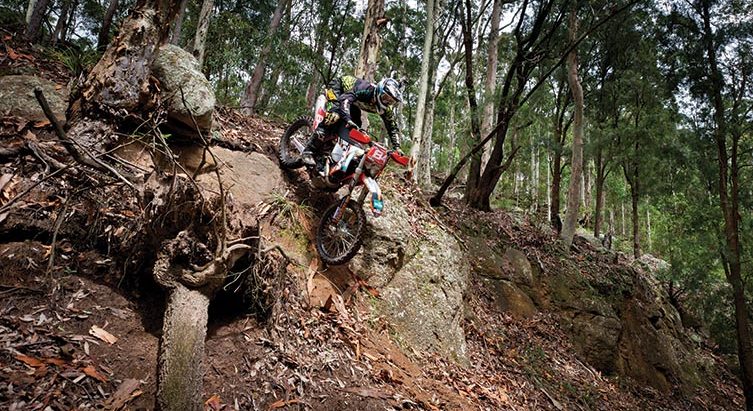
Lay of the Land
There’s a lot to be said for scaling big rocks and shear cliff faces, but riding down them can be just as gnarly. The first and most important step is physically dismounting from your bike and carefully checking the drop-off or descent in front of you.
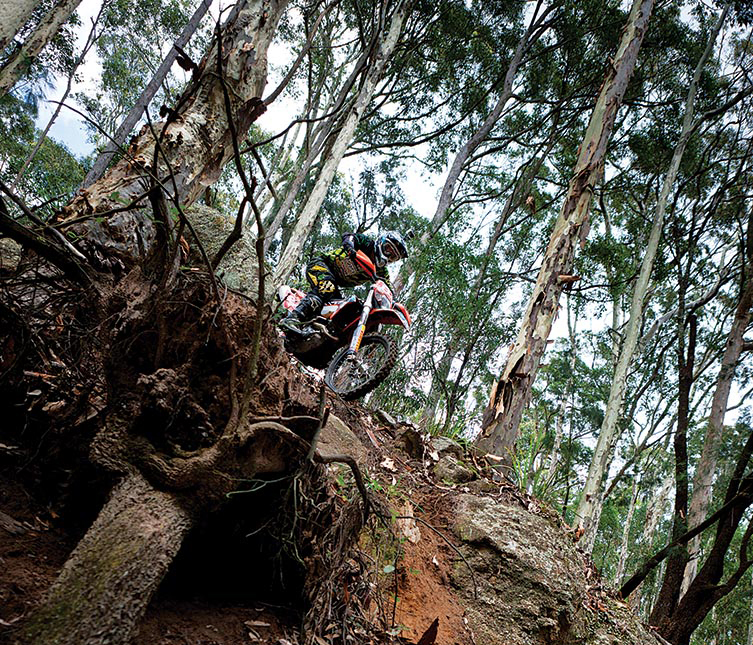
Doing so will provide you with the information about the ideal line to take, how much speed you’ll need, judge how much body movement will be required and, more importantly, check how much run-off space you have at the bottom. Take extra note of rocks and logs underneath fallen leaves and long grass in your lead-up and at the top of the cliff. It only takes one little kick in the back-end from a rock to induce an over-the-bars endo.
Total Control
Although it doesn’t look like it, this three-metre drop-off was almost vertical in the critical part of the descent. At the top, the virgin trail had a lot of rocks and bushes to unsettle the bike. Usually, I’ll select second gear for a steep descent to ward off too much engine braking, although in this situation I had to use first gear and take things extra slow because of the uncertain ground conditions.
Before I’ve dropped over the edge, I’ve kept my body weight central, but standing high in the pegs so that I can see over into the ‘abyss’. It’s critical at this point to avoid generating too much speed as you drop down; otherwise you compress the forks too much and risk going over the bars. As soon as you roll over and down, push your butt as far back as possible, balance the bike’s drive and engine braking with the clutch and throttle, roll your feet back off the pegs slightly, grip with your knees and keep your arms supple to counter any sideways kicks from the front wheel.
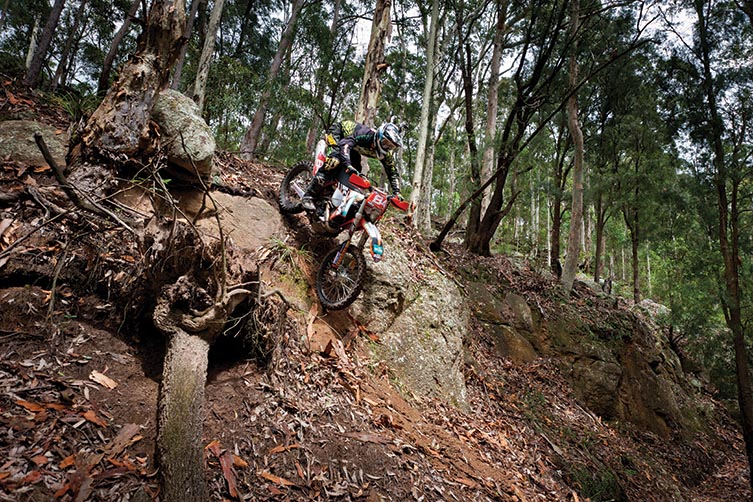
Riding Out
As the bike compresses in and out of the G-out zone at the bottom of the descent, make sure your head is held high to scan the trail ahead for any trees or rocks that you’ll need to dodge. With your weight still positioned toward the rear of the bike, apply just enough throttle to keep the front wheel light so it doesn’t trench into anything and stop you dead in your tracks.
Never, under any circumstance, grab a handful of front brake until the bike is well below vertical and out of the tip-over zone. Try to rely on small amounts of rear brake – like you’re trying to mimic a car’s ABS system – coupled with engine braking to slow the descent down if you think you’re carrying too much speed

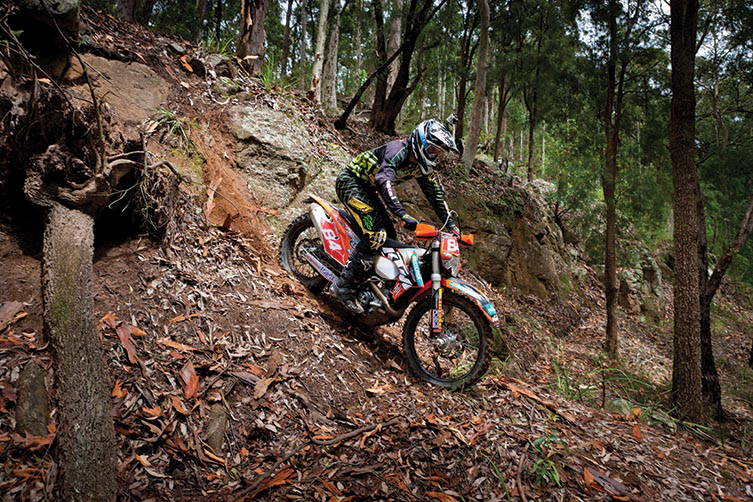
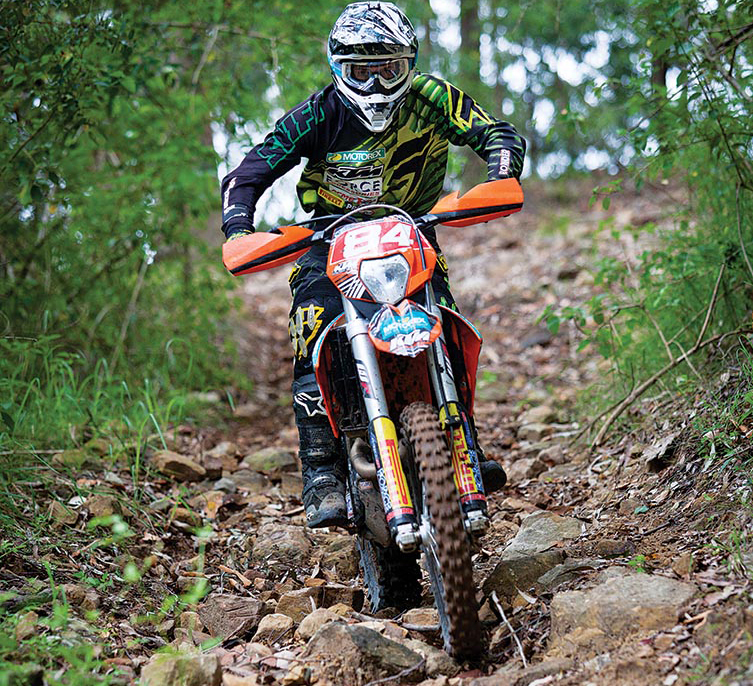
Looking Ahead
It’s all too common to see guys sitting down and struggling through shifty rock sections of trail or dried up creek beds – a combination of bad technique and poor planning always results in frustrating little crashes.
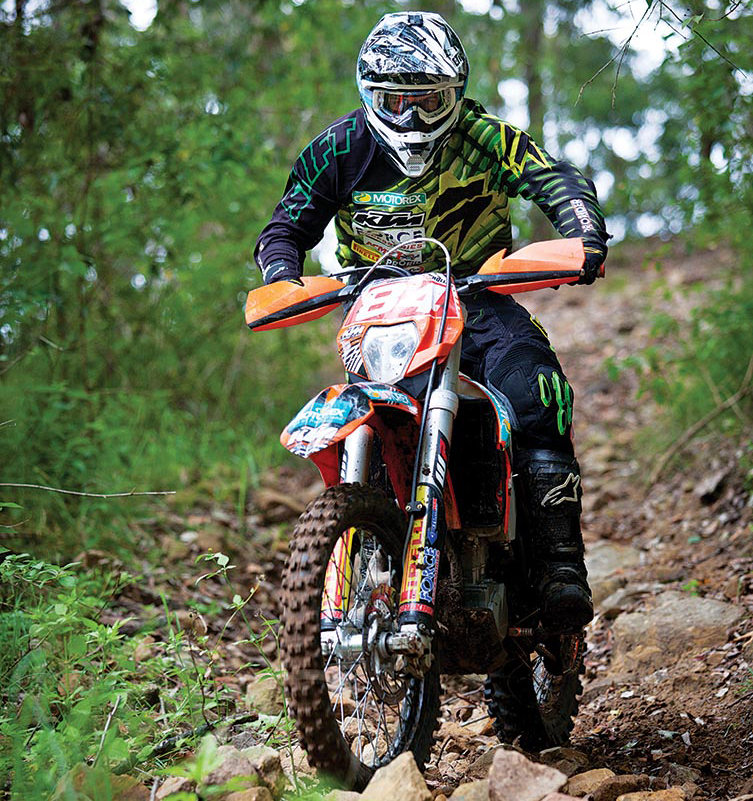
Because traction is never constant, the bike will persistently move around as the wheels deflect and glance off moving rocks. In your approach, you need to be looking as far ahead as possible to scope the cleanest line. If there are bigger boulders littered throughout the centre of the rocky trail, try scoping the sides of the track for a better option. The smoothest line may well involve zigzagging from side to side.
Standing Up
Once you’ve sighted what looks to be the smoothest line, enter the section of trail with a steady but relatively low speed, and remain standing on the pegs. In the standing attack position, not only can you see further and balance better than in a seated position, but you can also use your legs and arms to quickly counter-act any sudden movements the bike will make as rocks shift and roll underneath the wheels.
Here, my bike is in second gear and I’m making sure I’ve kept the throttle constant – never blipping my way from point to point. Any short, sharp bursts of throttle will unsettle the balance of the bike and guarantee the back wheel breaks traction. On the odd occasion my bike has glanced off-line, I’ve quickly recovered through standing tall on the bike, but remaining supple in the arms and legs. If I were sitting down here, I would have crashed for sure.
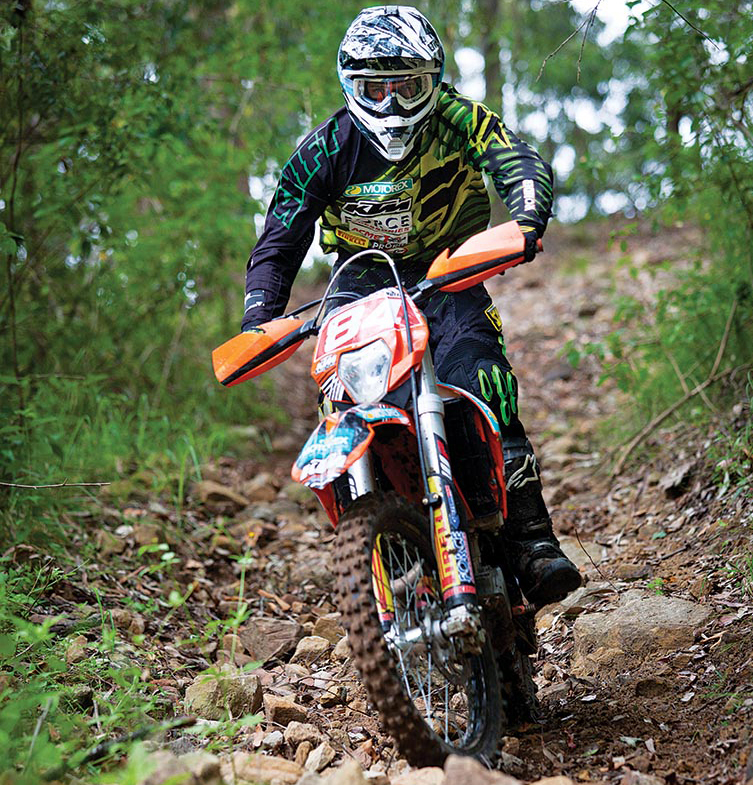
Momentum
Holding a steady pace into the entrance of a rocky section of trail is critical to keeping the bike settled and smooth. The momentum you generate at the beginning is what you will ultimately aim to hold all the way through to the end. Like descending cliffs and power-sliding through grassy turns, focusing on your exit point and using your body’s weight distribution to balance the bike are all key to riding over temperamental terrain.
If you happen to lose your balance and you’re forced to sit down, waste no time in standing up again. The quicker you can get back to a standing attack position and the longer you can remain there – looking ahead, staying supple in the arms and legs and holding a constant throttle – the easier riding rocky singletrail will be.
Related Content
HOW-TO: CORNER SPEED

HOW-TO: CLEAN AND OIL AN AIR FILTER
You might also like...

2026 SMX WORLD CHAMPIONSHIP VIDEO PASS
The SMX Video Pass is back, and again providing live and on-demand access to all 31 rounds.

2026 ENDURO & CC MODELS: 7-BRAND PRICE COMPARO
A handy table of easy-to-compare prices for seven brands’ 2026 enduro and cross-country models.

HONDA CLAIMS EIGHTH AUSX TITLE
Dean Wilson sealed the deal for Honda with a dominant 2025 Australian Supercross season.
National Motorcycle Insurance
6 months ago
Ride Smart | Presented by National Motorcycle Insurance
Transmoto’s Simon Barratt covers some handy tips on how to protect your dirt bike, presented by National Motorcycle Insurance.
KTM
7 months ago
KTM DOMINATES 2025 AUSTRALIAN ENDURO CHAMPIONSHIP
The KTM DM31 Racing Team wrapped up four titles at the weekend’s AusEnduro season finale.

Boost Secures 2025 AUSX Naming Rights
The Australian Supercross Championship is set to launch into its biggest season yet.

TT Circuit Assen To Host 2027 MXoN
The 80th edition of the MXoN will see the legendary event return to Dutch soil in 2027.

First Look: Aus MXGP Battleground
The 2025 MXGP of Australia track design has been revealed.
Be the first to comment...