How-To: Shred Grasstrack
![]()
This content was originally published in issue #27 of Transmoto Dirt Bike Magazine in December, 2013.
![]()
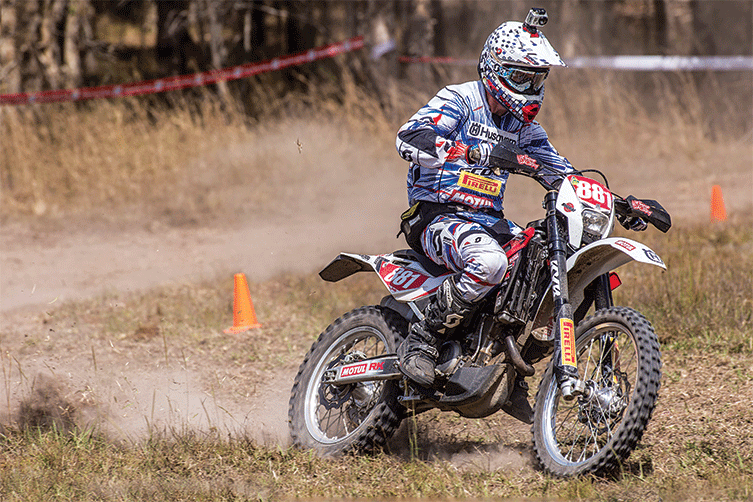
If you think back to your earliest riding experience, chances are that it was a wide-open paddock. In your childlike enthusiasm, you may well have overlooked the fact that those early few metres, wobbling around on that hand-me-down mechanical beauty, were not only an introduction to the world of two wheels, but also your first crack at grasstrack riding. Grasstrack is basically any open grass area that you can make a circuit on. It’s the purest form of dirt biking, but an art form unto itself. And it’s this “How hard can it be?” simplistic nature of riding around obstacles on a flat field that can make it the most frustrating. Far from being easy to master, grasstrack requires an array of techniques you’ll need to employ to find the flow and unlock the secret to fast, smooth laps. From lapping with your mates on the back of a property to rolling up to your first A4DE (in which grasstrack is the dominant discipline), you need to be able to read and adjust to the course laid out beneath your tyres. In order to explain the skills and mindset needed to unravel grasstrack’s secrets, we’ve enlisted the help of a rider who’s been ripping around paddocks for more than three decades. Reigning A4DE and AORC Vets-class champ, PSC Husqvarna’s Damian Smith, knows a thing or two about being fast on the grass. Here, he runs through the approaches you’ll need to keep your mates seeing green. Heed his advice, follow his lines, and life will be sweet.
![]()
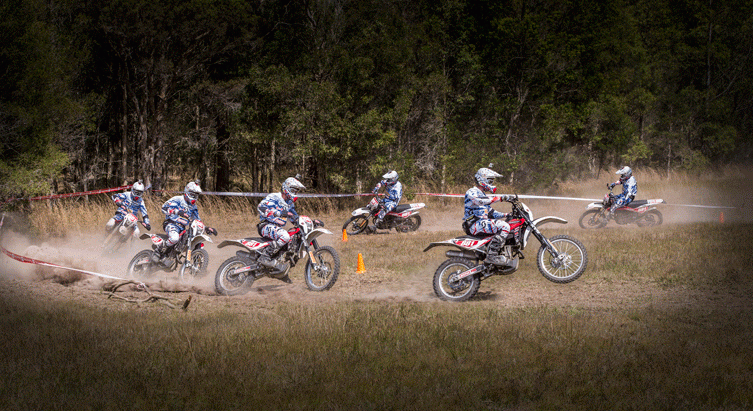
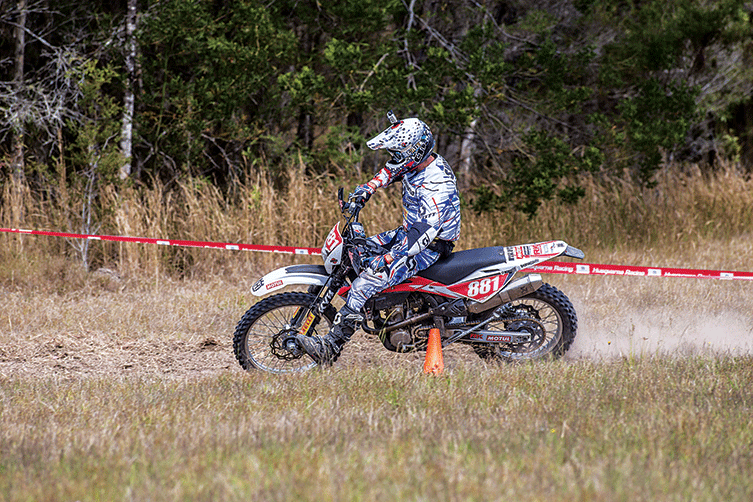
Line Selection
![]()
Line selection is the single most important decision you need to make when grasstracking. I tell people to think of the arc an F1 car takes when planning their lines. You watch the drivers take a bend and you realise it’s not about the shortest possible line but the one that will carry the most momentum on the exit. The three lines illustrated above show the inside, middle and outside lines. Let’s run through them…
Line 1 – Inside
This may look the fastest line – after all, it does offer the shortest distance of the three lines – but what you gain on the distance front, you lose on momentum and safety. By opting to go up the inside, you have to brake harder, turn sharper and also lose more speed than the other two. That increase in braking effort means the bike enters the corner with the suspension unsettled, steering angle increased and the tyres have more work to do, as you’ll be leant over the most of the three options at the apex. Once past the apex, you’ll need to be more careful laying down the power as you’ll probably be a gear lower and the bike will tend to spin up faster and easier, meaning more chance of a slide or highside. On the exit, the bike will be more upright, but the lack of momentum will hurt your speed down the following straight.
Line 2 – Middle
The second-best option. This allows you to carry a bit more speed into the corner than the inside line, but you won’t get the same flow as from the outside. Things can change on a wet track, though. If the outside line was worn, but the middle still grassy, I’d chose the middle line first as there’s more grip (and traction) on wet grass than on wet dirt, and the wet nature of the track means that corner speeds will generally be slower, and momentum lost becomes not as essential as grip found. However, in the dry, you’ll find this line will have the exit compromised by the rider on your outside who’s found the ‘slingshot’ effect, and gets ahead as you start to chase gears down the straight.
Line 3 – Outside
Apart from the above-wet scenario, this is where you should be. You’ll carry more speed in, have to brake less up to the apex, have the most settled bike and best vision through the corner. Even though you’re leant over for a longer arc, you’re not at such an acute angle and therefore not putting the same pressure on the bike. From the outside line, the momentum carried at the apex can be twice that of on the inside line, meaning you’ll be faster into, up to and out of the corner. If you repeat for every corner on the track, your advantage over the other lines will be huge. As the track becomes more worn, the displaced dirt will form on the outside like a mini berm. Although this is too soft to push into with the front wheel, it can be useful hook-up on the exit
![]()
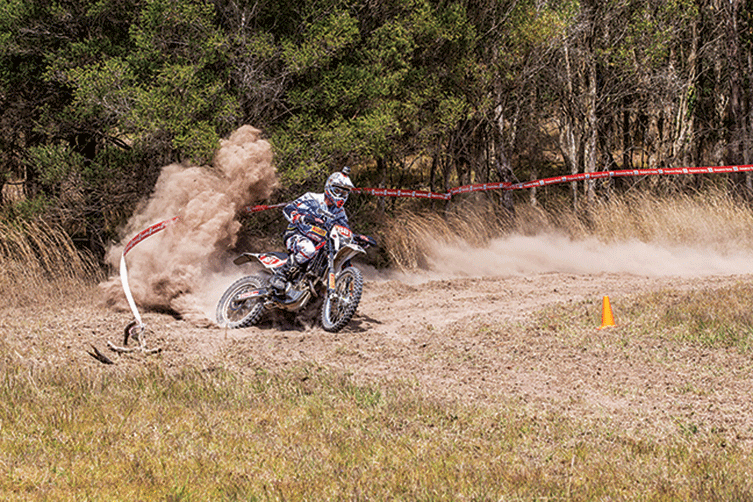
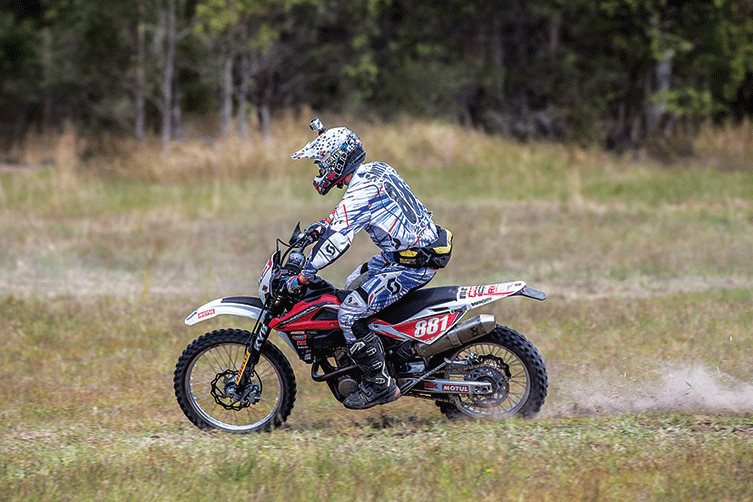
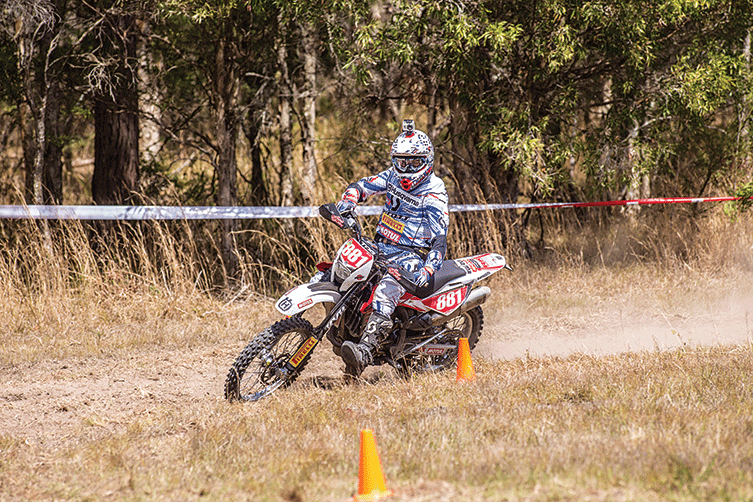
Corner Set-Up
![]()
Apex & Vision
With most racing grasstrack circuits being between five and six metres wide, the apex is not always a clearly defined piece of real estate. So it’s best to choose the apex that suits your style rather than just follow the herd. It’s now that your eyes work overtime, varying the focus from a few metres in front of the fender to scanning for the exit line. This requires more than just a dart of the eyes – from braking into the apex to neutralizing the bike mid-corner, my head angle changes from ‘eyes down for a full house’ bingo-lover to lighthouse keeper’s lookout! I’m not so concerned with how close I get to the apex, but more about how fast I can be at it. Being slow here can mean an unwanted gear change or the engine bogging slightly.
Body Position
From my attack position on the previous straight, I move towards the rear of the bike, standing but with knees bent and arms stretched, as I try and get the rear to anchor into the dirt. Further into the corner (with the braking effort reduced as the speed comes down and the lean angle increases), I’ll return to sitting on the bike, making sure I get as far forward as possible to help the front tyre find grip. Whilst performing this change in stance, I’ll then place my inside leg off the peg as a counter-balancing aid and to help keep my upper torso as vertical as possible. Even though my head moves as I focus ahead and on the exit, it stays in line with my torso to keep me balanced. While all this is going on, my outside foot is weighting the footpeg, helping to push the tyres into the ground to find extra grip.
Entry Braking
Diving into the start of the corner, I’m towards the rear of the bike but applying more braking effort to the front wheel than the rear. I want to brake as hard as I can without locking either wheel, as that will make the bike slide and affect my entry. Only a few of the top riders can successfully “back it in,” where the bike is turned via the rear brake. I’ll trail some rear brake up to the apex, but this can be tricky as I’ve gone from a standing to a sitting position while modulating the pressure on the rear pedal. With my weight over the front, I can confidently brake harder with the front, should the need arise. Then the only braking thought left is to make sure I’m off the front brake well before the apex and the point that the bike’s leant over most.
![]()
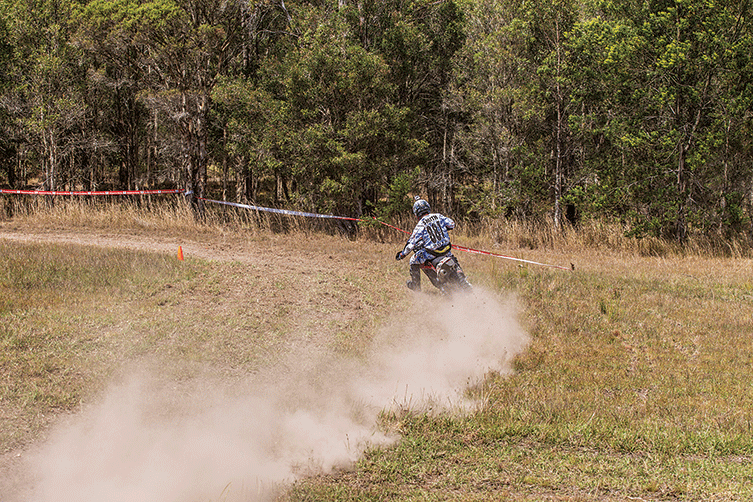
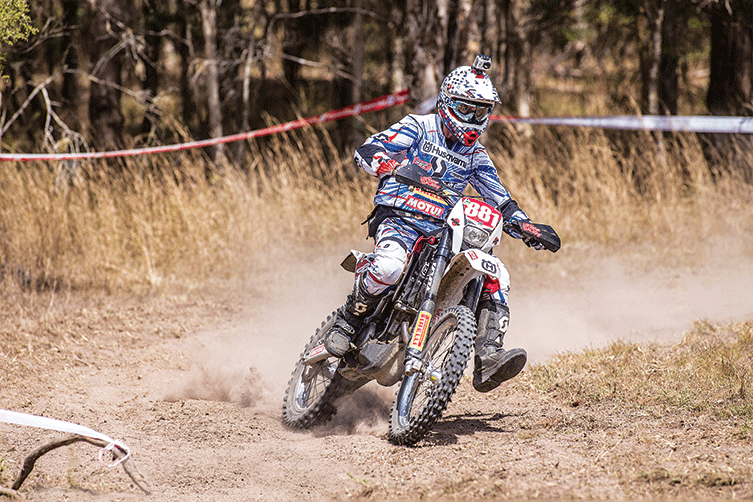
Corner Exit
![]()
Apex & Vision
With my scanning of the area before I reached the apex, I’m now just focusing on the exit line. I’m heading for the outside of the bend. This will allow me to carry the most speed into the next section. The only thing that can change my line is if the exit – on the drive-line – is extremely rutted. As there’s not much traction to be found bouncing through ruts, I’d take avoiding action if I were to spot them now. My vision is now 100% on the next section and setting up for the next corner. I’m now controlling the bike with just the throttle – all braking actions are over. This tranfers the weight from the front to the back and loads the rear tyre; essential as you dial the throttle on to hook up for the drive out of the corner and through the next section.
Body Position
From the apex, where the family jewels are kissing the tank’s filler, I’ve moved rearward as I get on the gas. It’s a fine line between being far enough back to get rear-wheel traction and not having enough weight on the front and losing time with a massive wheelie. I try to keep my head over the top of the bars and shift so that I end up sitting back squarely on the saddle, with my head in a perfect line through my body and to the centre of the bike. As the rear finds traction and I drive out of the corner, I’ll assume the attack position – head low over the bars – to achieve the best speed down the next straight. If it’s a particularly tight left corner, I’ll need to get my foot back on the peg as quickly as possible so I’m ready to shift up through the gears.
Exit
Everything I’ve done up to now has been for one reason only – to arrive at this point carrying the maximum momentum and to have the bike set-up for the next section. Any mistake made on the entry or apex to this corner will be magnified greatly at this point. If everything’s gone according to plan, I now have time to scan the horizon further than at any time previously. This gives me more time to plan on how to attack what’s coming next. Basically, at this point, any thinking about this corner is history. I’m just thinking about getting the bike upright and achieving the best drive (and hence speed) through the next section. Already I’ll know what lies ahead – be it a long straight or sharp corner – and I’ll be starting my thought process all over again.
![]()
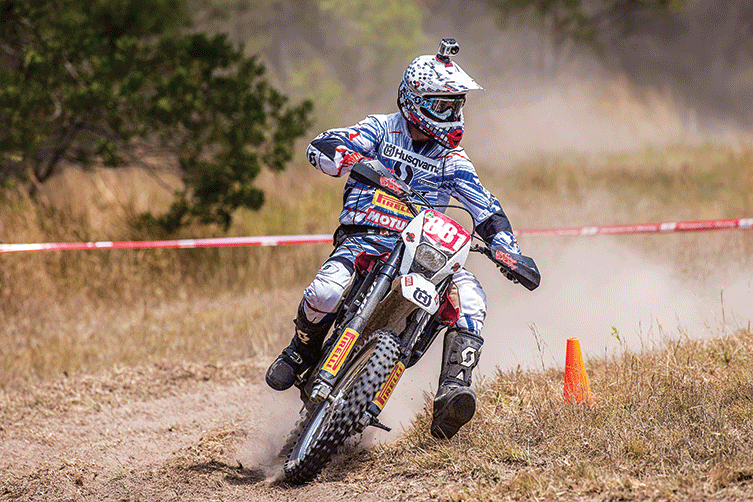
Transmoto Expert
![]()
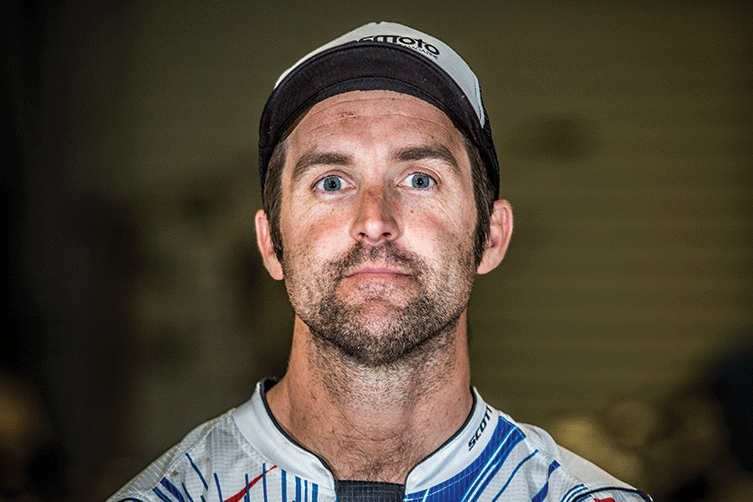
Damien Smith
Damian Smith has represented Australia 15 times at the ISDE – bagging an astounding nine gold medals along the way – and is the current AORC Vet-class champ. Backed by his PSC Husqvarna race team, Damo runs the ‘Master and Apprentice’ development program and is always willing to teach the fine art of riding faster, smoother and more confidently. Over the years, he’s mastered grasstracks from around the world in every conceivable condition, so he’s ideally placed to help you master your own back yard.
Related Content

HOW-TO: TEAR UP HILLS

HOW-TO: 2-STROKE ENGINE MAINTENANCE
You might also like...

2026 SMX WORLD CHAMPIONSHIP VIDEO PASS
The SMX Video Pass is back, and again providing live and on-demand access to all 31 rounds.

2026 ENDURO & CC MODELS: 7-BRAND PRICE COMPARO
A handy table of easy-to-compare prices for seven brands’ 2026 enduro and cross-country models.

HONDA CLAIMS EIGHTH AUSX TITLE
Dean Wilson sealed the deal for Honda with a dominant 2025 Australian Supercross season.
National Motorcycle Insurance
7 months ago
Ride Smart | Presented by National Motorcycle Insurance
Transmoto’s Simon Barratt covers some handy tips on how to protect your dirt bike, presented by National Motorcycle Insurance.
KTM
8 months ago
KTM DOMINATES 2025 AUSTRALIAN ENDURO CHAMPIONSHIP
The KTM DM31 Racing Team wrapped up four titles at the weekend’s AusEnduro season finale.

Boost Secures 2025 AUSX Naming Rights
The Australian Supercross Championship is set to launch into its biggest season yet.

TT Circuit Assen To Host 2027 MXoN
The 80th edition of the MXoN will see the legendary event return to Dutch soil in 2027.
First Look: Aus MXGP Battleground
The 2025 MXGP of Australia track design has been revealed.
Be the first to comment...