How-To: Extreme Enduro
The only people who say doing tricks on your bike isn’t big or clever, are the ones who’ve tried and failed. Learning to do something that’s outside your normal riding will make you a much smarter and safer rider. The thought process that goes on when analysing a difficult obstacle means that you’ll both be looking at it and also ahead, so you become more aware of the environment you’re riding in. And by practicing the technical aspect of how to conquer such an obstacle, it will improve your balance, clutch, throttle and brake control, and make you a better rider.
So, next time you unload the bike from the van and blast down your usual trails, why not find an area that’s a little more difficult than normal and use the following guidance as part of your ongoing off-road learning? After all, he might only be 19 years old, but Matt Phillips is already armed with the DNA of a great teacher. In this article, he’ll guide you through extreme riding, from the pretty simple to the thoroughly awesome. Fill your head with his wise words and take them out with you next time you ride. And then it’s up to you to practice until you nail it, and proudly add another skill to your riding CV.
This content was originally published in issue #34 of Transmoto Dirt Bike Magazine in Aug, 2013.

The Hop-Up
As off-road riding requires more rider input and skill than riding a Harley down a dual carriageway, obstacles like this one shouldn’t scare the hell out of a decent rider. Sure, there’s the right way and wrong way to attack this, but a methodical approach will see you right every time. I’ve spotted this square-edged step-up from about 15 metres back and can see the base is made from wet mud. I’m not necessarily looking for the shortest line up the face of the step-up, but the one that will allow me to keep the most momentum up and over it.
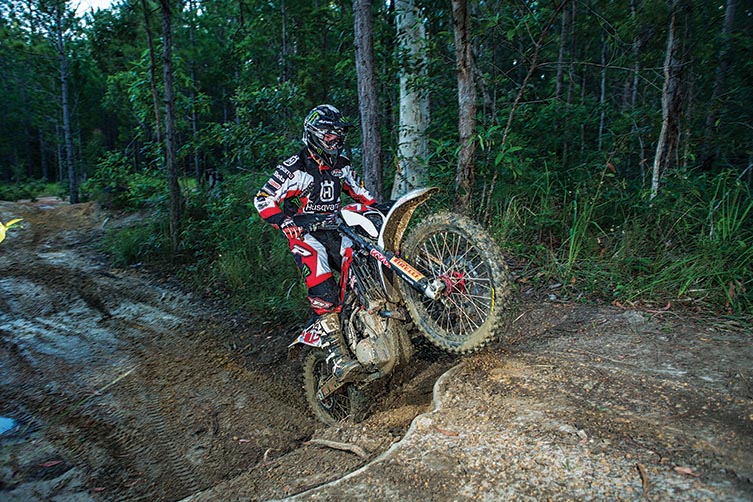
I can see the twin roots running along the base and top of the mound and these play an important part in my approach. The last thing I want to do is to hit these roots at an angle – that’s the easiest way to crash here. I’ve judged my speed to equate to lowdown in second gear; that’s slow enough to allow me the spring to get to the top, but not too fast as to spoil my rhythm and have me pogo once I hit the crest. As dirt equals traction, I’m trying to find the driest section at the base to launch off. My aim is to compress the suspension by bouncing like I’m just about to do a bunny-hop, before clutching the front wheel up into a wheelie, so it lands on, or above, the higher root. At the same time, I try and make myself as light as possible on the footpegs by gripping with my calf muscles and leaning forward slightly to place more weight on the bars, forcing the front into the top of the step-up. All this time, I’m keeping my body as central and upright as possible, so I can dictate the trajectory of the bike.
This means the bike will rock back and forth as it mounts, climbs and exits the hill. From here, momentum and steady power will see the back tyre climb the hill. If the rear wheel threatens to spin, I’ll quickly dip the clutch so that the tyre finds traction again. The ideal is for both wheels to be on the ground as much as possible through the whole manoeuvre. I’ve already looked ahead so I now know what my exit strategy is and will power out accordingly.

The How Hard?
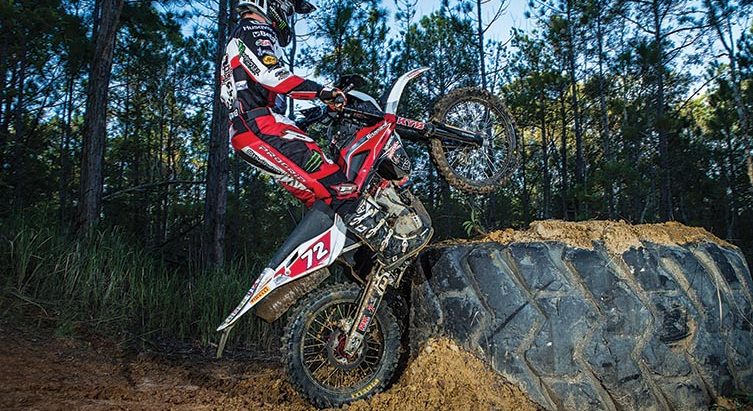
Now we come to a more difficult and technical obstacle, but the thinking remains basically the same. It’s a more daunting exercise than the natural one for two reasons. The first is the sheerness of its face; the second being its rubber construction.
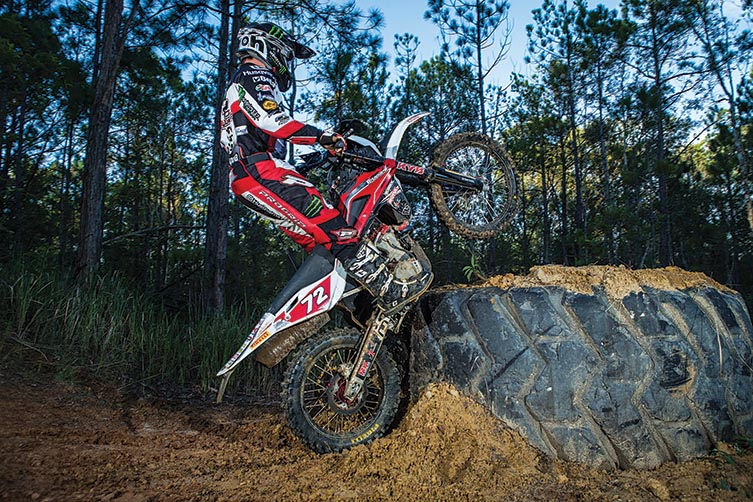
Although the basic premise is the same – front wheel up and then the rear will follow – the whole process involves much more input from the rider. It also involves more violence, as the front rises so quickly that the bars nearly hit my chest.
Starting with a trials-type approach, I’m low in the revs in first gear and edging towards the tyre at little more than walking pace. I’m extra careful about my balance on the bike – both side-to-side and front-to-back. With the front wheel close to the tyre, I’ll compress the suspension and ping the clutch to hoist the front high. I need to clear the front edge of the stationary tyre with my front wheel – as hitting the edge will throw my weight back (and there’s normally only one result from there!)
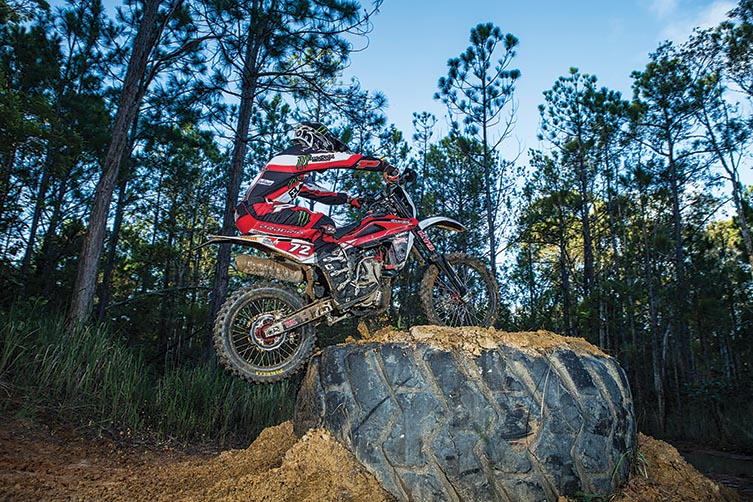
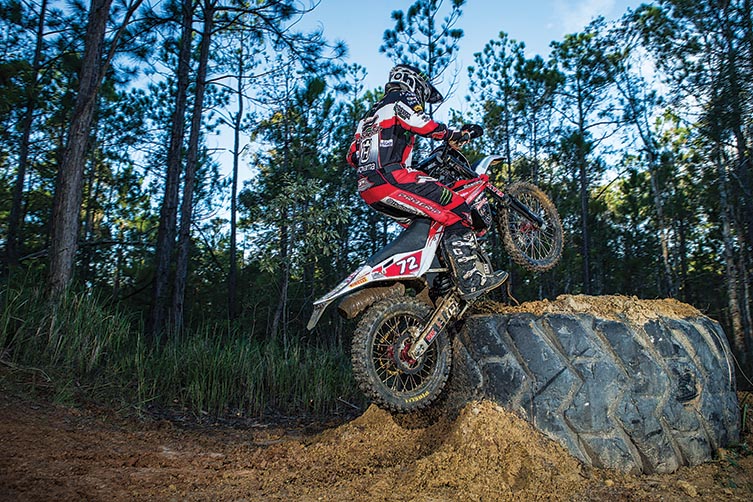
As soon as my front’s clear over the tyre’s edge, I’m leaning forward and physically trying to push the front down into the earth in the middle of the huge tyre. I need my front to really bite hard into the mud. This gives me both stability and also helps the back wheel ride up the face of the tyre smoothly. I’ve got little to no throttle at this point, as my rear tyre and the excavator tyre will just slip against each other and pull me backwards if I throttle on too much. As my tyre rolls over the edge of the obstacle, I lean back to minimise any hop that might occur.
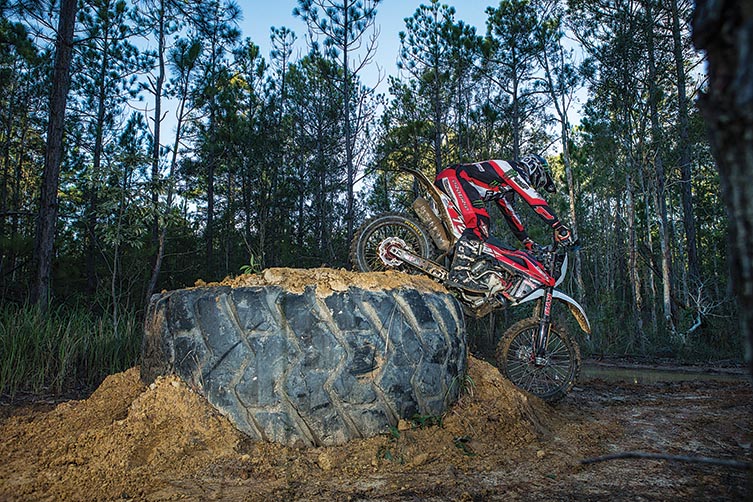
As the centre of this stationary tyre is caked in slippery clay, I’m not going to jump off the other side; just roll over it. As the front wheel gets close to the edge, I’ll compress the suspension and throttle on slightly to take the weight off and allow the wheel to roll over without tucking under. That way there’s no danger of me being pitched over the bars.

The Not-To-Be-Stumped
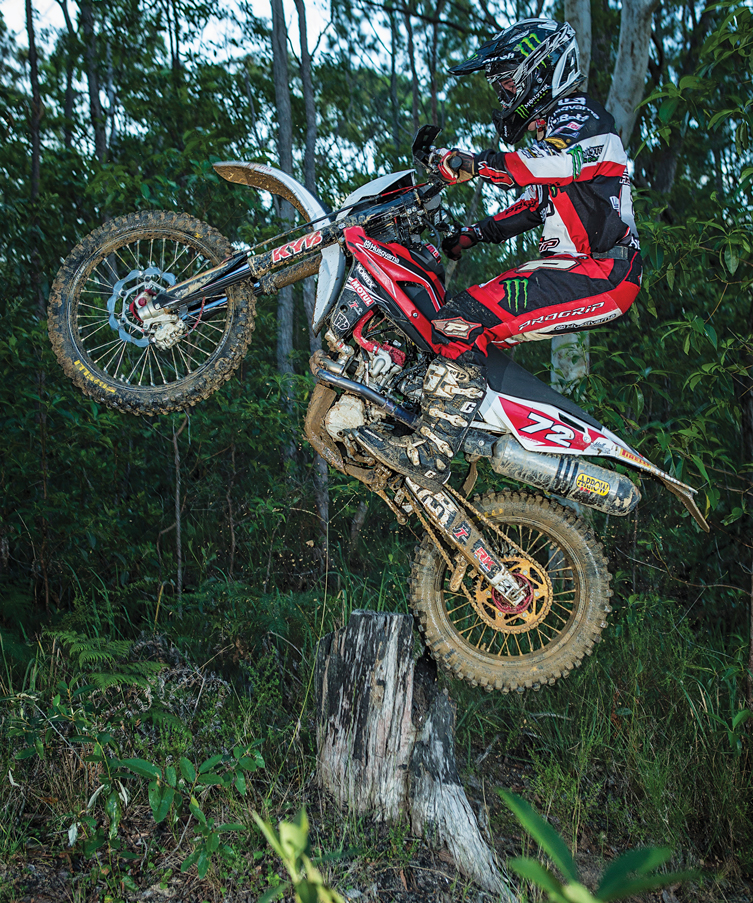
If you get bored of the usual stuff, you can find obstacles anywhere. This tree stump looked like it could be good fun to ride over so I quickly scouted it out. I’m mainly looking at the strength of the wood and the angle of take off, but also the landing area behind. Obstacles like this are for the confident and committed rider only, so you have to know you can land and ride out the other side before you try it.
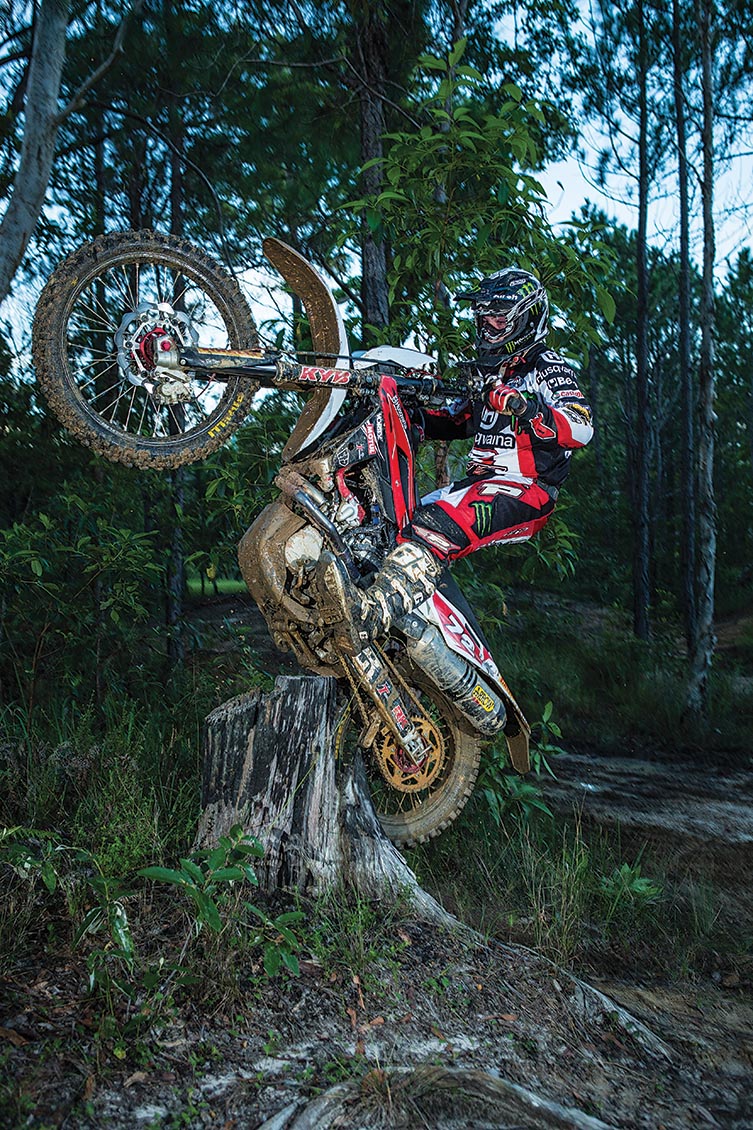
If you need to gain confidence before hitting something natural like this, then the best practice is over a normal ramp, made out of a sheet of wood. Build it sturdy and to a similar angle and length as the stump in the picture. Then practice wheeling and jumping over. This will get you used to the motion and technique, and will allow you to ride off the sides if you get your balance or controls wrong.
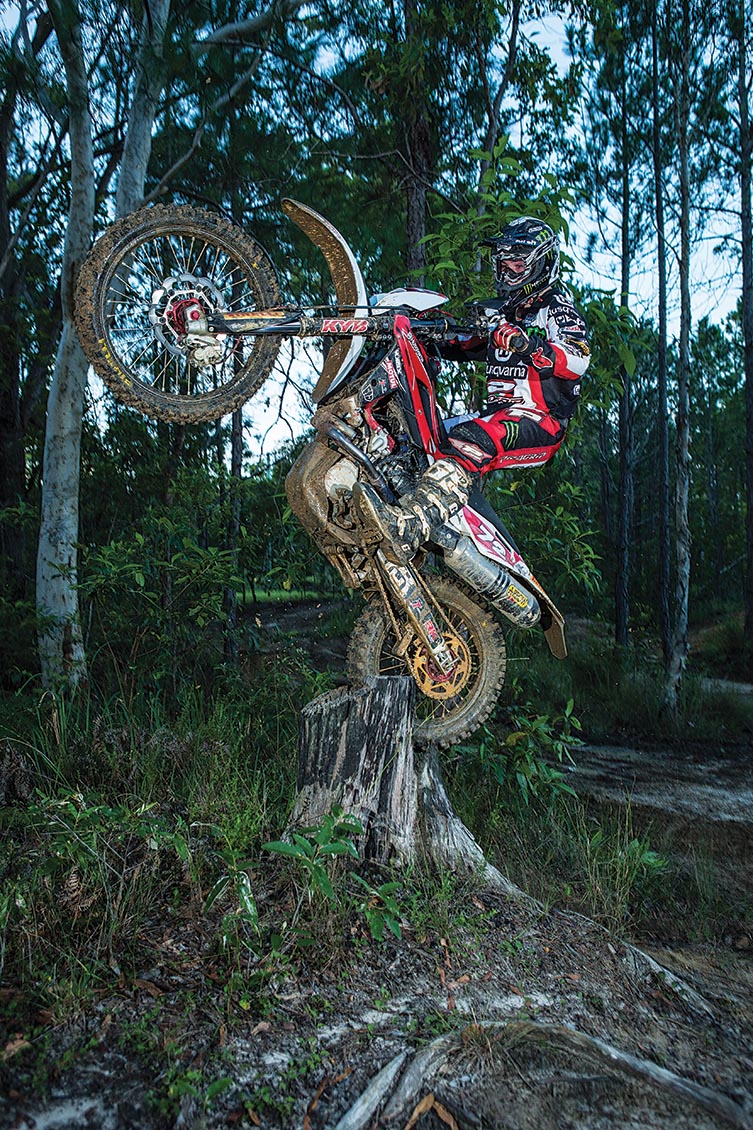
Moving on to the actual stump, I’ve selected first gear, and I’m only about three to four metres away from it. That’s just enough to get my balance before compressing and hoisting the front into the air. This is by far the most vertical the front gets while riding this type of obstacle, and you’ll need to keep the revs high so the bike continues to drive up and over the trunk. Any lack of confidence here will be your undoing.
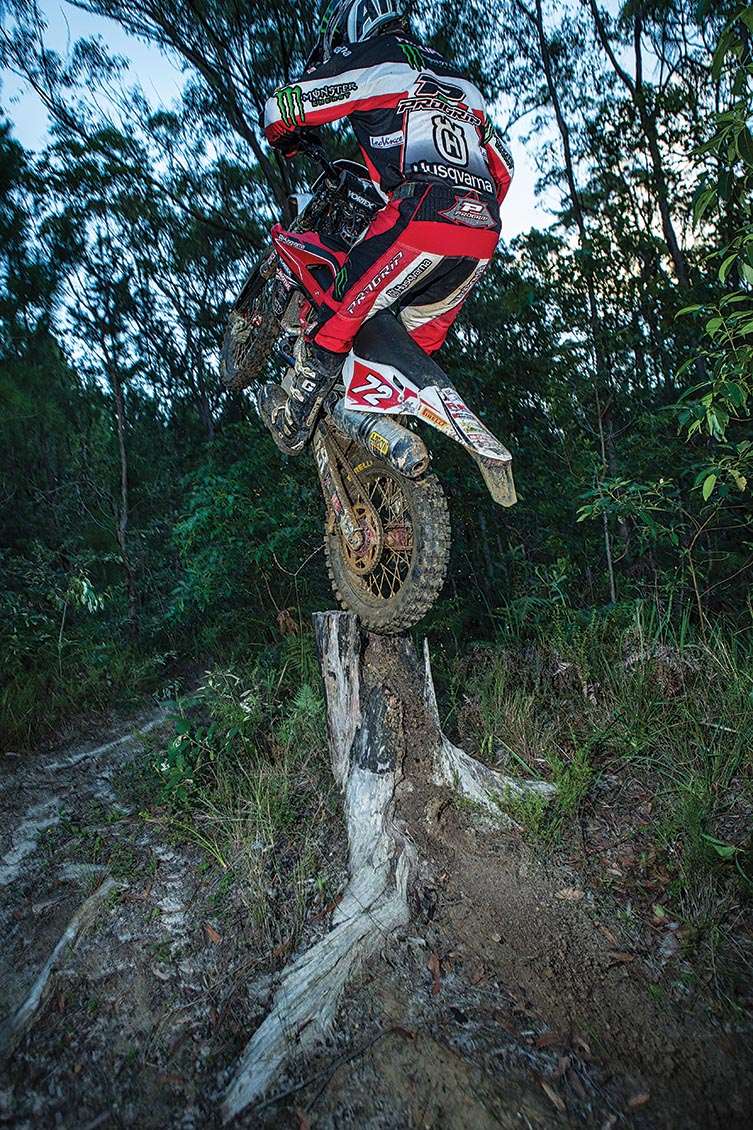
Break drive at any point and there’s a real danger that either the bashplate or bottom suspension linkage will catch the stump on the way over and bring you down to earth by bucking you over the bars. There’s also a real chance that you’ll get thrown sideways off the ramp (and good luck with landing that!). Alternatively, if you give it too much gas, you’ll be shot skyward but, without any real forward momentum, the landing will be heavy and ugly. With the right amount of speed, you’ll treat it just like a jump – by keeping the power on through the whole exercise.
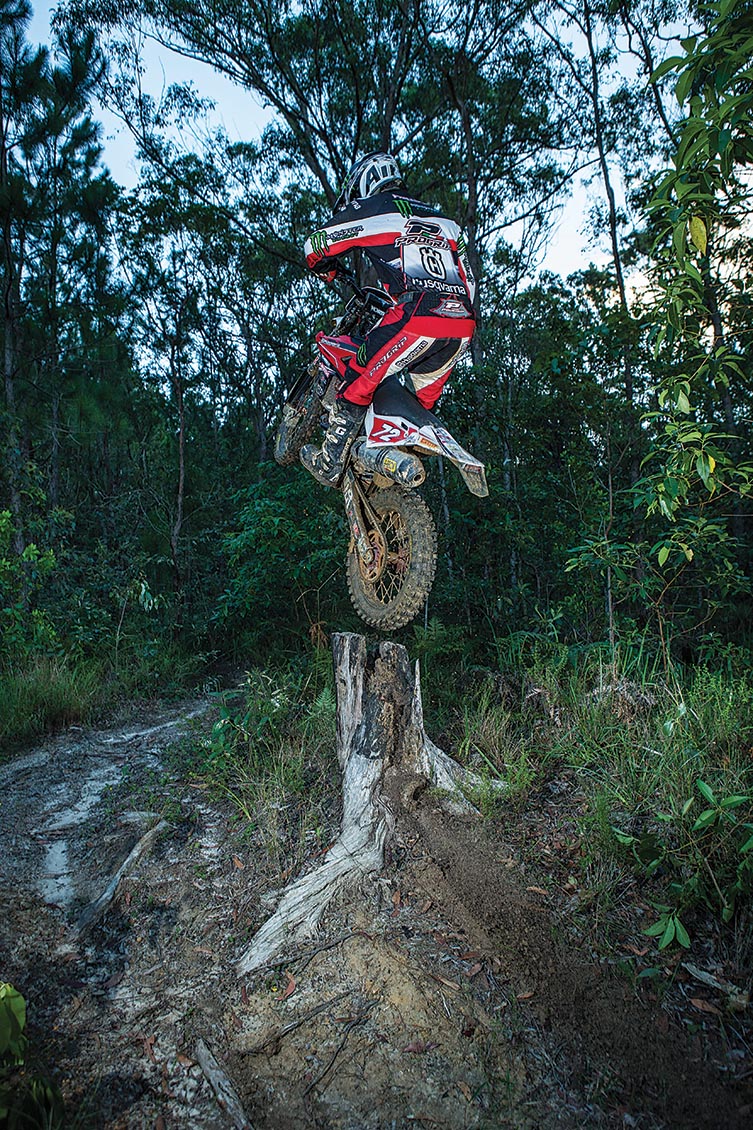
That means you’ll not bog down on landing, and that’s doubly important if that area’s uphill and into sand. If you need to alter the altitude of the front wheel in the air, revving the engine will help bring it down to a more comfortable level. All the time, your focus should be on spotting the landing and keep a finger on the clutch in case the engine threatens to stall when the back wheel lands and bites into the earth. Usually, after about three attempts at this type of obstacle, I get to the point where I start thinking of how I can ride it better and faster. You never stop learning.
Related Content

HOW-TO: TECHNICAL RUTS

You might also like...

2026 SMX WORLD CHAMPIONSHIP VIDEO PASS
The SMX Video Pass is back, and again providing live and on-demand access to all 31 rounds.

2026 ENDURO & CC MODELS: 7-BRAND PRICE COMPARO
A handy table of easy-to-compare prices for seven brands’ 2026 enduro and cross-country models.

HONDA CLAIMS EIGHTH AUSX TITLE
Dean Wilson sealed the deal for Honda with a dominant 2025 Australian Supercross season.
National Motorcycle Insurance
5 months ago
Ride Smart | Presented by National Motorcycle Insurance
Transmoto’s Simon Barratt covers some handy tips on how to protect your dirt bike, presented by National Motorcycle Insurance.
KTM
6 months ago
KTM DOMINATES 2025 AUSTRALIAN ENDURO CHAMPIONSHIP
The KTM DM31 Racing Team wrapped up four titles at the weekend’s AusEnduro season finale.

Boost Secures 2025 AUSX Naming Rights
The Australian Supercross Championship is set to launch into its biggest season yet.

TT Circuit Assen To Host 2027 MXoN
The 80th edition of the MXoN will see the legendary event return to Dutch soil in 2027.

First Look: Aus MXGP Battleground
The 2025 MXGP of Australia track design has been revealed.
Be the first to comment...