DIY Tech: Electrical Basics
![]()
This content was originally published in issue #27 of Transmoto Dirt Bike Magazine in January, 2013.
![]()
Quick changes in temperature, frequent encounters with water, harsh grit and continuous vibration – these are some of an electrical engineer’s most hated things. Yet, as dirt bikers, we manage to throw all these and more at our bike’s wiring almost every time we ride, so our bike’s electrics can be prone to failure. Fortunately, a dirt bike’s electrical system isn’t that complex – especially if you’re not running ADR gear – so it pays to have an understanding of the electrical components. With a few basic tools you can diagnose most issues. And with a bit of practice, you’ll be able to carry out simple trail-side fixes with ease. These pages intend to arm you with the knowledge and confidence to get your mitts on the spaghetti beneath your seat and headlight and get those paralyzing or niggling electrical issues sorted.
![]()
Tools You’ll Need
![]()
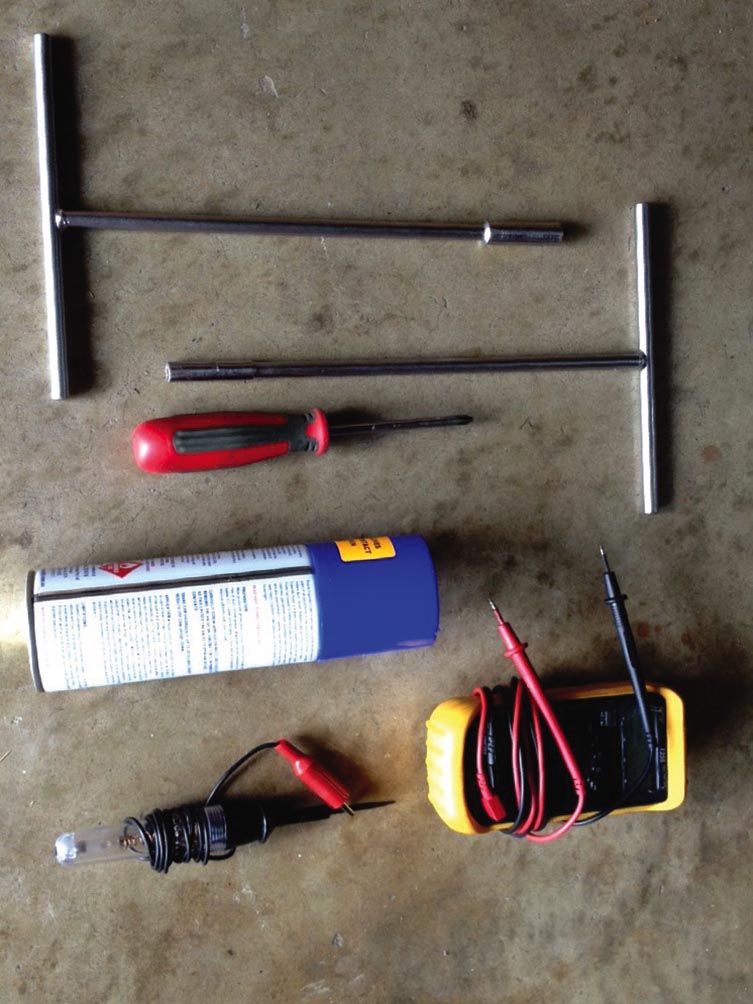
● Multimeter
● Test Light
● Contact Cleaner
● Basic spanners and screwdrivers
![]()
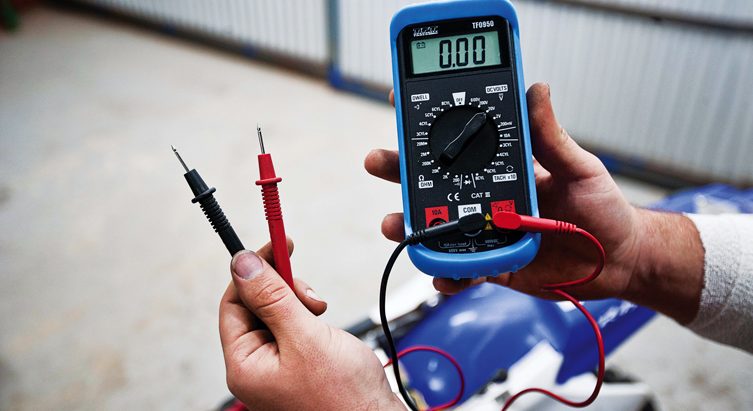
The Tool Setup
![]()
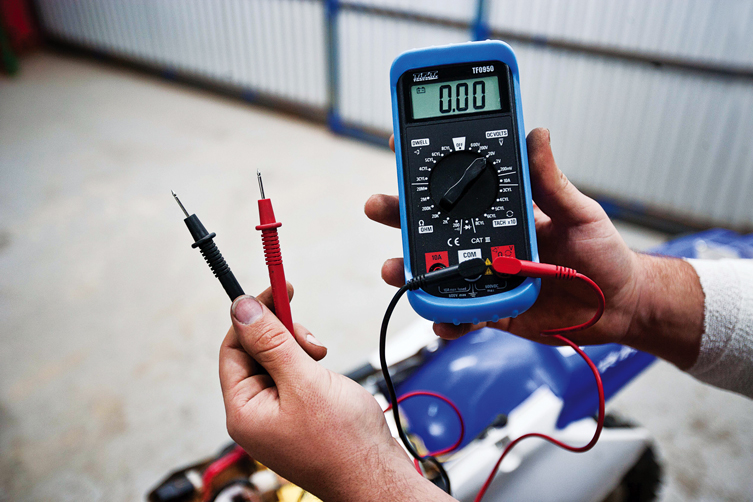
Most electrical diagnosis requires a test light or multimeter. So as not to misdiagnose any issues due to faulty or incorrectly set-up tools, ensure your tools are working properly before you start work. For the test light, simply connect the flying lead to earth and touch the tip on the positive battery terminal and ensure the light illuminates. On the multimeter, you generally set the dial to the DC 20 volt setting (as your bike runs a 12 volt electrical system or 6 volt on older bikes) and, if there’s more than one port on the multimeter for the positive lead, ensure it’s plugged into the port marked with a ‘V’. Then carry out the same test as for the test light and ensure you get a reading from the battery.
![]()
Checking for Ignition
![]()

If your bike isn’t starting properly and you know the engine’s getting good, fresh fuel, then check if your ignition system is working properly by removing the spark plug and checking for life. Give the tip of the plug a quick clean with a wire brush then, with the plug pushed into the plug cap, hold the insulated cap and place the thread of the spark plug firmly against an exposed bolt head that’s grounded to earth. Grip the plug from the cap on the electrical lead, and hold it with a thick rag or some pliers with plastic-coated handles, as there is a high risk of getting an electrical shock. The spark won’t kill you, but perms are sooo Eighties… Then turn the engine over with the starter motor or kick-start. If you have a strong spark, you’ll know that your ignition system is working properly.
![]()
Battery Health
![]()
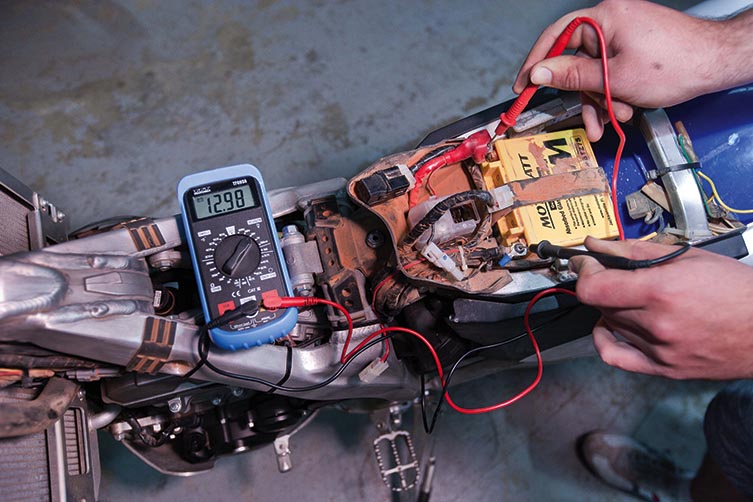
If your battery is struggling to turn the engine over, put it on charger or go for a ride to put some charge into it. Then, to determine the health of the battery, put the multimeter leads across the positive and negative battery terminals. With the ignition switched off, you should get a reading of around 13 volts, but over 12.4 volts at minimum. Then, with the ignition turned on, the volts should not drop below nine when you hit the starter button. If you return a lower reading on either count, have the battery professionally tested or replaced. Think about using a trickle-charger to prevent this problem from occurring in the future.
![]()
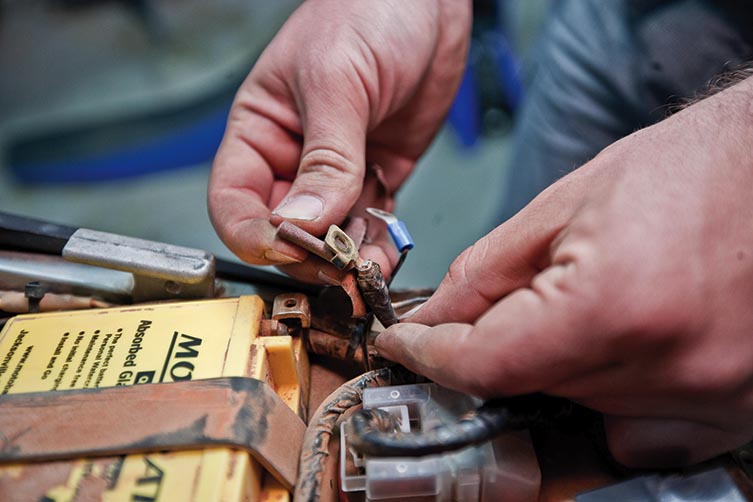
Cleaning Terminals
![]()
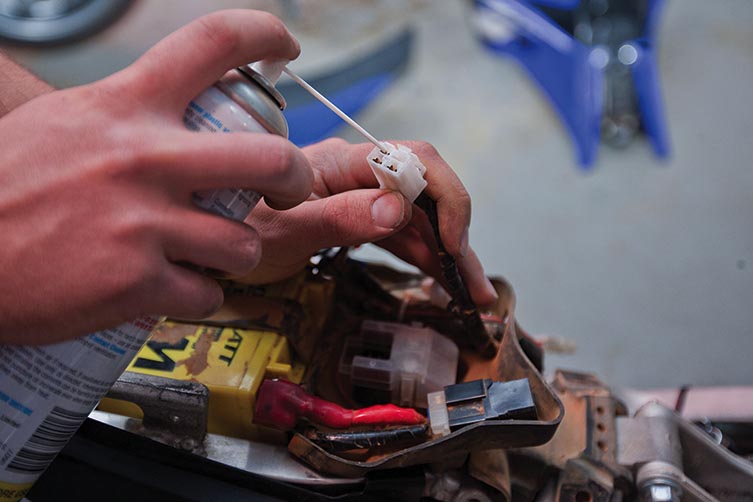
If you are unable to get any ignition or the ignition is intermittent at times, it’s likely that dirt and corrosion on the battery terminals are preventing a good connection, so check to ensure that they are clean. If not, remove the leads and give the battery terminals and leads a polish with fine sandpaper, then reassemble tightly. If you’ve got a problem in a specific electrical system, check any plugs in that area, and give them a good spray with contact cleaner to clear away any dirt or corrosion. If that doesn’t improve connectivity, try using a small file on the plugs to get to the good (bright) metal. Be careful not to take off too much of the soft metal.
![]()
Broken Wires
![]()
If you’ve checked the plugs on an electrical system but still haven’t got power, it’s likely that a wire has broken or been rubbed through – a common problem on dirt bikes. If you’re testing a live (positive) wire, use the test light to narrow down the section of the electrical system that is faulty. Alternatively, your multimeter has a setting whereby it emits a noise if you have a closed circuit, which allows you to check for a faulty connection or broken wire along an entire system without having to constantly look at the readout.
![]()
Checking Fuses
![]()
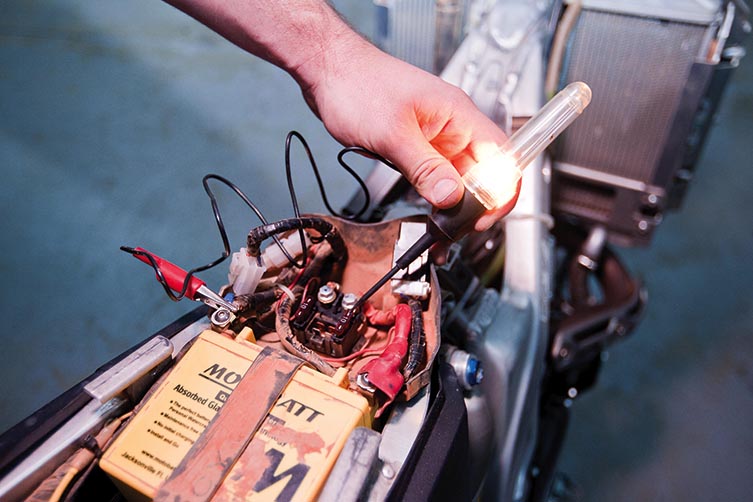
The quickest way to check your fuses is with a test light. Clamp the test light lead onto an earth point and switch the bike’s ignition on. Then touch the light’s tip against the two exposed bits of metal on the top surface of the fuse that sit either side of the number. If you’ve got power on both sides of the fuse, you know it’s working properly. If there’s only power on one side, it’s time to replace that fuse and to restock the spare.
Related Content

HOW-TO: CARBURETTOR MAINTENANCE
HOW-TO: REPLACE FRONT & REAR SPROCKETS
You might also like...

Boost Secures 2025 AUSX Naming Rights
The Australian Supercross Championship is set to launch into its biggest season yet.

TT Circuit Assen To Host 2027 MXoN
The 80th edition of the MXoN will see the legendary event return to Dutch soil in 2027.

First Look: Aus MXGP Battleground
The 2025 MXGP of Australia track design has been revealed.

Aussie Riders Join Aus Hall of Fame
Four new Aussie riders have been inducted into the Australian Motorsport Hall of Fame.

VIDEO: DAKAR RALLY 2025 – BIKE HIGHLIGHTS
Didn’t manage to keep up with the longest desert race in the world? We’ve got you covered.

FIVE REASONS TO RACE A 2025 TRANSMOTO EVENT
Need some convincing? We’ve got you covered.

2025 SMX World Championship Video Pass
SuperMotocross Video Pass season subscribers can enjoy 10 months of live event coverage, plus over 900 hours of archived Supercross & Pro Motocross races.

OCEANIA WOMEN’S MX CUP EXPANDS IN 2025
An expanded Oceania Women’s MX Cup promises to be real shot in the arm for female MX riders – in Oz and worldwide!
Be the first to comment...