How-To: Replace a 4-Stroke Piston
The top end in a four-stroke can be split up into two major sections: the head, and the cylinder and piston. They both require specific attention and critical steps to ensure proper operation once everything is back together.
https://www.youtube.com/watch?time_continue=24&v=IfD6HqIn9Vc
Recently, the guys over at ProX made a video telling you about their used 2006 YZ450F that they’re rebuilding and documenting step-by-step. In this part 1 video, they’ll go over tips on replacing a four-stroke piston. Take it away boys…
Dissasembly
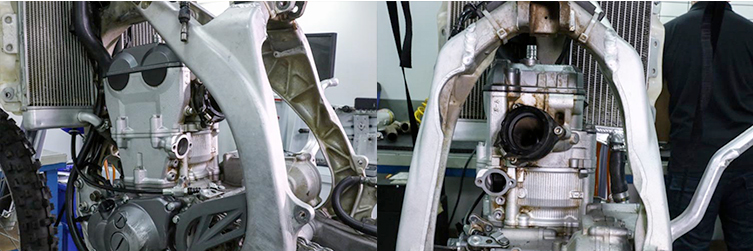
To prepare to disassemble your head and cylinder, you’ll need to remove the seat, gas tank, exhaust system, and carburettor (or throttle body). While not always required, removing the sub-frame, shock, and air boot make accessibility to the engine a lot easier in most cases.
Once those major components are removed, you’ll need to remove any other components attached to the head or cylinder, such as clutch cable guides, spark plug boots, and electrical connections.
![]()
Removing the subframe, airboot, and shock, in addition to the other components, provides much better access to all sides of the motor. Don’t forget to remove any cable guides or other items bolted to the head/cylinder.
![]()
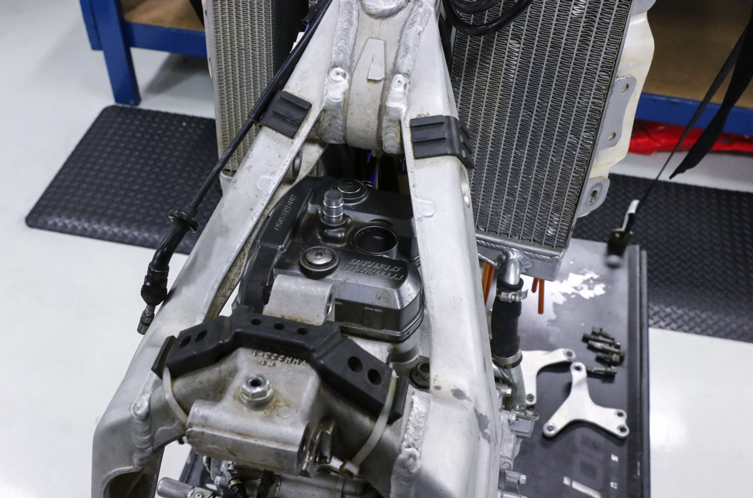
Next, remove the cam cover, loosening the bolts incrementally until they are all loose. With that off, it is best to make sure your camshafts are not fully compressing any of the valve springs before you loosen the cam caps. You can do this by slowly rotating the crankshaft via the kickstarter. With the cam caps removed, loosen and remove the cam chain tensioner next. This will give you the slack to remove the timing chain completely. You can now lift the camshafts completely out, handling carefully.
![]()
Remove the cam cover and head bolts incrementally until loose. This prevents the chance of warping.
![]()
Now you can loosen the head bolts in incrementally in a crossing pattern. Remove the head and place it aside, handling it carefully. Next, do the same for the cylinder bolts, and carefully remove the cylinder. As you remove the cylinder, the piston is going to stay on the connecting rod, so it helps to hold the connecting rod steady as you wiggle the cylinder off the piston. It is always a good idea to fill the opening of the cases with a lint-free rag to prevent debris or loose parts from falling in.
Finally, you can remove one wire lock from the stock piston using a pick or small screwdriver. Slide the wrist pin out, and remove the piston from the small end of the connecting rod. Be very careful not to drop anything into the cases during this step, and throughout the entire process.
Cleaning
With everything removed, you’ll need to clean any old gasket material and other residues off your sealing surfaces. This includes the base for the cylinder on the cases, top and bottom surfaces of the cylinder itself, and the bottom surface of the head that seals to the cylinder.
For large or difficult pieces of material, it is common to use a razor blade for removal. However, be gentle and careful not to put deep grooves or scratches on the surfaces. Also, don’t cut your finger open, or off.
![]()
Scrape old gasket material off carefully, being cautious of any grooves or scratches in sealing surfaces and personal injury.
![]()
Final cleaning commonly consists of using carb cleaner, or a similar chemical cleaner, and a rag to achieve completely clean and flat surfaces.
Cylinder Prep
Before you go and put that cylinder back in with your new piston, you’ll want to inspect it for signs of wear, and measure it to make sure it’s within spec (refer to your owner’s manual for proper specifications). If there is minimal glazing on the cylinder, no grooves are worn in, and it’s within spec, you should be ready to reinstall after a good honing. Always use a diamond tipped honing brush for resurfacing work. If you’re unsure about performing any cylinder prep work yourself, talk to your local dealer about cylinder shops, where any prep work required can be performed.
ProX pistons are available in multiple sizes to accommodate for cylinder wear, so be sure your bore measurements correlate with the size of piston you’re installing.
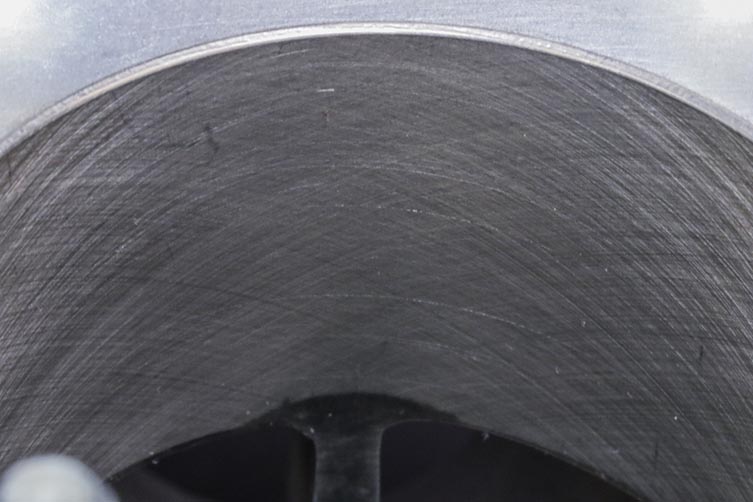
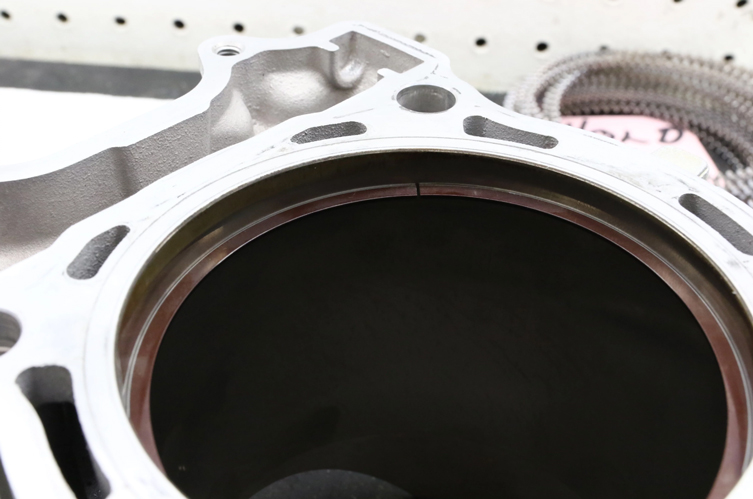
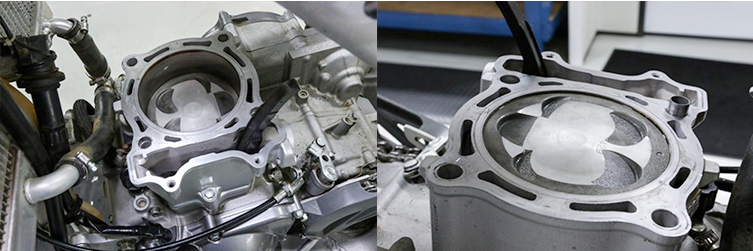
![]()
Make sure your cylinder is the correct bore size for your piston, and properly cleaned and honed, as pictured here.
![]()
Reassembly
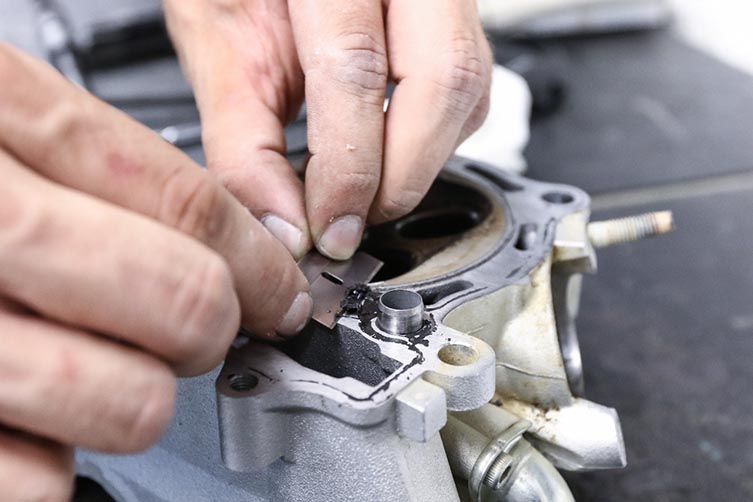
When you have your cylinder prepped and ready, now is a good time to double check your piston-to-wall clearance and ring end gap. For piston-to-wall, measure the size of your ProX piston using a micrometre only. Measure the piston on the skirt, 90 degrees from the wrist pin bore, at the point on the skirt that is 1/4 of height of the piston from the bottom. Refer to your manual for acceptable piston-to-wall clearance range. When measuring ring end gap, install the top ring and second ring (separately, and if applicable) approximately 1/4″ into the bore. Use a feeler gauge to be sure ring end gap is within the dimensions specified in your piston kit instructions. ProX rings are pre-gapped, but it is always good practice to double check.
![]()
While ProX rings are pre-gapped, it’s still a good idea to double check your ring end gap.
![]()
Install the rings in the proper order and location on your pistons. Refer to the instructions that come with ProX piston kits to be sure you are installing the rings in the correct fashion and location. After this, install one wire lock into your piston, being sure it is properly seated.
Click here for our tips on installing wire locks.
Use your finger to put a layer of motor oil on the cylinder wall. Next, put a layer of oil on the outside of your new piston (on the outside of the rings, on the ring belt, and on the skirts). You don’t want your new piston and rings breaking in under dry conditions. Use the normal motor oil you use in your 4-stroke.
![]()
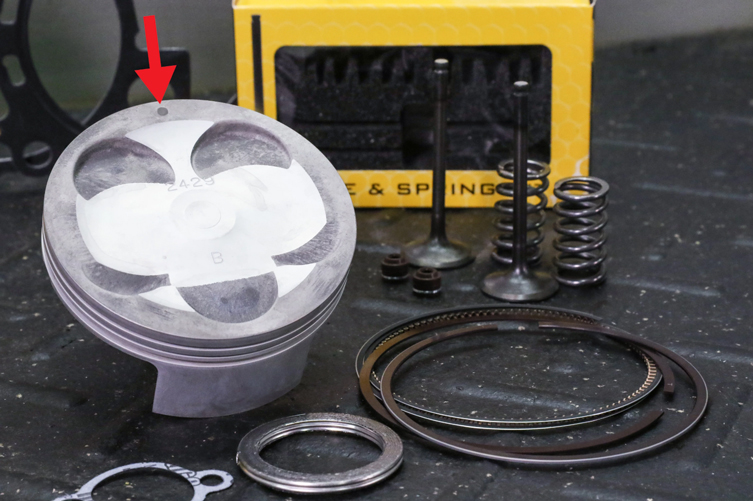
The arrow shows the marking on the piston crown that indicates that is the side of the piston that needs to face the exhaust.
![]()
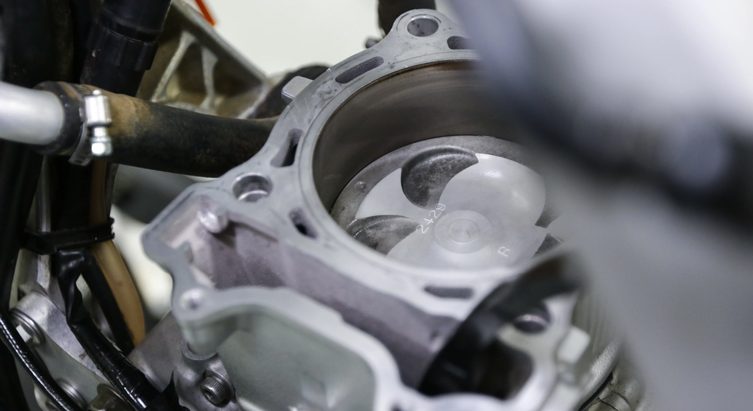
Piston installation can be done via more than one method, but in our case, we installed the piston in the cylinder before attaching it to the connecting rod. Either way, be sure your piston is facing the correct direction, meaning the exhaust valve reliefs line up with the exhaust side of the head. There will be markings on the crown of ProX pistons to indicate which side is the exhaust side. Also, make sure your rings remain in the proper location as you slide the piston into the cylinder.
![]()
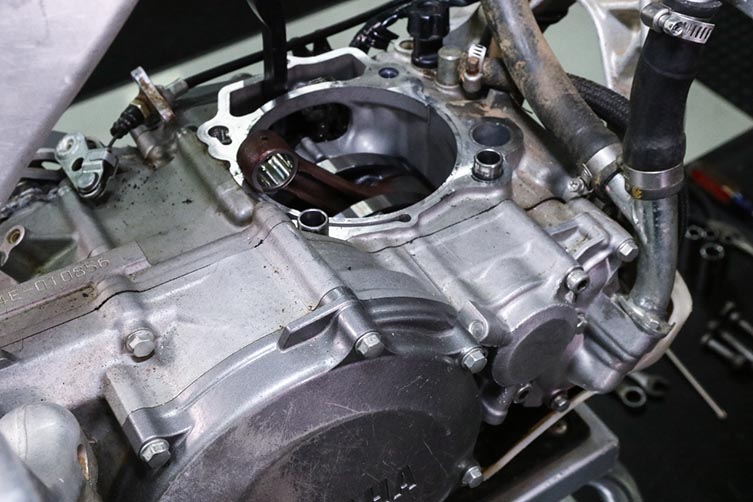
Before installing the new base gasket, piston and re-installing the cylinder, make sure the surface is clean and the crankcase is free of debris. While the top end is off, this could also be a good time to make sure your crankshaft is in spec.
![]()
Next, lay your new base gasket on the cases, lining it up properly. Install the piston (which should remain in the cylinder) onto the connecting rod by lining up the pin bore with the small end bore, and sliding your new wrist pin (put a layer of oil on this before installing) completely through until it stops against the one wire lock previously installed. With the piston secured to the connecting rod via the wrist pin, install your remaining wire lock, and make sure it is properly seated. You can now slide the cylinder all the way down to meet the cases. Note: Make sure you take any rags out of the cases before reassembling!
![]()
Our new ProX piston and freshened up cylinder successfully installed. Note the dot on the piston crown, indicating that is the exhaust side.
![]()
You’re now at the point in reassembly where you will install your rebuilt head (details in part 2 of this top end rebuild soon to come) with the proper head gasket, and re-install all the items previously removed. Be sure you are following all proper torque specs specified in your manual.
Head back for part 2 of the top end rebuild, where we’ll show you some great tips on assembling a four-stroke head with new valves and valve springs, re-installing camshaft(s) and timing chain, and checking and adjusting valve clearance.
Related Content
HOW-TO: BUILD A BULLETPROOF RACE BIKE

HOW-TO: MAINTAIN YOUR FOUR-STROKE
You might also like...

HIGHLIGHTS: 2026 TRANSMOTO 8-HOUR AT NARRABRI, POWERED BY KTM
Check out the highlights video from the 2026 Transmoto 8-Hour at Narrabri, NSW, powered by KTM.

2026 SMX WORLD CHAMPIONSHIP VIDEO PASS
The SMX Video Pass is back, and again providing live and on-demand access to all 31 rounds.

2026 ENDURO & CC MODELS: 7-BRAND PRICE COMPARO
A handy table of easy-to-compare prices for seven brands’ 2026 enduro and cross-country models.

HONDA CLAIMS EIGHTH AUSX TITLE
Dean Wilson sealed the deal for Honda with a dominant 2025 Australian Supercross season.
National Motorcycle Insurance
8 months ago
Ride Smart | Presented by National Motorcycle Insurance
Transmoto’s Simon Barratt covers some handy tips on how to protect your dirt bike, presented by National Motorcycle Insurance.
KTM
9 months ago
KTM DOMINATES 2025 AUSTRALIAN ENDURO CHAMPIONSHIP
The KTM DM31 Racing Team wrapped up four titles at the weekend’s AusEnduro season finale.

Boost Secures 2025 AUSX Naming Rights
The Australian Supercross Championship is set to launch into its biggest season yet.

TT Circuit Assen To Host 2027 MXoN
The 80th edition of the MXoN will see the legendary event return to Dutch soil in 2027.
Be the first to comment...