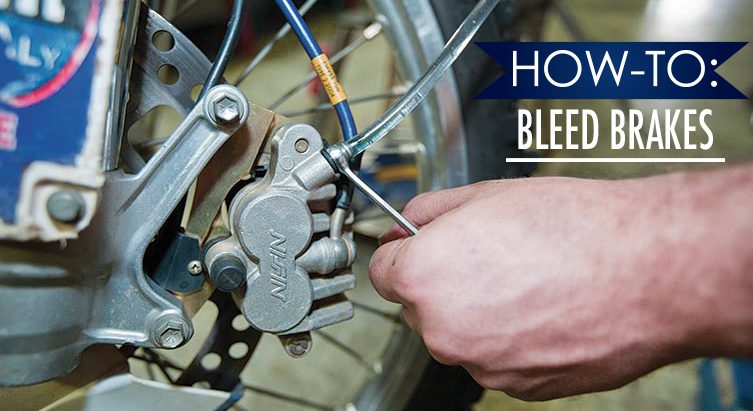
DIY How-To: Bleed Brakes
Compared to the time and expense of maintaining an engine, disc brakes are a magically simple system that requires very little love and attention to be kept in tip-top condition. Aside from replacing worn pads, the second most important task is to change the brake fluid every six to 12 months (or every time you boil the stuff ). The “hygroscopic” properties of brake fluid make it a magnet for moisture. And through time, heat and seal breakdown, air bubbles can form in the brakeline which decreases your stopping-power and causes an inconsistent feel at the lever. Here, the guys from Teknik Motorsport explain how to quickly replace and bleed the fluid, and restore your bike’s braking performance to how the factory originally intended.
TOOLS YOU’LL NEED
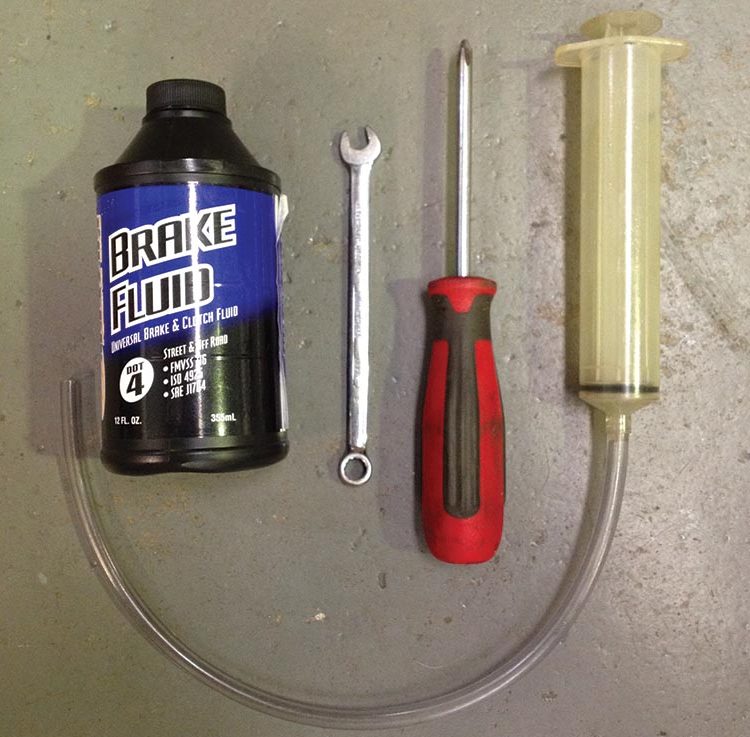
● Phillips-head screwdriver
● 8, 10 or 11mm spanner
● Syringe
● Hose
1. Screw Job
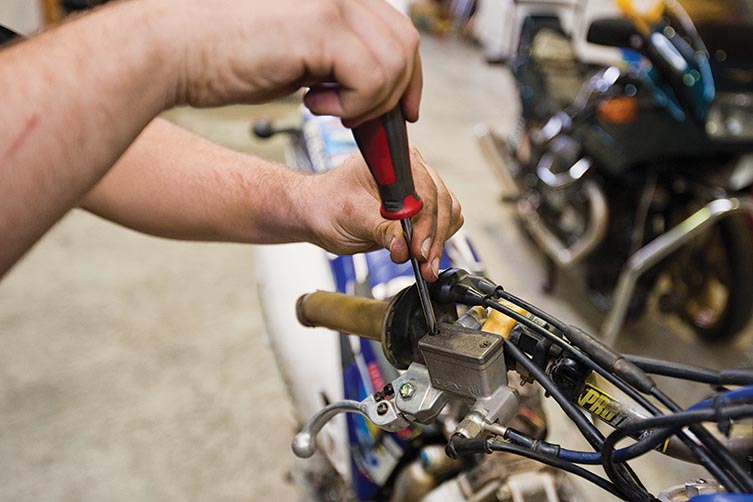
Starting with the front brake, ensure that the master cylinder and bleed nipple on the caliper are clean. Then, gently remove the master cylinder cap and rubber boot, being careful not to strip the phillips-head screws in the process.
2. All Bar The Needle
Using a large-volume syringe, suck out as much of the old fluid as possible from the master cylinder cavity. You’ll need to repeat this step a few times until your syringe is sucking nothing but air.
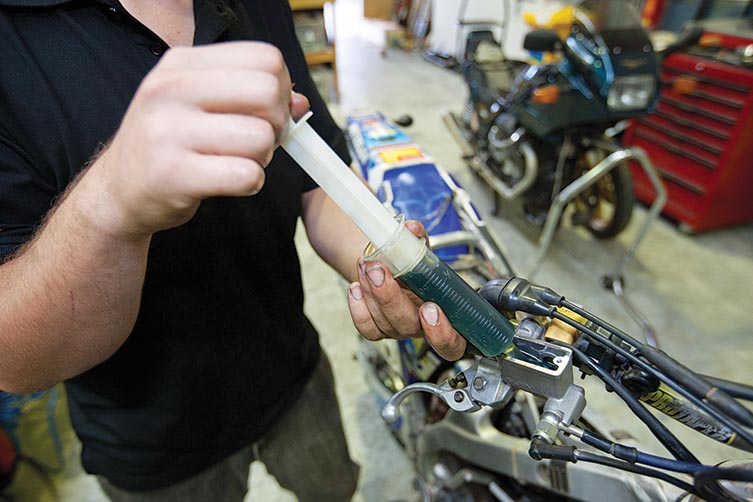
3. Sucking It Up
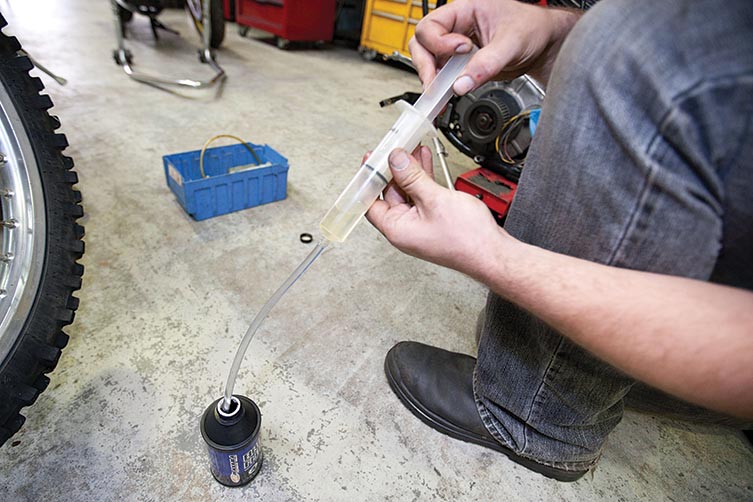
Install a piece of clear tube over the end of a second syringe, and then fill the syringe with fresh brake fluid. Once full, turn the syringe upside-down and gently push through every last air bubble (several flicks with your index finger will help dislodge smaller bubbles).
4. Slide It On
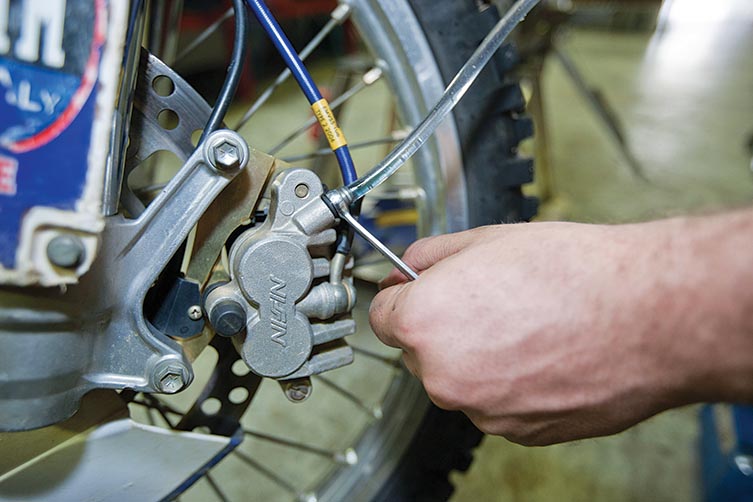
Place the appropriate ring spanner over the bleed nipple, and then slide the free end of the tube over it. It’s essential that you ensure no air bubbles are created between the nipple and the tube – otherwise you’ll defeat the purpose of bleeding your brakes.
5. Pumping It
Now, use the ring spanner to ‘crack’ the brake nipple, and slowly but firmly pump the contents of the syringe up through the brakeline until the fluid becomes clear and there are no more bubbles. To prevent any overflow as fresh brake fluid fills the master cylinder, you may need to repeat Step 2 several times.
6. Meeting The Level
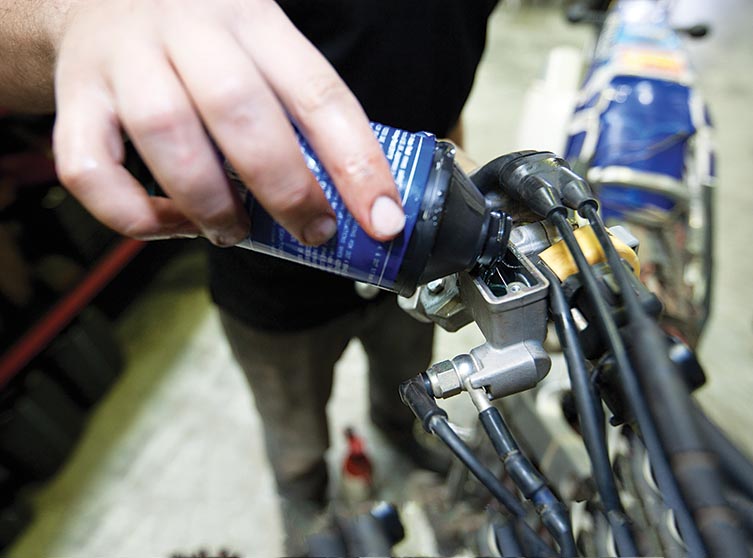
Before removing the syringe or tube, lock-off the brake nipple. Now give the brake lever 10 firm pumps and top the master cylinder up to the ‘max’ line. Once you’ve regained full pressure, clean the rubber boot and bolt everything together taking care not to over-tighten the screws. Then repeat this process for the rear brake.
Why Bottom Up?
The traditional method of bleeding brakes is to push fluid through the system from the top, using the lever as a pump, and by controlling the flow by opening and closing the nipple. Although that method may eventually work, the major flaw is that air bubbles – the very devil you’re trying to remove in the first place – like to travel upwards. By pumping fluid through the system from the bottom up, you will be much more effective in ridding your bike’s brake system of bubbles by pushing them in the direction they want to naturally travel.
Expert Tips – With Nick Dole
- Avoid using Dot 5 brake fluid. Although the stuff has a higher boiling point than Dot 4 fluid, it’s more corrosive and will eat away your brake’s seals.
- Spilt brake fluid can do nasty things to your skin and painted surfaces. Keep an old rag on hand at all times and always wear plastic gloves if you don’t want your future offspring to have four eyes.
- Your local pharmacy will stock baby feeding syringes that’ll do the job okay. But it’s the ones from vet clinics or farming shops you really want.
Related Content

🎥 HOW-TO: INSTALL GRIPS
HOW TO: FUNDAMENTAL MAINTENANCE
You might also like...

HIGHLIGHTS: 2026 TRANSMOTO 8-HOUR AT NARRABRI, POWERED BY KTM
Check out the highlights video from the 2026 Transmoto 8-Hour at Narrabri, NSW, powered by KTM.

2026 SMX WORLD CHAMPIONSHIP VIDEO PASS
The SMX Video Pass is back, and again providing live and on-demand access to all 31 rounds.

2026 ENDURO & CC MODELS: 7-BRAND PRICE COMPARO
A handy table of easy-to-compare prices for seven brands’ 2026 enduro and cross-country models.

HONDA CLAIMS EIGHTH AUSX TITLE
Dean Wilson sealed the deal for Honda with a dominant 2025 Australian Supercross season.
National Motorcycle Insurance
8 months ago
Ride Smart | Presented by National Motorcycle Insurance
Transmoto’s Simon Barratt covers some handy tips on how to protect your dirt bike, presented by National Motorcycle Insurance.
KTM
9 months ago
KTM DOMINATES 2025 AUSTRALIAN ENDURO CHAMPIONSHIP
The KTM DM31 Racing Team wrapped up four titles at the weekend’s AusEnduro season finale.

Boost Secures 2025 AUSX Naming Rights
The Australian Supercross Championship is set to launch into its biggest season yet.

TT Circuit Assen To Host 2027 MXoN
The 80th edition of the MXoN will see the legendary event return to Dutch soil in 2027.
Be the first to comment...