DIY: Brake Pad Replacement
Going fast on a bike is the ultimate thrill, but if you’re lacking in the braking
department, it can turn into a painful nightmare. We’ll show you how to check and replace worn pads, before that date with destiny!
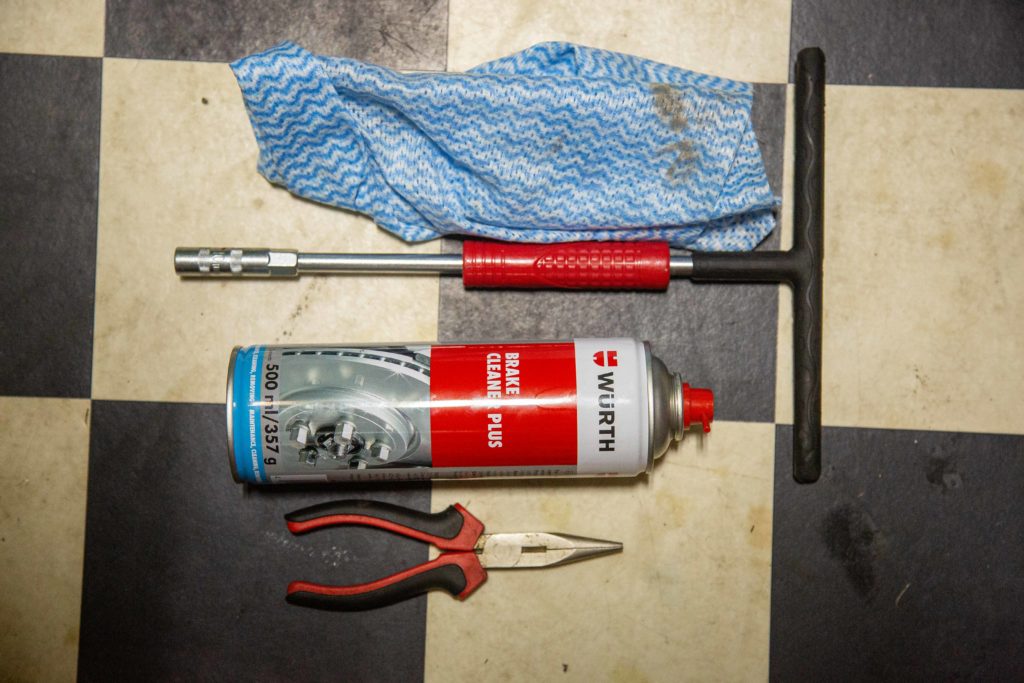
TOOLS YOU’LL NEED:
● 10mm T-bar
● Brake Cleaner
● Pliers
● Clean rag
1. SYSTEM CHECK
Poor brake performance isn’t just down to worn pads. It can be a variety of things – from leaking caliper seals, bulging brakelines or poorly maintained lever pivots. Looking down where the disc runs through the calliper to see how much ‘meat’ there is on the pads will give you an idea of their condition. If you never let them get less than 1-2mm thick, then you’ll never wreck a disc surface. But remember, pads are easily contaminated by a range of substances and that leaky fork seal is always the main culprit. Try spraying brake cleaner on the disc (both sides) and squirt the pads in the caliper. If you still go when you should slow, then the pads are cactus and are gonna have to come out.
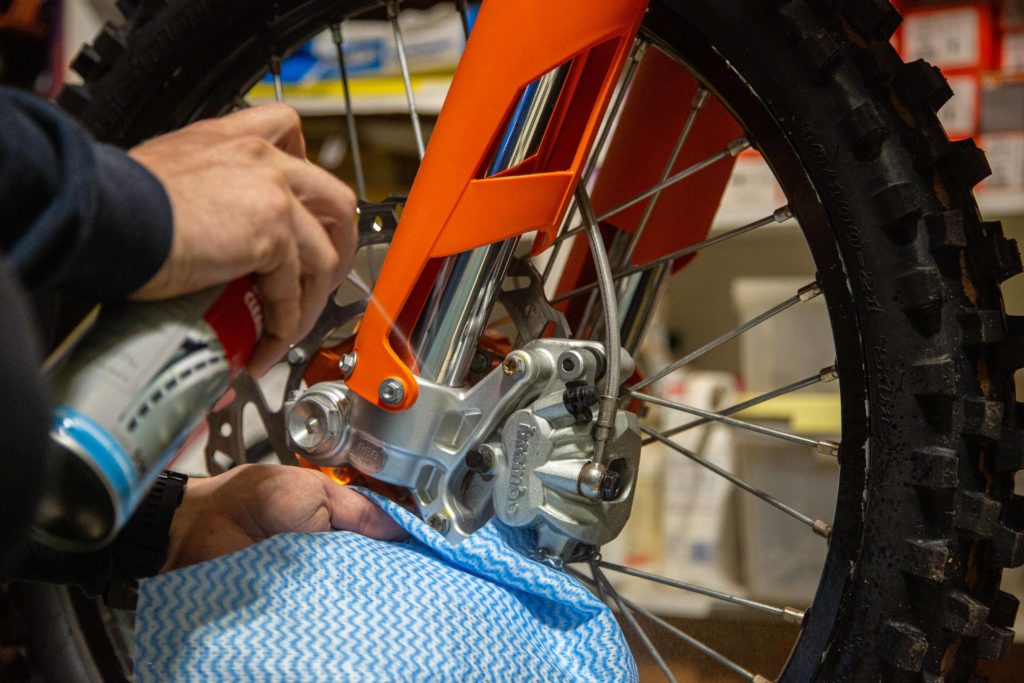
2. MAKE LIFE EASIER
A thorough clean around the caliper is a good move before you worry the socket set. Since you’re replacing the pads, don’t be shy on getting cleaning chemical on their surfaces and give the area a proper wash. Not all makes of calipers are the same, but the principle is – hydraulic fluid pushes the pistons onto one of the pads while the other pad gets pulled towards the disc, the pair working in a pincer movement to slow the machine. Before the caliper comes off, it’s a great idea to ‘crack’ the pad retaining pin. This can often be found under a rubber grommet or slotted cap. Removing this will give you access to the pad pin. Loosening it a couple of turns now will save you the added hassle of trying to hold it and crack the pin when it’s off the bike.

3. CALIPER COME-OFF
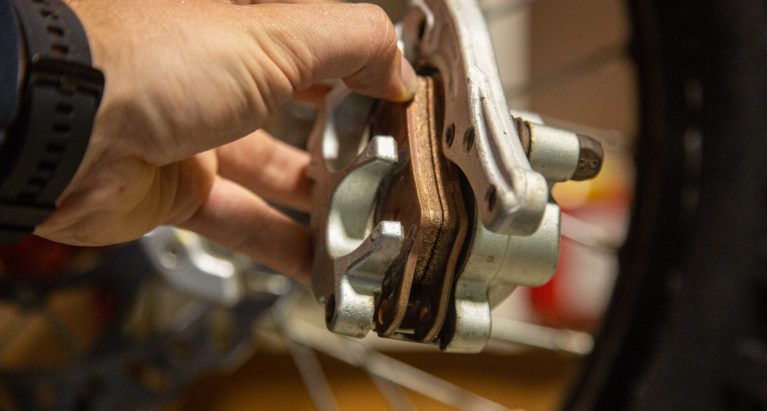
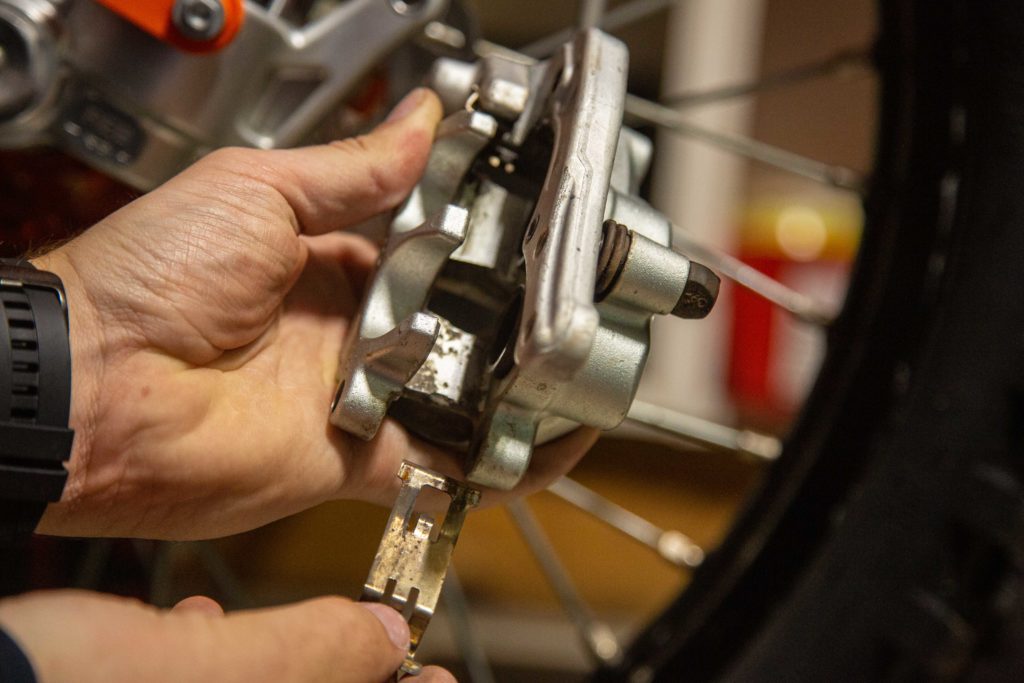
Now you can remove the caliper. It’ll be held on by two bolts and you’ll need to fully remove these. If the caliper has a spacer bracket (as part of an oversized disc kit, for example), remove the caliper from the bracket rather than the bracket from the fork leg. It’s not best practice to leave the calliper
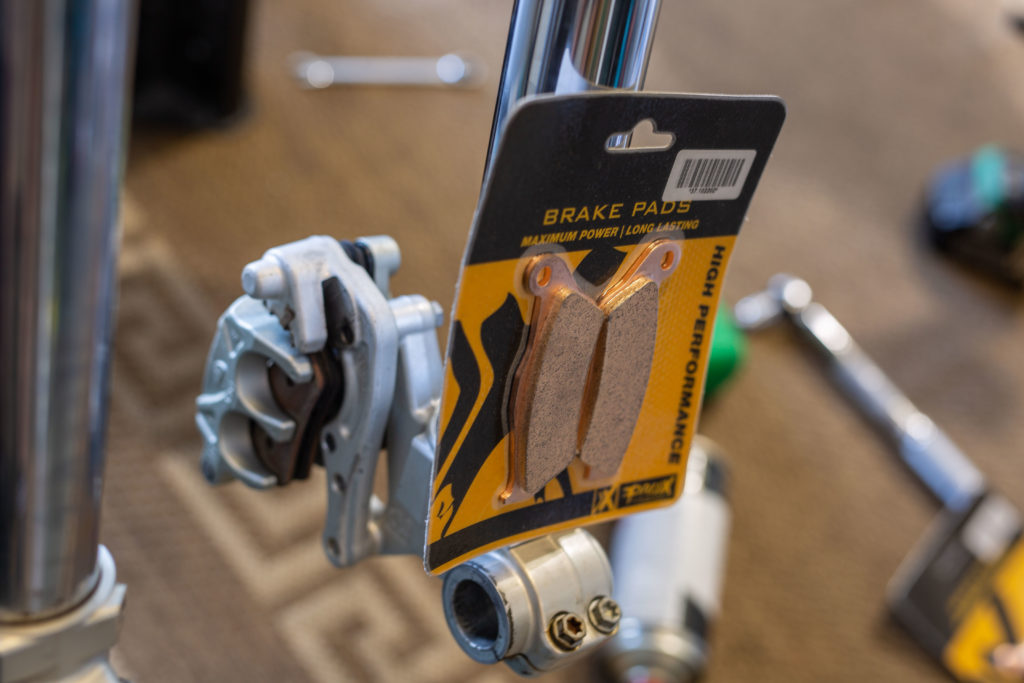
swinging in the breeze on the end of the hydraulic brakeline for too long, and a bungee cord, or stiff wire, make a great temporary holder. Now unscrew the pad retaining pin and take note of how the pads and spring plates sit. Remove these items and check the pads against the new items for overall size and hole locations.
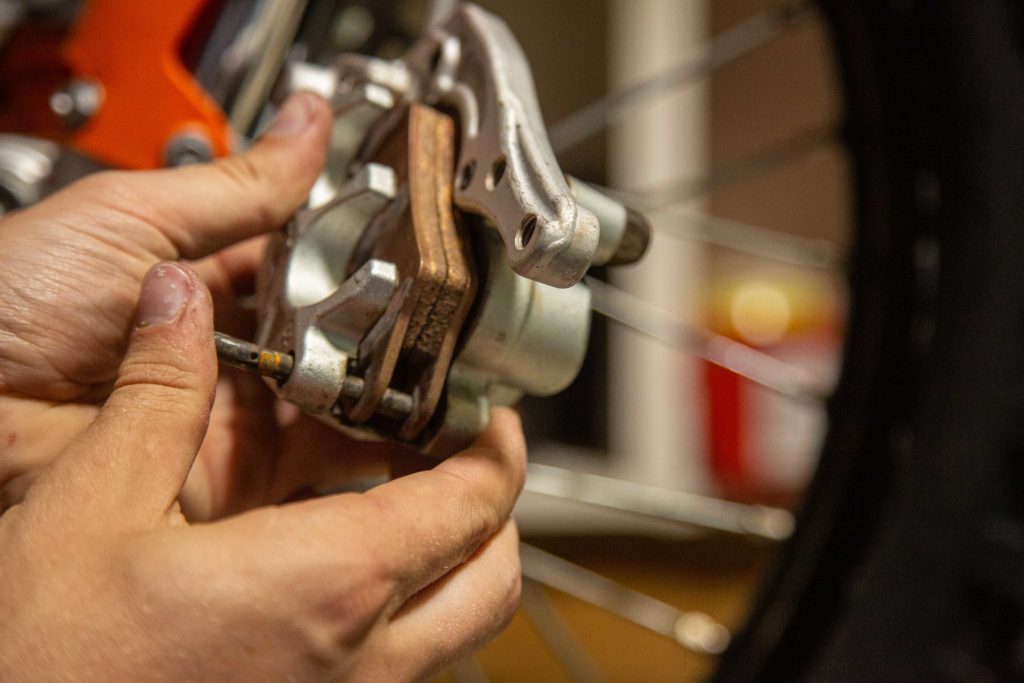
4. CLEAN AS, BRO
As pad change is the only time you’ll ever look at your caliper closely, take the opportunity to check on its condition. Using a spray brake cleaner and old toothbrush, clean around the pistons so you can clearly see their condition – major scores will lead to premature seal wear. Under no circumstances, squeeze the front brake lever while the caliper is off the disc as this forces the pistons out of their bores and can leak fluid or damage seals on the way back in.

5. PAD IT OUT
With a clean caliper in hand, place any spring plates into their recesses before fitting the new pads and refitting the retaining pin hand-tight.
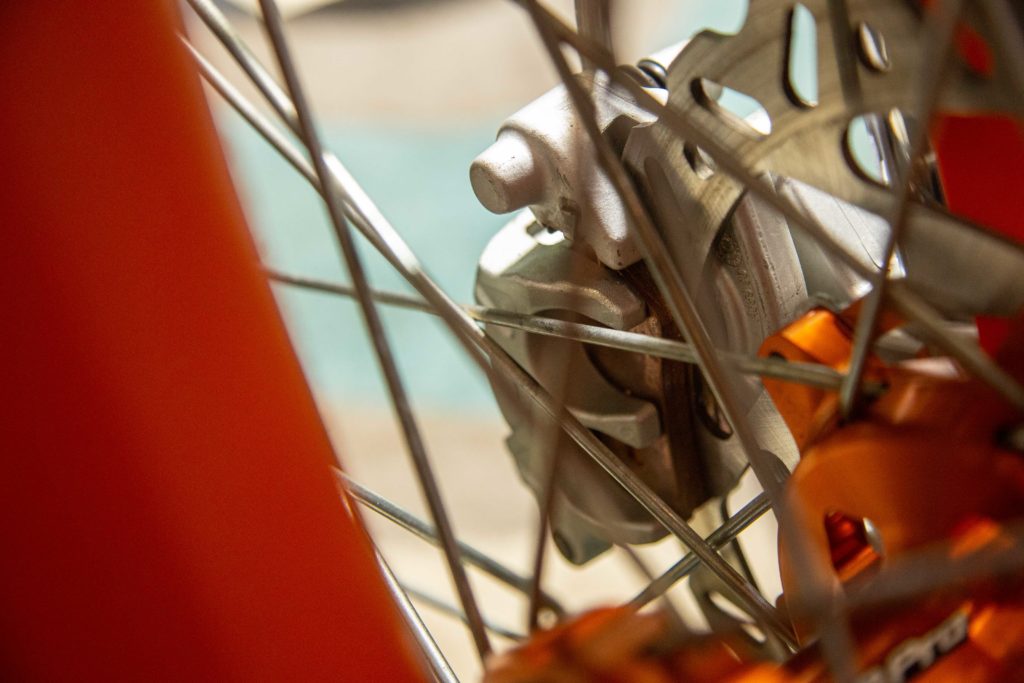
With the extra thickness of the new pads, it’s likely you’ll have to make a gap for the disc to fit. Do this by placing the pads tightly together, using adjustable pliers to squeeze across the caliper body and pads, thus avoiding contact with the braking surface. Then prep both sides of the disc with brake cleaner and wipe with a clean cloth. Place the caliper over the disc and slide on, using a clean, blunt blade if you need to prise the pads apart.

6. BOLT, CHECK & PLAY
Refit the caliper bolts and torque to spec. Then tighten the retaining
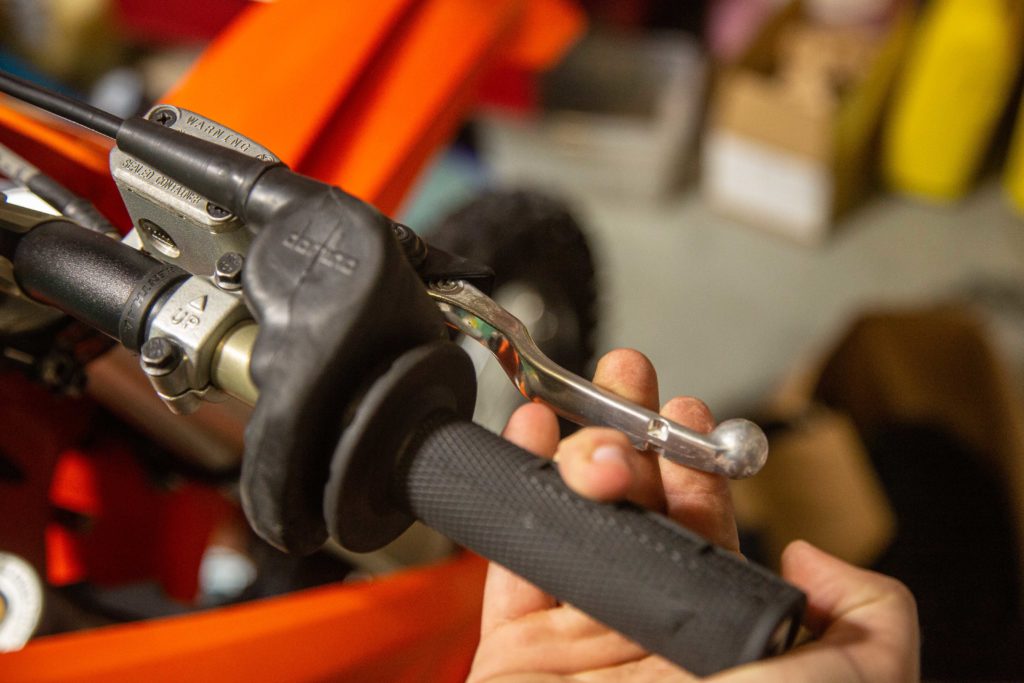
pin and replace its cover. Check for pressure at the lever by pumping it until it firms to its normal feel. As a final check, take a look at the fluid level in the master cylinder’s sight-glass and top-up if necessary with fresh, correct-spec fluid. With no leaks, firm lever and half-full sight glass, you’re ready to rock. And stop! With practice, changing your own pads will take less than five minutes. Why go to a mechanic for that?
Pro Tips With Teknik Motorsport
Nick Clemmett: “As brake pads are a cheap and essential item for your bike, there’s no excuse not to have a spare pair in your shed. Having said that, if you are caught out with contaminated pads before a shops-shut ride, you can soak them in brake cleaner to get them to grip easier against the face of the disc. This isn’t foolproof or recommended, though, as you won’t know how successful you’ve been until you come out of the coma! Take the glaze off new pads by rubbing them on an unpainted concrete floor, just enough to ‘rough’ them. The pin that holds the pads in also becomes the rod that the pads slide back and forth on. It’s a good idea to wire-wool the pin at every change to keep dirt and corrosion at bay. Lightly grease this pin to keep the pads from sticking and rubbing on the disc. There’s no need to Loctite the caliper’s bolts; they’re easily checked before each ride. If you race, lockwire’s the go here.”
PROX RACING PARTS FEATURED
- ProX Racing Brake Pads (front and rear)
- ProX Racing Brake Discs (front and rear)
WHERE TO PURCHASE PARTS
You can get sorted with ProX Racing parts through the Australian distributor, BBI Imports, by clicking here.
You might also like...

2026 SMX WORLD CHAMPIONSHIP VIDEO PASS
The SMX Video Pass is back, and again providing live and on-demand access to all 31 rounds.

2026 ENDURO & CC MODELS: 7-BRAND PRICE COMPARO
A handy table of easy-to-compare prices for seven brands’ 2026 enduro and cross-country models.

HONDA CLAIMS EIGHTH AUSX TITLE
Dean Wilson sealed the deal for Honda with a dominant 2025 Australian Supercross season.
National Motorcycle Insurance
5 months ago
Ride Smart | Presented by National Motorcycle Insurance
Transmoto’s Simon Barratt covers some handy tips on how to protect your dirt bike, presented by National Motorcycle Insurance.
KTM
7 months ago
KTM DOMINATES 2025 AUSTRALIAN ENDURO CHAMPIONSHIP
The KTM DM31 Racing Team wrapped up four titles at the weekend’s AusEnduro season finale.

Boost Secures 2025 AUSX Naming Rights
The Australian Supercross Championship is set to launch into its biggest season yet.

TT Circuit Assen To Host 2027 MXoN
The 80th edition of the MXoN will see the legendary event return to Dutch soil in 2027.

First Look: Aus MXGP Battleground
The 2025 MXGP of Australia track design has been revealed.
Be the first to comment...