How To: Braking & Corner Entry
Corners are crucial for maintaining speed; they can determine winning or losing a race, becoming the laughing stock in your riding group or flying past your mates. Either way, if you want to ride smooth and fast, you will have to read this article first. Aussie off-road icon, Damian Smith, explains how to make up time under brakes, and why corner entry techniques are much more important than most trailriders and racers realise.
This content was originally published in issue #47 of Transmoto Dirt Bike Magazine in Nov-Dec, 2014.

Why is washing off speed and setting up for a corner such a critical element of riding a dirt bike? Because the way you approach and get into a turn dictates the speed you can carry through it, and your ability to flow smoothly around any track or trail. In a world obsessed with horsepower and hurling roost, however, braking and corner entry seldom gets much attention. Despite the fact that massive gains can be made under brakes, very few riders actually practice these techniques. In fact, few riders put much thought into it at all. According to Damian Smith, one of Australia’s most decorated enduro pilots, trailriders and inexperienced racers tend to underestimate how much time can be made up on the way into turns, so the vastly experienced Team Husqvarna Enduro rider suggested it was time he addressed the issue. Damo takes us through the key aspects of control use and body positioning, before shedding light on the braking and corner entry techniques required for different types of terrain.
Over to you, Damian…
WASHING OFF SPEED…
Braking Philosophy
Many riders think braking is all about getting on the picks as late and hard as possible. And while that’s true to some extent, they should view braking more as a means to an end; their braking should be planned around where they want to be for the corner entry. On some types of corners, that might mean braking late and right into the apex. And for others, braking earlier may actually work better, as it allows you to set the bike up for the corner and carry more speed through it. Remember that you’ll lose more time (and probably skin) by braking too late and overshooting a corner, than by braking a little early for it.

Controls use
The optimum pressure to apply to your front brake lever and rear brake pedal will depend on the traction on offer, the power of your brakes, the quality of your tyres, and your body position on the bike. This is where practising your braking on different surfaces really pays off. It’ll give you a better feel for the point at which each wheel wants to lock. The objective is to feather both controls just short of this point for maximum braking effect. I run two fingers on the front brake lever, but many guys use just one. As a lot of weight is thrown onto the front wheel when braking, people underestimate how hard they can apply the front brake before it’ll lock. Dirt bikes aren’t like road bikes, where 95% of braking is done with the front, but a dirt bike’s front brake is still the majority player in the stopping equation. That said, a dirt bike’s rear brake plays a much more important role in settling the bike’s rear-end over bumpy terrain, and should not be locked up unless you’re intentionally performing a brake slide.
Vision
We’re all taught to look ahead on corner exits to choose a line with fewest acceleration bumps. But with braking, many riders simply charge in without looking ahead and then deal with problems when they get there. Bad idea! The benefit you have when braking is that you’re usually standing up, which allows you to look further ahead and select the optimal line with the fewest bumps and obstacles that threaten to unsettle the bike on the way into a corner.
Body Position
The biggest mistake I see most riders make is trying to sit down too much when braking. It’s very difficult to apply the brakes effectively while seated, especially in rough terrain. As your arms and legs offer additional suspension, stand up as much as you can. Standing in the attack position (crouching, rather than standing tall) will also give you better feel for both brakes, and allow you to move your weight back on the bike to counteract the braking forces. Standing will also help you position the bike exactly where you want it for the corner entry. Brace yourself by gripping the bike with your legs, but make sure you don’t fully extend your arms so you can still absorb any unexpected hits.
Using The Terrain
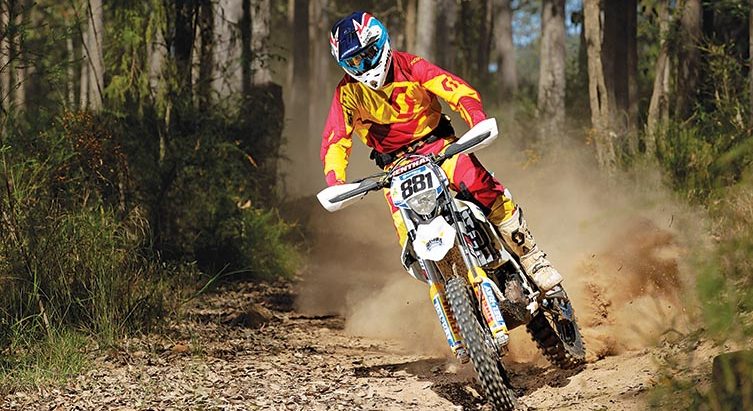
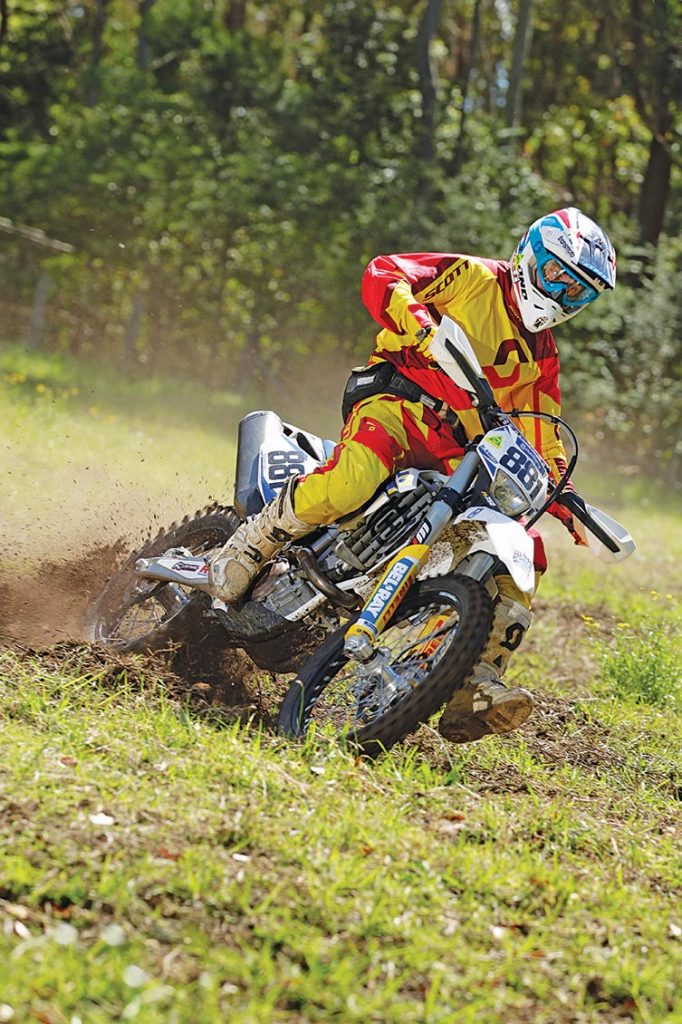
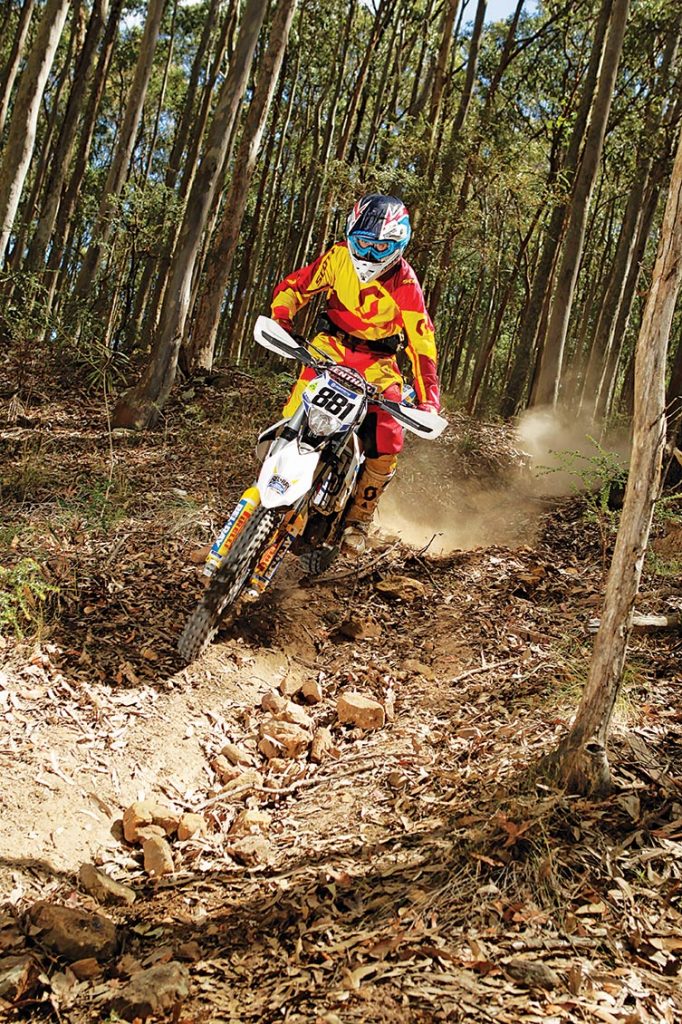
You need to brake at the right time and the right spot, but the terrain will determine when and where you brake. If it’s a loamy grasstack with heaps of traction, you can afford to brake later and further into the turn, even while the bike is cranked over. The grasstrack shot on this page is a perfect example, where I’ve already sat down as I’m nearing the corner’s apex. I’m still able to use my rear brake at this point because there’s so much traction. And because I’ve only got my toe on the tip of the brake pedal (the arch of my foot is off the peg), you can see how I’ve braced my leg against the bike to stabilise my foot. I’ve also taken advantage of the slight rise heading into this turn to brake later than I usually would and still confidently wash speed off . In situations where the terrain is off-camber or slippery hardpack, you’ll need to get on the anchors a little earlier. Or, as demonstrated in the other shot on this page, make use of berm to help wash off speed while still holding a good line into the turn. Note how I’ve stayed at the base of this berm where there’s good traction, rather than up high in the soft stuff. You can see that I’m still braking hard here by how much the fork’s compressed. If I’d tried to brake this late on the hardpack inside line, the front wheel would’ve washed for sure.
RUT TECHNIQUES…
Braking & Set-up
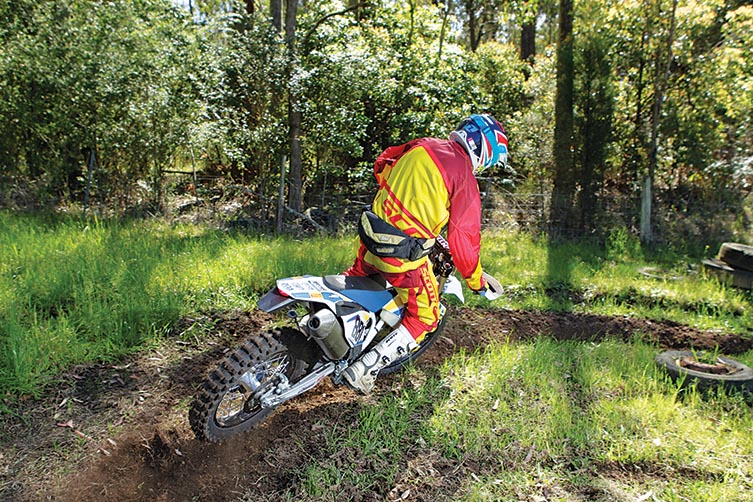
If you’re an enduro rider, you’ll encounter a lot of ruts like this one, which means you ought to be practising the technique. It’ll really pay dividends, as railing a rut sweetly is one of the best-feeling things you can do on a bike. Tight ruts, like the one pictured on this page, are fairly common on singletrails or grasstrack special tests – especially at the finish of a loop, where riders are funnelled into a chute. As this rut is a right-hander, I’m standing up while braking all the way into the middle of the rut. Before that, there’s very little wall to hold the wheels in place. And that’s why I’ve keep the bike fairly upright on the entry and, while still standing, applied maximum braking while I’ve got good feel for both front and rear brake modulation. With heaps of traction on offer, I’ve been able to brake really late and still not lock up the wheels. I see way too many guys lock up the rear heading into tight ruts like this, which costs them a lot of time and energy. The key is to stay smooth and keep both wheels tracking. You need to be confident that the front wheel is securely in the rut – and that the rear wheel is tracking nicely – before getting off the brakes and cranking the bike over.
Rut Entry
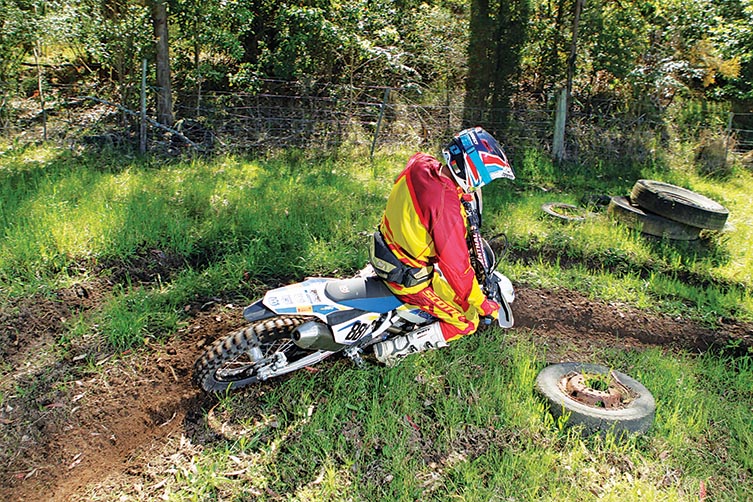
The most difficult technique for many riders with ruts is making the transition from the standing to seated position, which needs to happen in one smooth and fluid motion. In a right-hander, the transition to the seated position is harder because your inside leg has to perform rear brake duties as well as weighting the front wheel. Be mindful of this and make allowances by braking a fraction earlier for right-handers, and using the gearbox to create more engine braking. In the second shot on this page, the rear wheel is now locked into the rut, so I’ve started to tip the bike in. I’ve just got off the rear brake and I’m about to get my inside leg forward to load the front-end. In tighter ruts like this – especially if they turn through 180 degrees – I also like to trail the front brake. This compresses the fork a bit, helps the bike steer, and gives the front tyre more bite and traction. It’s an especially good technique to use in right-handers where you can’t access the rear brake. You can come in faster and hold the front brake right through the rut, and accelerate against it.
ROCKY TERRAIN…
Brake Modulation
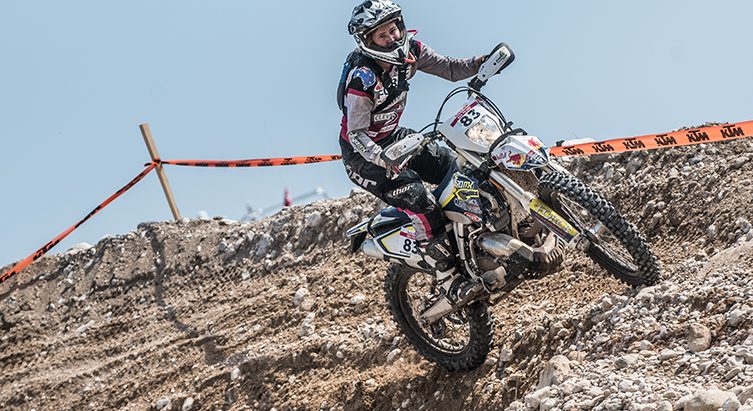
When you’re dealing with rough terrain and unpredictable traction in a braking zone (such as a bunch of loose rocks covered by leaves, as pictured here), you should use the same fundamental braking technique, but avoid heavy application of the front brake, and put much more emphasis on the rear brake. The benefit of not braking as heavily with the front over rougher terrain is that is your fork sits up in its stroke and absorbs the hits better without unsettling the bike. In these situations – especially on downhills – standing up to brake is critical as it’ll help you see further ahead to choose the best line earlier, and then soak up the bumps better when you get there. When standing, the bike can move around more underneath you, and you can react more quickly to a rock kicking a wheel out to either side. In this shot, you can see there’s a hump across the track before I got into the rocks, so I did my heavy braking leading up to that. This then allowed me to coast a bit and ‘float’ over the following section with the loose rocks, leaning back on the bike a little more than usual. I’m still on the brakes at this point, but nowhere near as hard because there’s a risk of locking a wheel. And if I locked the front on a downhill like this, I’d be on my head before I knew what happened.
Line Selection
On a singletrack downhill section like this, loose rocks are usually going to gravitate toward the bottom of the ‘trough’. I noticed this from further back up the track, which is why I did much of my braking 10 metres prior. Notice also how I’ve cut from the left side of the track to the right (my left and right, that is) to avoid running straight through the loose rocks. The smoother the ground your wheels come into contact with, the more effective your braking will be … and the less chance there is that you’ll crash. Avoiding the rocks is commonsense, but you’d be amazed how many guys I see crisscrossing a track like this at the wrong spot and coming unstuck by braking too hard on loose rocks – mainly because they didn’t plan their line of attack further back up the hill.

About The Rider
Since the early 1990s, Damian “Damo” Smith has been a front-runner in the Australian off-road scene, and is widely acknowledged as one of our most decorated off-road pilots. The jovial Jilliby boy is a vet of 16 ISDEs (where he’s claimed nine gold medals) and a season in Europe racing the Enduro World Championship. On home soil, he’s racked up nine Australian 4-Day Enduro titles and has just clinched his fourth consecutive Vets- class AORC title. Damo may have just turned 40 and announced his retirement from full- time AORC racing, but he’s still keen to give back to the sport that’s defined his life. And that’s how the subject of braking and corner entry techniques came up. Damo reckons many modern-day riders could improve their own and lap times simply by re-tuning the way they brake and approach corners, and he was only too happy to impart some words of wisdom on the topic.
Related Content
HOW TO: SURVIVE A ‘HARD ENDURO’
You might also like...
HIGHLIGHTS: 2026 TRANSMOTO 8-HOUR AT NARRABRI, POWERED BY KTM
Check out the highlights video from the 2026 Transmoto 8-Hour at Narrabri, NSW, powered by KTM.

2026 SMX WORLD CHAMPIONSHIP VIDEO PASS
The SMX Video Pass is back, and again providing live and on-demand access to all 31 rounds.

2026 ENDURO & CC MODELS: 7-BRAND PRICE COMPARO
A handy table of easy-to-compare prices for seven brands’ 2026 enduro and cross-country models.

HONDA CLAIMS EIGHTH AUSX TITLE
Dean Wilson sealed the deal for Honda with a dominant 2025 Australian Supercross season.
National Motorcycle Insurance
8 months ago
Ride Smart | Presented by National Motorcycle Insurance
Transmoto’s Simon Barratt covers some handy tips on how to protect your dirt bike, presented by National Motorcycle Insurance.
KTM
10 months ago
KTM DOMINATES 2025 AUSTRALIAN ENDURO CHAMPIONSHIP
The KTM DM31 Racing Team wrapped up four titles at the weekend’s AusEnduro season finale.

Boost Secures 2025 AUSX Naming Rights
The Australian Supercross Championship is set to launch into its biggest season yet.

TT Circuit Assen To Host 2027 MXoN
The 80th edition of the MXoN will see the legendary event return to Dutch soil in 2027.
Be the first to comment...