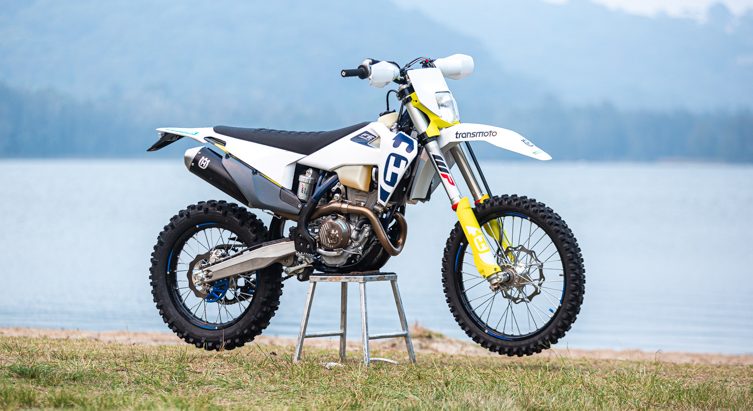
2020 FE350 Mods: What to Fit & Why
When the crew from Husqvarna Motorcycles says they’re happy to flow you a long-term project bike, how’s a bloke go about choosing from the seven models in the brand’s new-generation enduro range? Easy: take your favourite 2019 model, the FE350, and go again. That’s how!
In actual fact, there was a bit more to the thought process than that. Basically, I figured that getting an FE350 project bike in back-to-back years would be the perfect way to properly understand where the new-generation 2020 bike had changed and/or improved, and by how much. On paper, the new FE350 comes with sweeping changes to chassis, suspension and bodywork, and a bunch of small but significant refinements to its powerplant, mapping and traction control. But how do those changes translate into seat-of-the-pants feel when riding the thing? And are there any changes to fasteners and/or accessibility for maintenance? This 2020 FE350 would surely shed light on those questions.

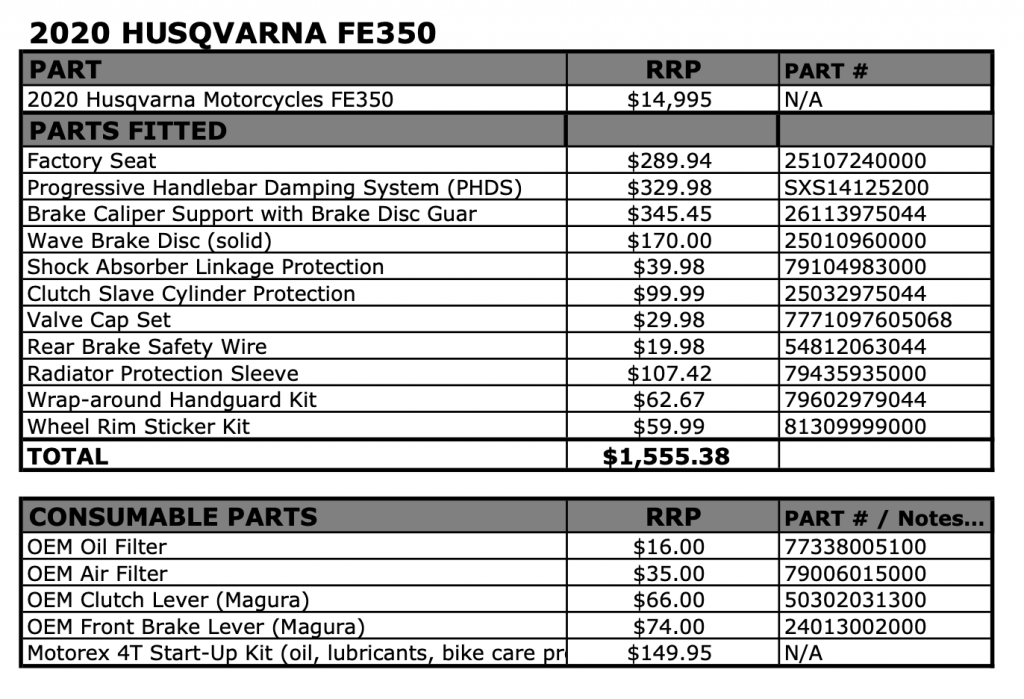
Okay, then how does a bloke go about choosing accessory parts for this 2020 FE350? Well, Husqvarna Motorcycles made that decision easy: by insisting that we only fit parts from the Husqvarna Accessories catalogue. It was a condition of us getting the bike. Which was fine by me because, when you think about it, the manufacturer gets a decent head-start on aftermarket parts guys when it comes to developing accessories – meaning Husky’s parts stand every chance of being the best part for the job. Husqvarna gave us a $1500 budget to spend on parts and accessories, and a Motorex 4T Start-Up Kit to make sure they honoured their worldwide association with the Swiss oil brand.
So, all that as left to do was sit down with a bottle of 12-year-old single malt whisky, pore over the countless options staring back at me from Husky’s Accessories catalogue, and figure out how to best spend that 1.5 large.
Here’s what I decided on, and why…
PARTS ADDED…
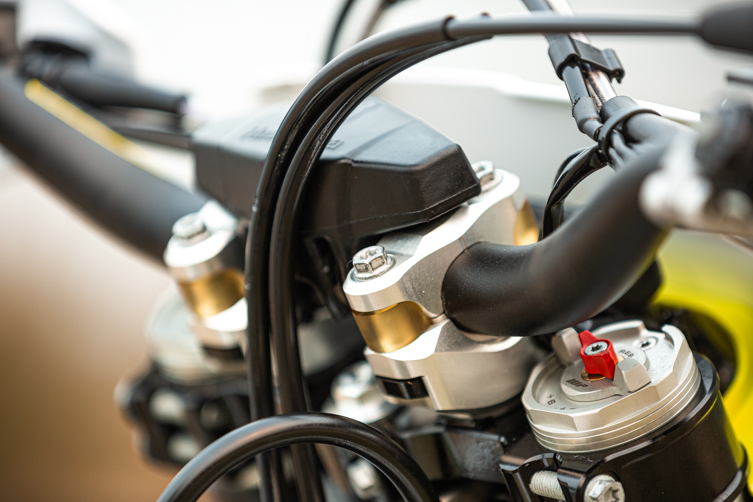
DAMPED BAR MOUNTS ($330)
Once you’ve run a set of the PHDS (Progressive Handlebar Damping System) bar mounts, you’ll want to fit a set on every bike you own because they offer all the benefits of rubber-mounted bars, but none of the disadvantages. As the PHDS’s lower mounts are hard-mounted to the triple clamp, they give you precise steering, but don’t twist like rubber-mounted bars in a crash. And yet the elastomer-damped upper bar mount helps reduce the vibration and shocks transferred to your hands, which genuinely reduces rider fatigue. The kit comes with all its own mounting hardware, plus 10mm bar raisers (which tall riders may want to fit), while optional soft and hard elastomer inserts are also available. The PHDS hardware is a little heavier than the standard bar mounts (and you do need to put a 5-7mm spacer under your instrument’s mounting points if you want to use the forward hole on your upper triple clamp). But they are compromises I’ll make any day of the week.
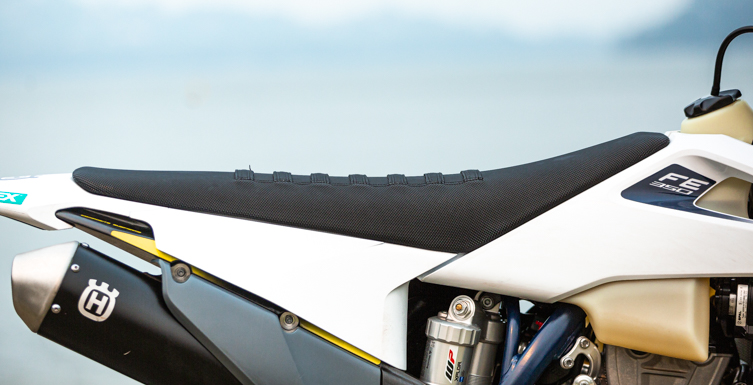
FACTORY SEAT ($290)
When I first sampled Husky’s 2020 models at the international launch in Finland, I wasn’t a fan of their move away from the diamond-pattern seat cover to a much slicker one. And that view hasn’t changed. When you get tired and don’t stand where you probably ought to, the slick 2020 seat doesn’t offer much resistance to slipping backwards. So I fitted a Husky Accessories Factory Seat, which comes with the super-grippy diamond-textured seat cover and a series of ribs to give your arse extra grip. With a little extra foam (mainly around the seat centre/pocket), it’s a little taller and more comfortable than the standard perch, but retains the lower height (by about 20mm) where it meets the rear guard – a change generated by the new linkage for 2020, and designed for extreme terrain. And who doesn’t like a black seat? In my mind, black seats will always be synonymous with factory bikes. Aesthetically, it looks way better than the blue perch.
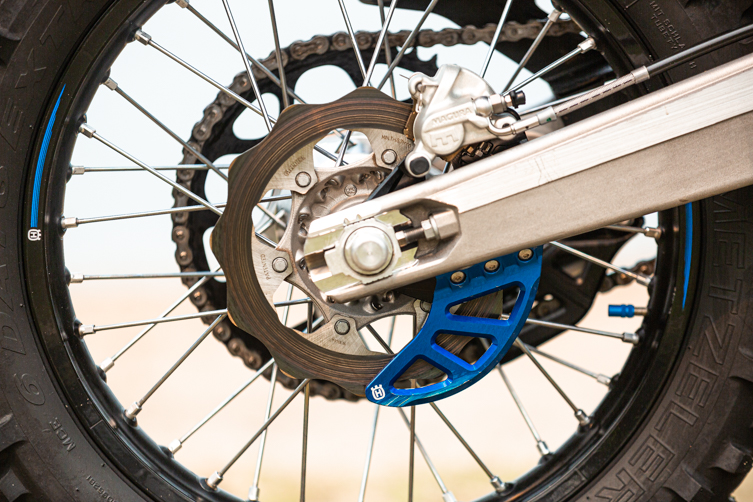
REAR BRAKE – DISC GUARD WITH CALLIPER SUPPORT ($345)
If you tend to ride a fair bit of technical terrain or deep ruts, then you’ve probably bent a rear brake disc or three. Fitting a disc guard (or ‘shark fin’) is a cost-effective way to minimise the risk of a rock bending or busting your rear disc. This alloy Brake Disc Guard from Husqvarna Accessories is beautifully made, super-strong, and comes with its own billet calliper carrier. And one look at the abuse the guard cops is enough to prove it has prevented at least one destroyed disc (which, in itself, costs the best part of $200).
REAR BRAKE – SOLID DISC ($170)
When it comes to a dirt bike’s rear brake, 95% of riders will tell you they’d like more feel and modulation from the thing, not more power. That’s largely why Husqvarna lengthened their rear brake pedal by 10mm back in 2017; to generate better feel and prevent you from inadvertently locking the rear wheel. I took things a step further on the 2020 FE350’s Magura braking system by fitting a Husqvarna Accessories solid wave rear brake disc. In addition to giving me noticeably more feel, the solid disc also reduces brake pad wear, especially in muddy conditions.
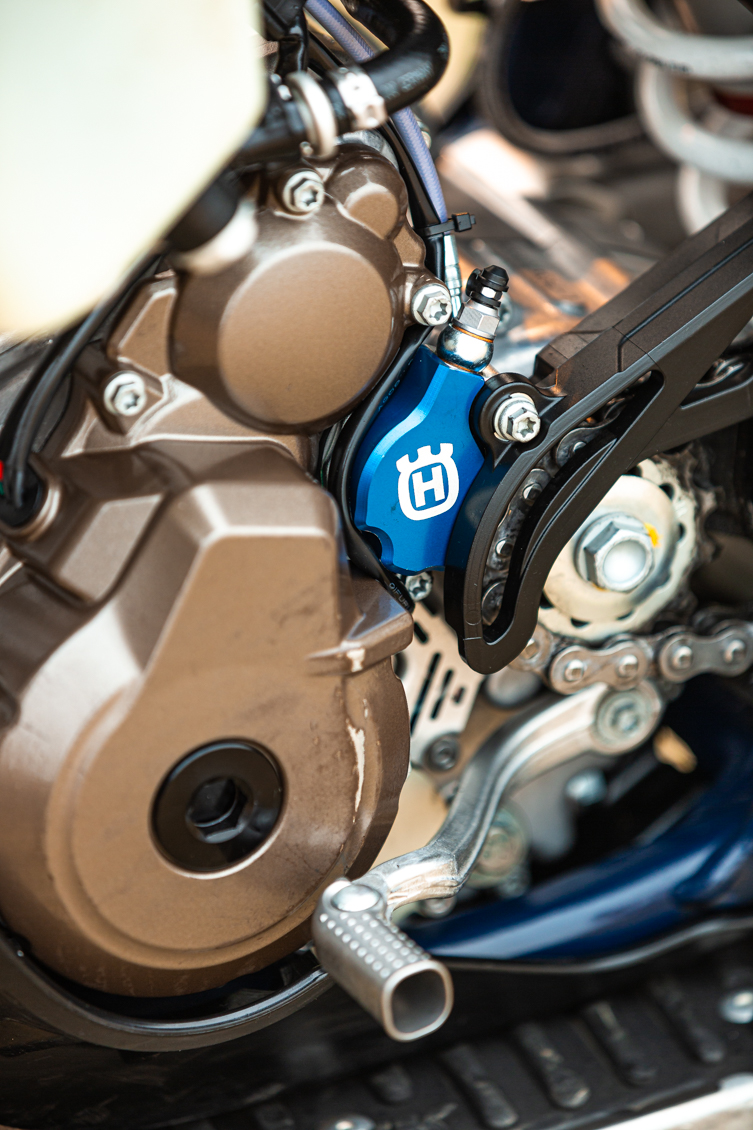
CLUTCH SLAVE CYLINDER PROTECTOR ($100)
If your chain has ever thrown a rock through your clutch’s slave cylinder and called a premature end to a day’s riding, then you’ll understand that $100 is cheap insurance. This billet blue ‘case saver’ bolts quickly and easily in place in front of the countershaft sprocket. It comes with two mounting bolts, and an entirely new upper chain slider, which is modified where it meets the countershaft sprocket to accommodate the case saver.
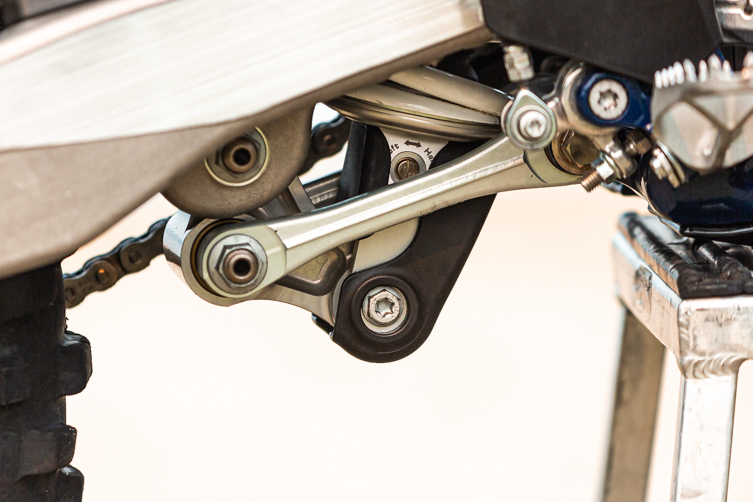
LINKAGE PROTECTION ($40)
The ongoing KTM versus Husky debate often centres around the shock absorber linkage, or the lack of it. KTM guys will talk about the maintenance-free simplicity of the linkage-less PDF system, and how its streamlined design means it won’t get hung up on obstacles. Husky guys, on the other hand, will draw attention to the superior overall performance of the rising-rate linkage, and the additional set-up options a linkage gives you. Irrespective of which camp you sit in, it’s clear that linkages are more susceptible to hits and damage in extreme terrain. And that’s why I fitted this nifty little Shock Absorber Linkage Protector. It snaps easily into place over the lowest part of the linkage and is then clamped in place by an opposing cap and plastic screw. Fitting it does require you to remove a couple of linkage bolts, but that’s a five-minute job. And for $40, I reckon this is cheap, lightweight insurance against linkage damage.
BRAKE & CLUTCH LEVERS ($66, $74)
With Husqvarna’s move to Magura (from Brembo) for its brakes and clutch in 2017, the clutch and front brake levers are now conveniently interchangeable. That saves you money on spare parts, and means you can get away with carrying less in your bumbag. That said, it is a bit fiddly to ‘adapt’ the brake lever to the clutch side if you’re out on the trail because you need to remove the pivot’s bushing and the tang (that activates the brake switch), and then re-fit the spring-loaded end from the busted clutch lever. It’s doable, but much easier with the assistance of a bench-mounted vice.
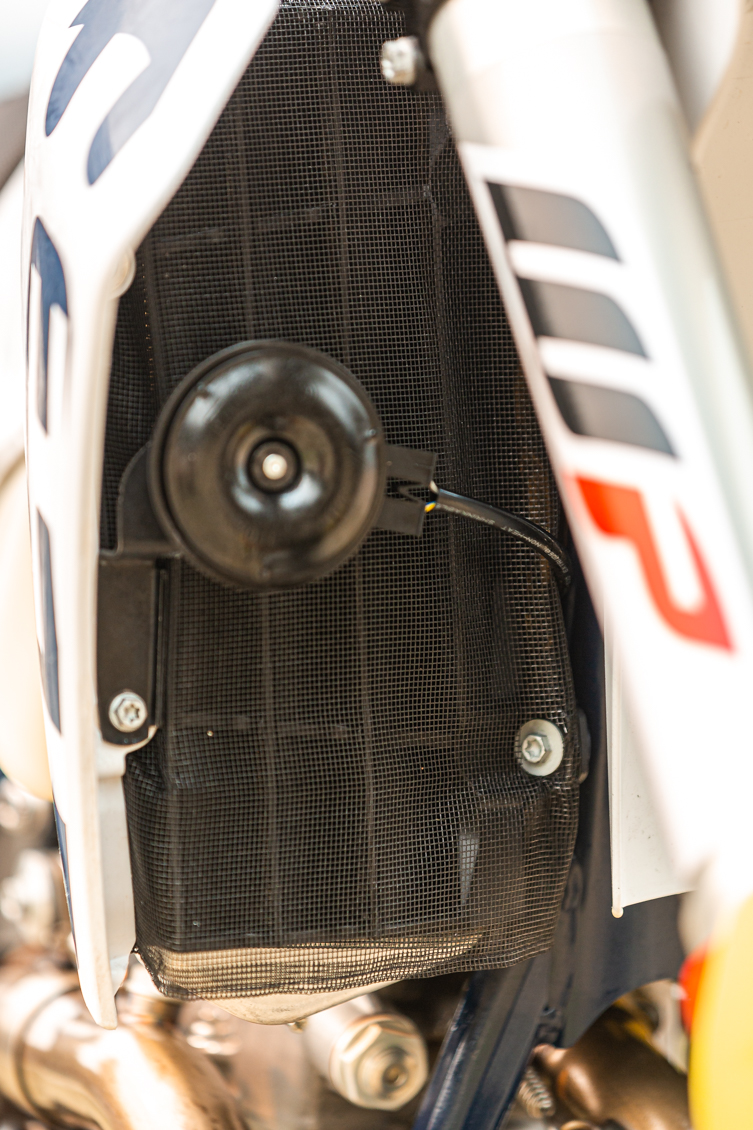
RADIATOR PROTECTION ($107/pair)
To minimise the build-up of grass and leaves between the radiator louvres and radiators, Husqvarna Accessories offer a pair of what look like mesh pockets. You simply remove the louvers, slip the mesh over them and bolt them back in place (making sure the open ends of the mesh face down so they don’t act as leaf catchers). It does make it a little fiddlier to insert the four bolts that secure the louvers and radiator halves, but then it saves you time when it comes to cleaning any debris out. At $107 a pair, the mesh isn’t cheap, but I figured I could take the things with me for my next bike.
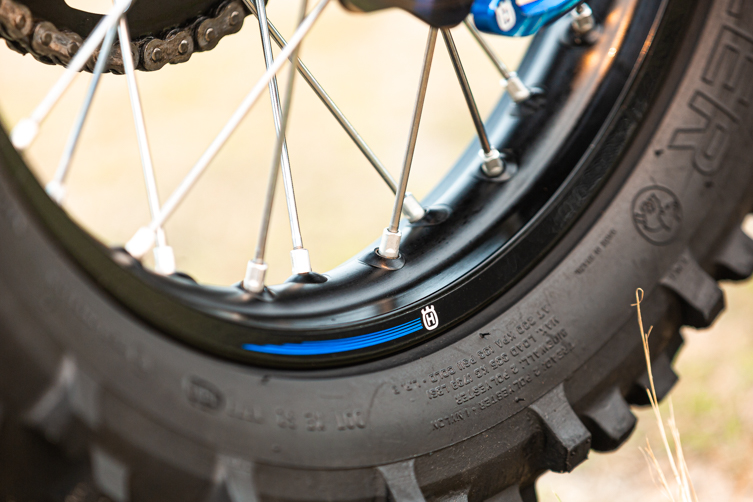
RIM TAPE ($60/kit)
Everyone loves a black-anodised wheel, right? Well, yes, until you turn that asset into an aesthetic liability by scratching the bejesus out of them with a set of tyre levers. The best solution to the problem is a preventative one: simply grab a Husqvarna Accessories Rim Tape Sticker Set. If your levers scuff the tape, no problem – the kit comes with a few extra stickers you can use as replacements. The bonus is that this rim tape gives your wheels a cool look, without being teenage lairy.
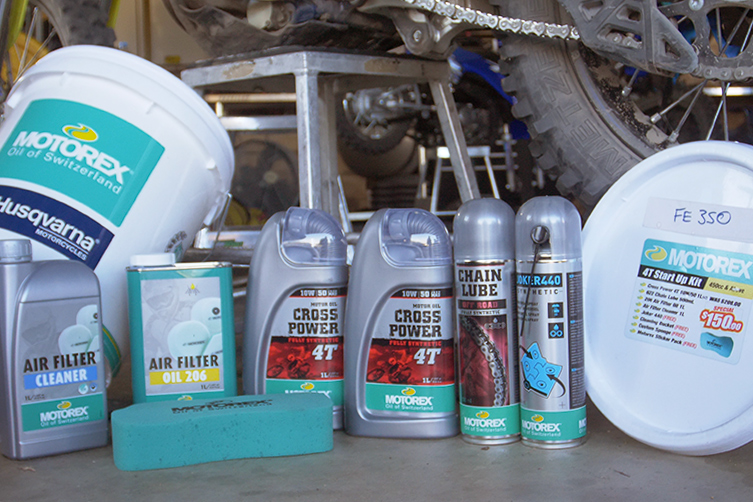
MOTOREX OIL & LUBE ($150)
Call me superstitious, but I’ve always been disinclined to change the brand of engine oil my bikes have been run-in with. Thankfully, the boys at A-One Accessory Imports (who distribute Motorex in Oz) flowed me a 4T Start-Up Kit, which are a super-convenient, cost-effective way to grab all your bike’s oil and lube requirement in one cost-effective hit. The kit includes: 2x Cross Power 4T 1L, Chain Lube Off-Road, Joker 440 Spray, Air Filter Oil, Air Filter Cleaner, bucket and sponge.
MISCELLANEOUS PARTS
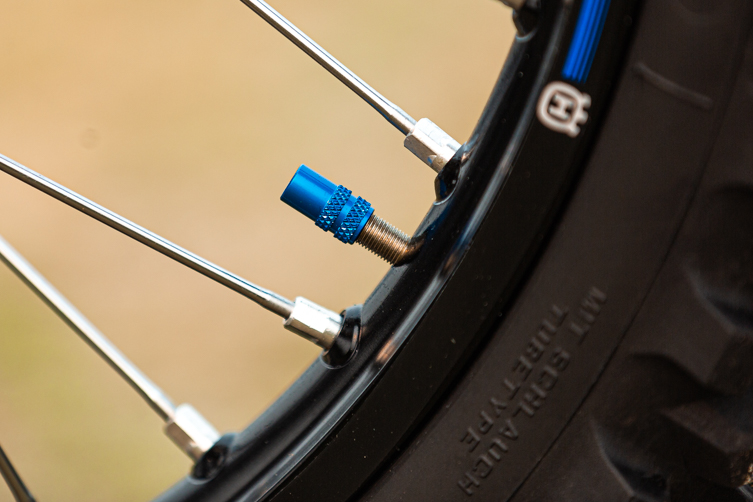
- Value cap set ($30) – They may look like blue bling, but they’re actually practical because they double as a value tool.
- Rear Brake Safety Wire ($20) – Quick and easy to fit, this ‘brake snake’ minimises risk of a your rear brake pedal getting bent out at 90º after being bashed by a stick or torn back in a crash.
‘BENCHED’ PARTS
When you run through Husqvarna’s online Accessories Catalogue and add parts to your ‘cart’, you’re not given a corresponding RRP for them. So I simply sent through a wishlist of parts to Husqvarna Australia – items I was confident would improve the bike and/or customise it to suit me – and asked for each part’s RRPs to help me prioritise what I wanted. Interestingly, the only part that didn’t fit within my prioritised $1500 budget was the Preload Adjuster for the XACT shock absorber. Initially, I wanted to fit it because I knew this FE350 would be ridden by a bunch of Transmoto test riders whose weights vary by 20-30kg, but I decided that $317 was too big a price to pay for that luxury. So, instead of using a T-bar, I just have to make do with the old-fashioned way of adjusting shock preload. And to be fair, the plastic preload collar on the Husky makes the job pretty easy anyway.
KEEPING AN EYE ON…
THE SUBFRAME
The fibre-reinforced plastic subframe on Husky’s 2020 models is 250g lighter than its predecessor’s and intentionally designed with added flex. More than ever before, it’s an absolute work of art, but there have been a few reports of the things breaking (most failures have occurred where the lower mounts meet the main frame). When pressed, the guys from the Husqvarna factory in Austria did acknowledge that a batch of inferior material had affected the strength of the subframes on some 2020 units, and that steps had been taken to address the issue. So don’t be afraid to speak with your local dealer about a warranty claim if you’ve experienced an issue with your subframe.
MAGURA CLUTCH & BRAKE
Assembly inconsistencies with the Magura clutch’s slave cylinder caused seal wear and failures in Husky’s 2017 and 2018 models (which cost about $400 plus labour, as you had to buy a complete slave cylinder, rather than the seal itself). Thankfully, Husky dealers are reporting they aren’t seeing many such problems in the 2020 models. Similarly, seal issues that resulted in Magura’s front brake getting air in the line (leading to a spongy lever and poor stopping power) seem to have been addressed.
OTHER OBSERVATIONS…
- The new and improved fork spring preload adjusters make the job of changing spring preload to your fork much easier. It’s no longer notchy or vulnerable to breakages.
- Note that the triple clamp pinch bolts’ torque settings are now 15Nm and 17Nm for the lower and upper clamps, respectively. Previously, the recommended values were 17Nm and 20Nm.
- The separation of the radiator shroud and sideplate (which doubles as an airbox lid, with three locating lugs) is a much better design for 2020. It eliminates the tendency for the entire LHS plastic panel to fall off if you failed to properly locate it on the two fuel tank lugs, or kick the crap out of it (or drop the bike) in extreme terrain.
- One annoying thing about the Magura front brake is that the throttle assembly and cables hinder access to the brake perch’s 8mm hex-head bolt (this is because its perch uses a pinch-clamp set-up with just one bolt, unlike a more conventional perch with two bolts). There’s no getting around the fact you need to loosen and twist the throttle housing to adjust the front brake perch.
- In spite of the airbox design being modified for better airflow, you’ll be happy to know that the existing air filters (and cages) still fit the 2020 models.
Wanna Win a 2020 Husqvarna FE450? Check this out!

TRIBE BENEFITS
- 48-hour Priority Entry to Transmoto Enduro Events;
- A 15% discount on all Transmoto apparel and accessories;
- Monthly special offers from leading dirt bike brands, such as discounts, exclusive giveaways and limited-edition products.
- Your chance to win loads of prizes – including event tickets, products, merchandise and more; and
- Transmoto Tribe Member Pack* – 2x Transmoto T-shirts, Transmoto x FIST Handwear Gloves, Tribe Sticker Pack, Iron-on Patch, Stubby Cooler and Bottle Opener (* total value $120, available only with $159 Transmoto Tribe membership).
What are you waiting for? For an annual fee of just $159 (or $98 without the Member Pack), it’s no-friggin’-brainer!
You might also like...
HIGHLIGHTS: 2026 TRANSMOTO 8-HOUR AT NARRABRI, POWERED BY KTM
Check out the highlights video from the 2026 Transmoto 8-Hour at Narrabri, NSW, powered by KTM.

2026 SMX WORLD CHAMPIONSHIP VIDEO PASS
The SMX Video Pass is back, and again providing live and on-demand access to all 31 rounds.

2026 ENDURO & CC MODELS: 7-BRAND PRICE COMPARO
A handy table of easy-to-compare prices for seven brands’ 2026 enduro and cross-country models.

HONDA CLAIMS EIGHTH AUSX TITLE
Dean Wilson sealed the deal for Honda with a dominant 2025 Australian Supercross season.
National Motorcycle Insurance
8 months ago
Ride Smart | Presented by National Motorcycle Insurance
Transmoto’s Simon Barratt covers some handy tips on how to protect your dirt bike, presented by National Motorcycle Insurance.
KTM
9 months ago
KTM DOMINATES 2025 AUSTRALIAN ENDURO CHAMPIONSHIP
The KTM DM31 Racing Team wrapped up four titles at the weekend’s AusEnduro season finale.

Boost Secures 2025 AUSX Naming Rights
The Australian Supercross Championship is set to launch into its biggest season yet.

TT Circuit Assen To Host 2027 MXoN
The 80th edition of the MXoN will see the legendary event return to Dutch soil in 2027.
Be the first to comment...