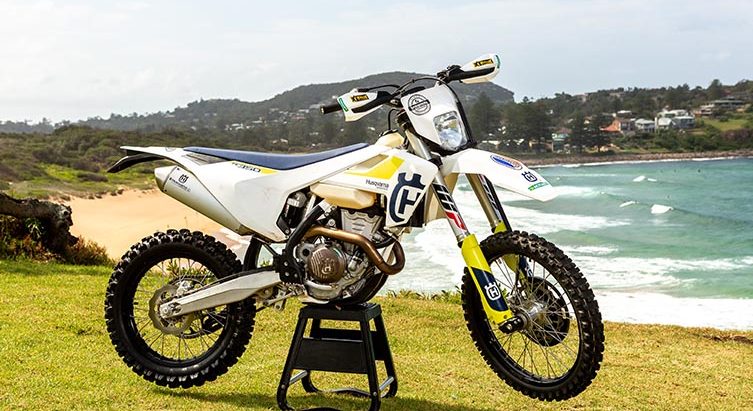
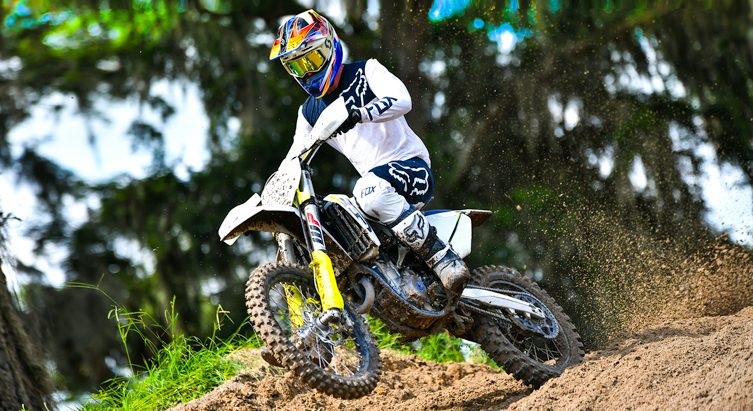
2019 FE350 Mods: What to Fit & Why
Ever since KTM’s groundbreaking 350EXC-F first appeared back in 2012, the ‘best of both worlds’ performance that mid-capacity enduro bikes deliver – whether you’re talking KTM, Husqvarna, Beta or Sherco – has generally made them the best-selling model in each manufacturer’s four-stroke range. And while it’s true that Husky’s FE450 has made big advances in recent years (a 6kg reduction in curb-weight and a more user-friendly style of power, for example), the FE350 remains my favourite machine in Husqvarna’s 2019 enduro-bike model-range, two-stroke or four. Why?
Even though the FE350 is only 1.5kg lighter than its 450cc sibling (and $300 cheaper at the dealer), it feels like it’s 6 or 7kg lighter to ride because its engine crates so much less gyroscopic force. And in tight off-road terrain, where I spend a majority of my ride-time these days, the 350’s additional agility is a big advantage. It beats me up less. It’s more enjoyable to ride for longer periods. And it seems to suit my smooth, flowing riding style better than the point-and-shoot muscle of the FE450 does.
So, now that I’ve spent the past few months (and 25 hours’ run-time) riding and living with our 2019 FE350, what parts have I fitted to this mid-capacity giant-killer, and why? How did I customise its cockpit and ride? And what do I advise owners to keep an eye on? Here’s a snapshot…
PARTS ADDED…
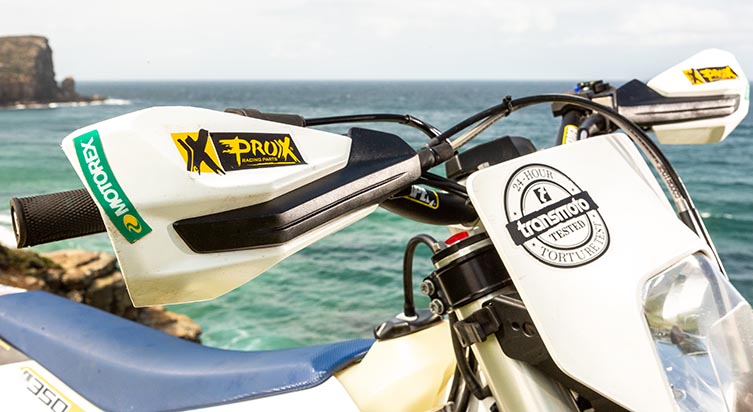

HAND GUARDS
After snapping off one of the FE’s standard hand guards in a small crash, I decided to fit a pair of the slightly different units available through the Husqvarna Accessories catalogue (these are essentially the same guards used on Husky’s 2014-’16 FE/TE models, and current-model KTMs, and they all use the same mounting hardware). Aside from looking a bit sleeker, they use a dual-density plastic (the black rib in the centre is more rigid, while the white surround is more giving), which seems to make them resistant to busting from a crash. I reckon they tie in with the B&W aesthetic of the FE better, too.
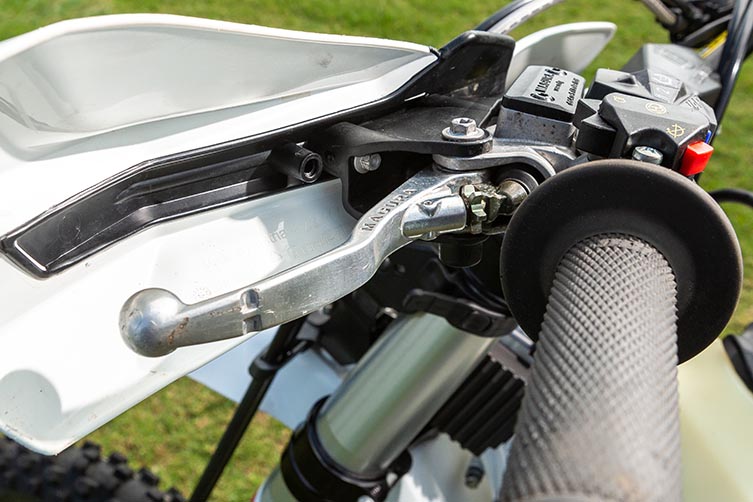
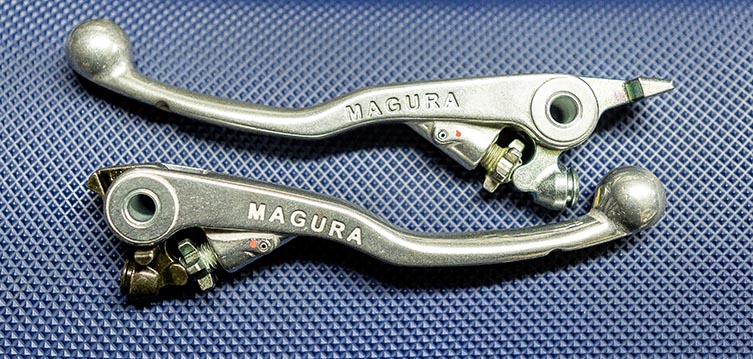
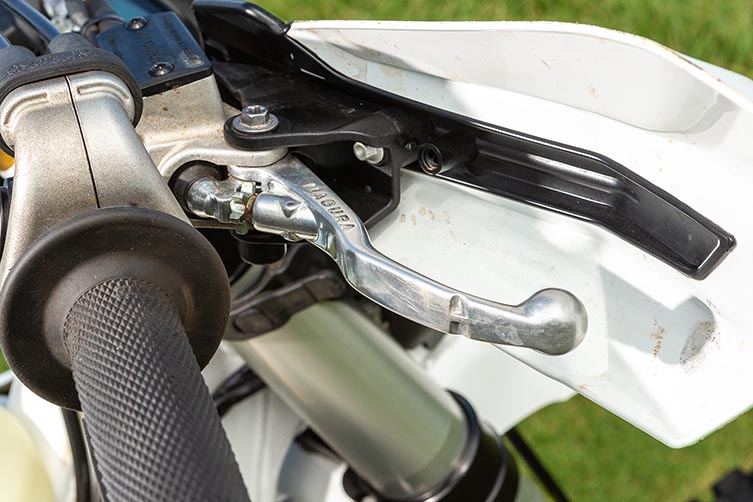
BRAKE & CLUTCH LEVERS
With Husqvarna’s recent move to Magura (from Brembo) for its brakes and clutch, the clutch and front brake levers are now conveniently interchangeable. That saves you money on spare parts, and means you can get away with carrying less in your bumbag. That said, it is a bit fiddly to ‘adapt’ the brake lever to the clutch side if you’re out on the trail because you need to remove the pivot’s bushing and the tang (that activates the brake switch), and then re-fit the spring-loaded end from the busted clutch lever. It’s doable, but much easier with the assistance of a bench-mounted vice.
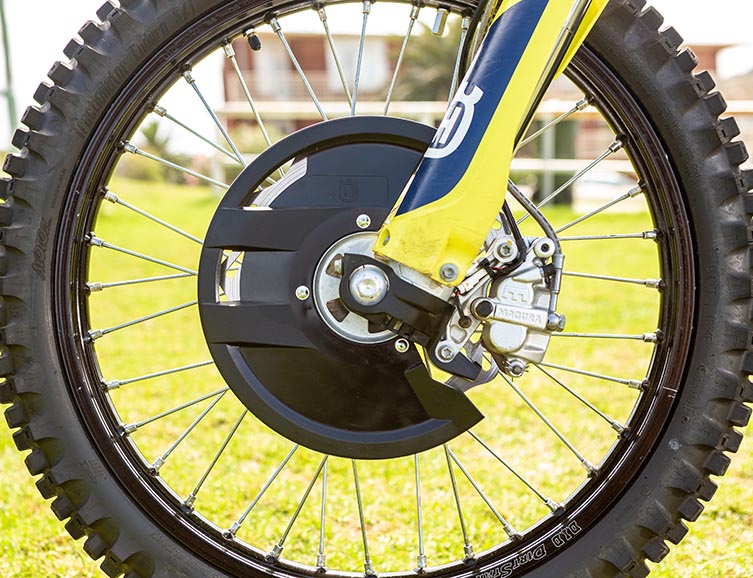
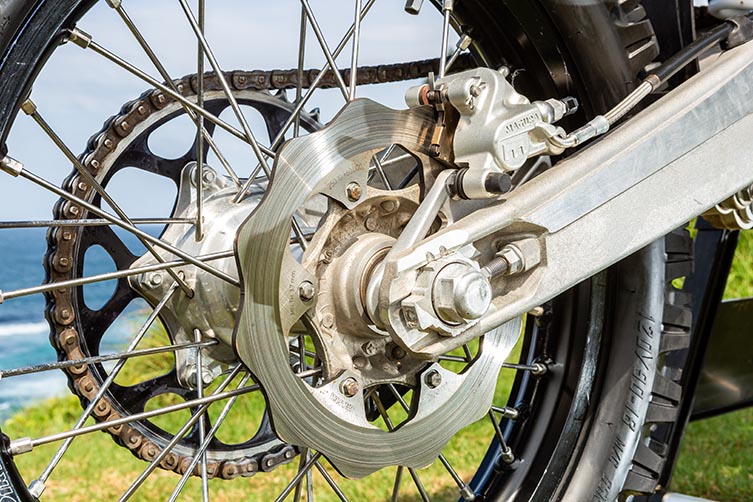
FRONT DISC PROTECTION
While much of the country remains in the grips of a drought, the Sydney Basin has copped a few “weather events” in recent months, making many trails wet and muddy. And after of couple of pants-soiling incidents when a build-up of mud on the front brake disc pushed the pads apart and allowed the lever to come back to the bars, I decided to fit a disc guard to prevent the issue (note that the guard and its mounting bracket, which replaces the LHS wheel spacer, need to be purchased separately). While the mod has eliminated the dreaded floppy-lever scenario, it does make front wheel changes a bit more of a chore. So if you’re an enduro racer who needs to perform wheel changes against the clock, you’ll need to weigh up the pros and cons here.
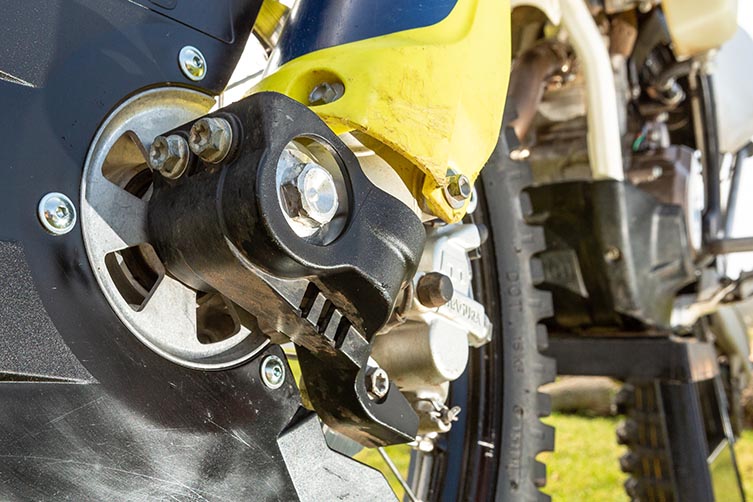
FORK SHOE PROTECTOR
The beauty of WP’s 48mm USD Xplor fork is that, with both rebound and compression star-clickers in the fork caps, you no longer have to get on your back to adjust the clickers in the bottom of each fork leg. This set-up also means you can fit a set of plastic fork shoe protectors (to prevent those unsightly gouges that rock-filled ruts often create in your alloy fork shoes) without affecting clicker access. These plastic shoe protectors are a cinch to fit (they come with four slightly longer front axle pinch bolts) and they also help protect your front brake calliper’s lower mount. However, when fitting the front wheel, they do make it easier to inadvertently dislodge the wheel spacers, and fiddlier to push the front axle through the shoes.
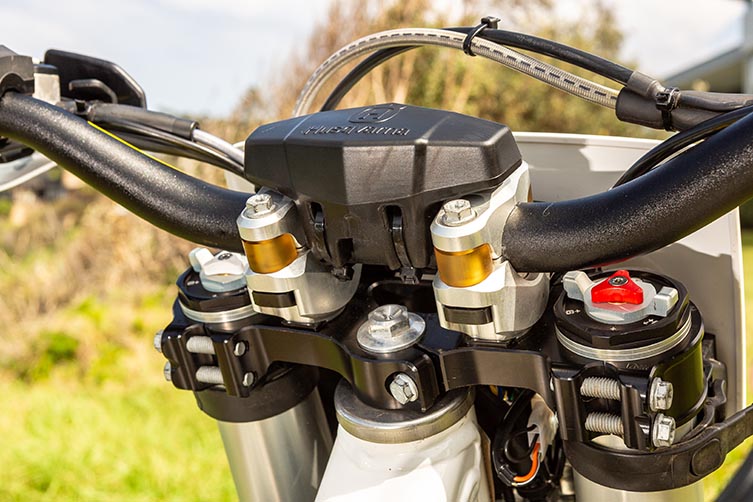
DAMPED HANDLEBAR MOUNTS
Once you’ve run a set of the PHDS (Progressive Handlebar Damping System) bar mounts, you’ll want to fit a set on every bike you own because they offer all the benefits of rubber-mounted bars, but none of the disadvantages. As the PHDS’s lower mounts are hard-mounted to the triple clamp, they offer precise steering feel and don’t twist anywhere near as readily as rubber-mounted bars in a crash. And yet the elastomer-damped upper bar mount helps reduce the vibration and shock transferred to your hands and arms. And that genuinely reduces rider fatigue. The cool thing is that the kit comes with all its own mounting hardware, plus 10mm bar raisers (which tall riders may want to fit). Optional soft and hard elastomer inserts are also available. The PHDS hardware is a little heavier than the standard bar mounts, but in my mind, it’s a compromise I’ll make any day of the week.
SOLID REAR DISC
When it comes to a dirt bike’s rear brake, 95% of riders will tell you they’d like more feel and modulation from the thing. That’s largely why Husqvarna lengthened their rear brake pedal by 10mm back in 2017; to generate better feel and prevent you from inadvertently locking the rear wheel. I took things a step further on the FE350’s Magura braking system by fitting a Husqvarna Accessories solid wave rear brake disc. In additional to offering noticeably more feel, the solid disc also reduces brake pad wear, especially in muddy conditions.
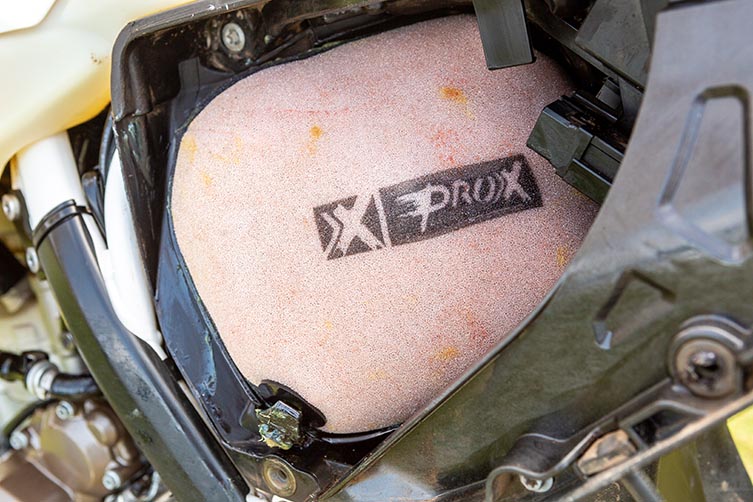
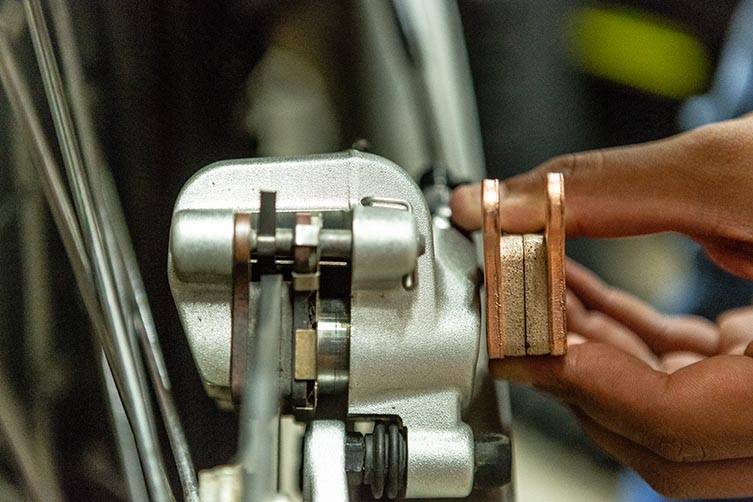
PRO-X RACING BITS
Netherlands-based company, ProX Racing, makes a huge array of performance parts and consumables for motorcycles, and supplied us with replacement oil filters, air filters and brake pads for the FE350. Conveniently, the ProX Racing brake pads used for Magura and Brembo brakes are identical.

SHORT-PULL THROTTLE
I dig the lock-on ODI grips that come standard on the Husky, and it’s handy that you get a choice of cams to fit on the end of your throttle tube (a standard and quick-pull cam comes in the bike’s spares kit and with any replacement ODI grips). Because you tend to be more ‘active’ with throttle inputs on smaller-capacity models, fitting the quick-pull cam is a good option on the FE350 because it saves you from having to drop your right elbow at full throttle. I’m not sure I’d fit one on a 450 or 501 or large capacity two-stroke, though, as those more powerful beasts can punish you for over-exuberant throttle application!
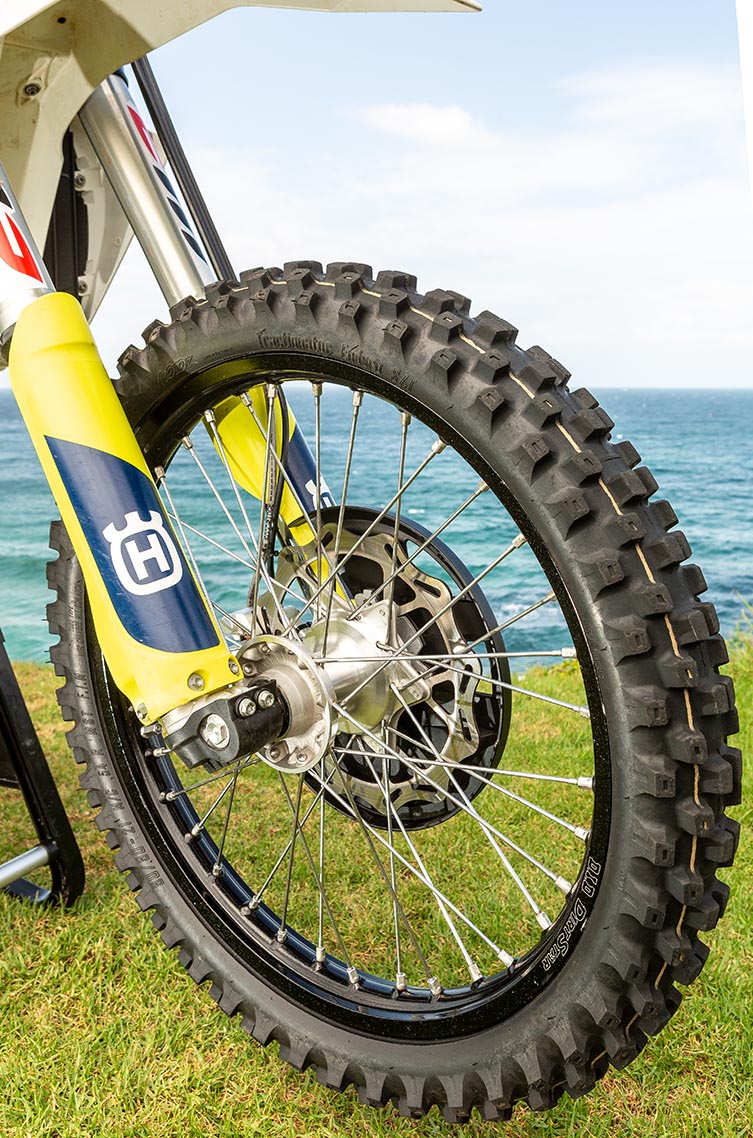
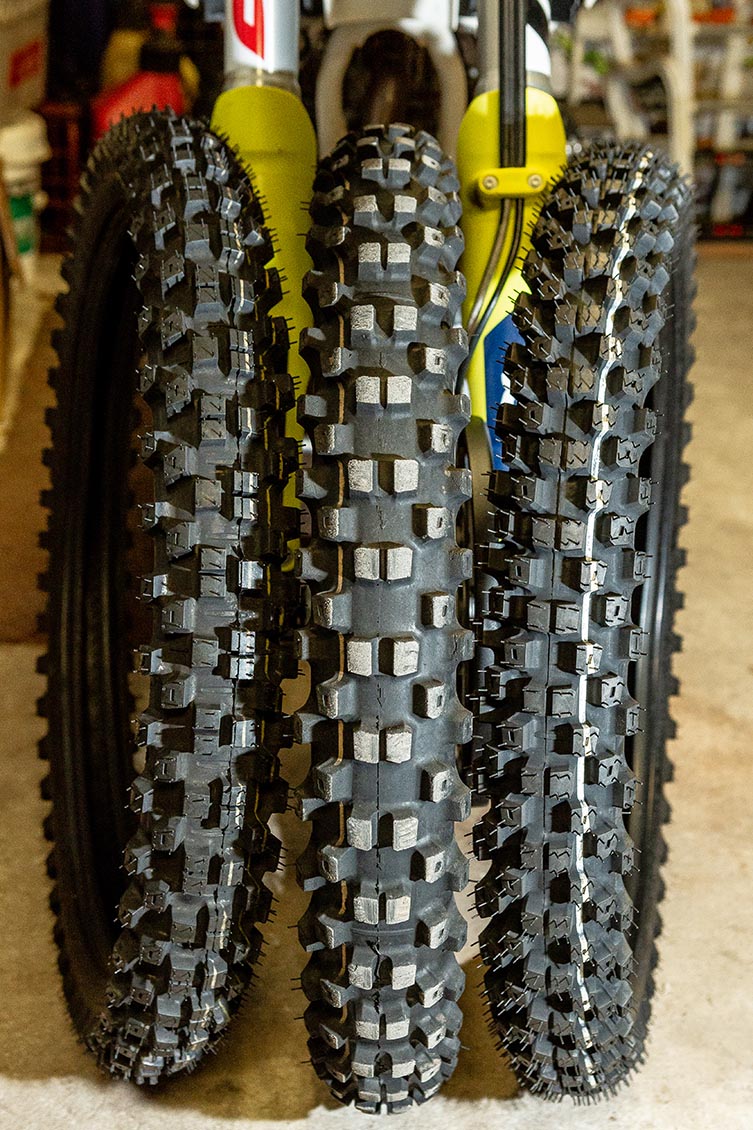
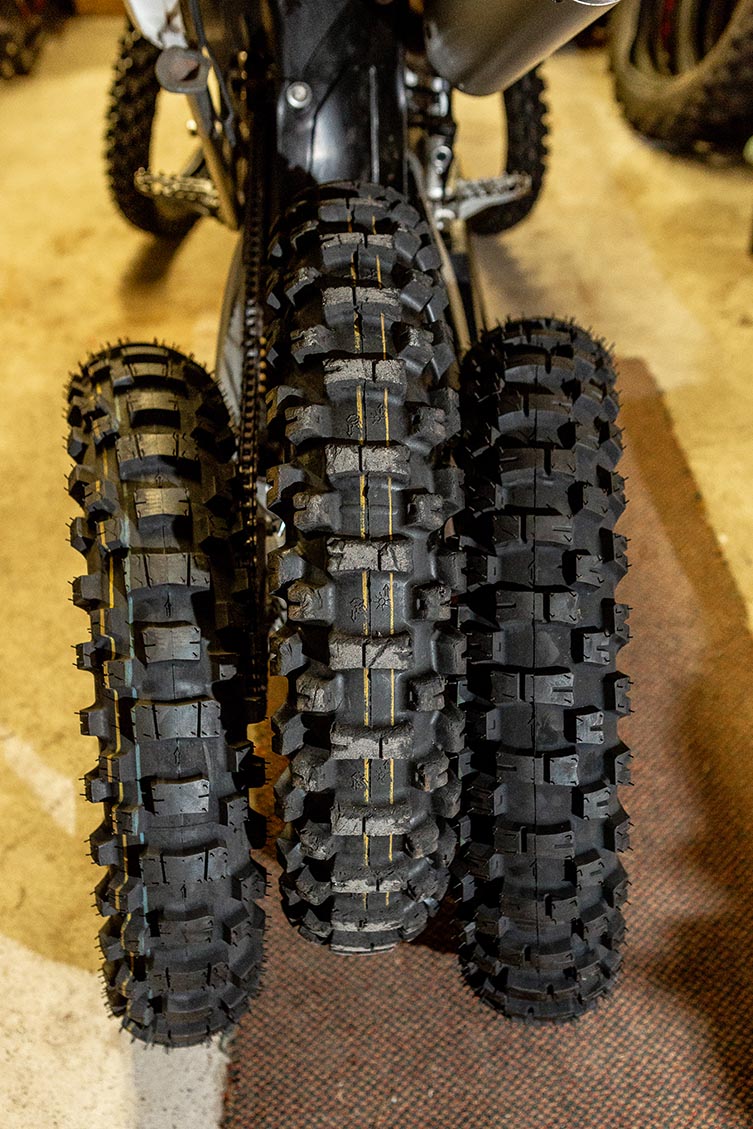
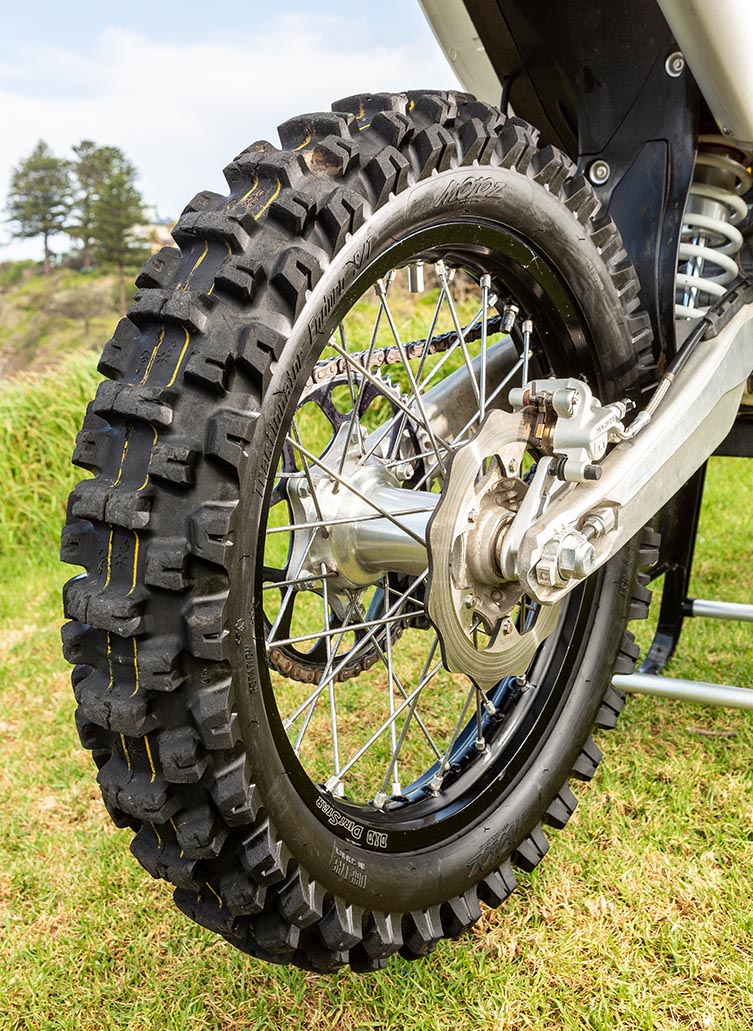
MOTOZ RUBBER
Once the FE350’s standard Metzeler 6 Days Extreme tyres were cactus, I fitted a fresh set of Tractionator Enduro S/T (Soft Terrain) hoops from Australian tyre manufacturer, Motoz. Unlike the Motoz off-road tyres from a few years back – which tended to use tread patterns with an unusually high land-to-sea ratio – these new-gen Tractionator Enduro S/T tyres now boast levels of performance and durability that are comparable to the bigger tyre brands. In fact, with the hybrid natural/synthetic rubber compound the Tractionator Enduro S/T tyres now use, the they’re much longer-wearing than a majority of soft-terrain tyres on the market, plus the rear is reversible for dry and wet conditions. And to make sure I minimised the chance of pinch-flats, I also fitted a set of Motoz’s Uber-Ultra Heavy Duty Tubes, which are 4mm thick and virtually bulletproof.
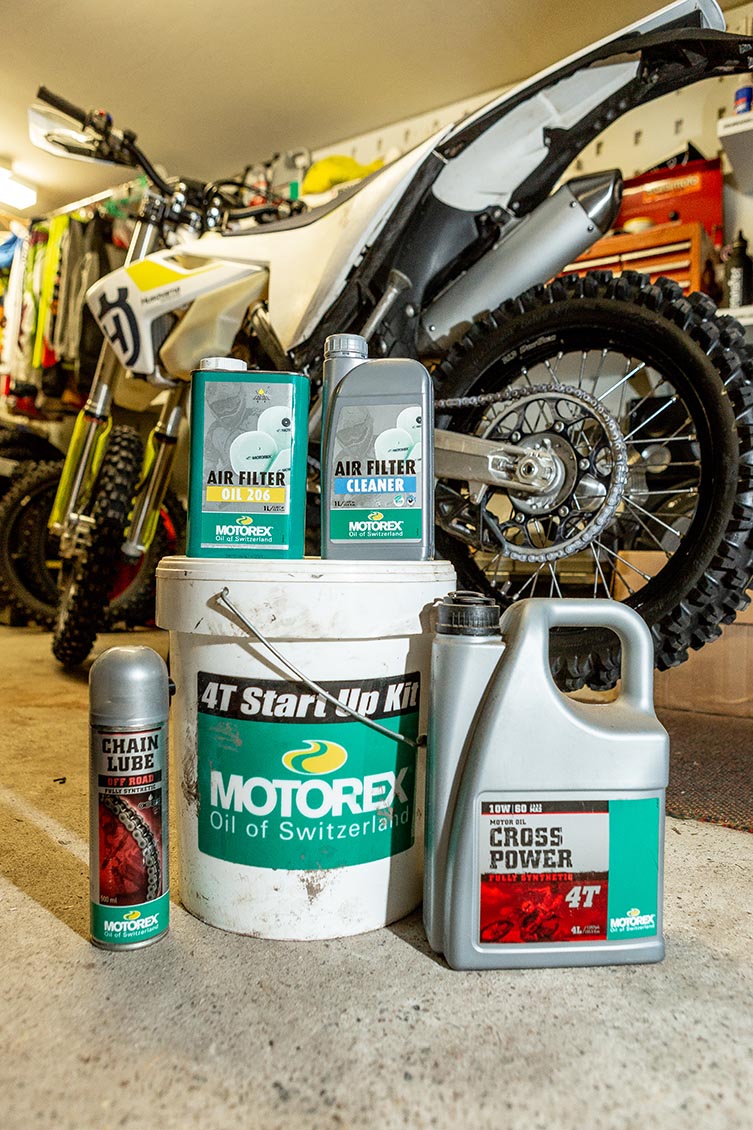
MOTOREX OIL & LUBE
Call me superstitious, but I’ve always been disinclined to change the brand of engine oil my bikes have been run-in with. And thanks to the boys at A-One Accessories, who distribute Motorex in Oz and flowed me a couple of 4T Start-Up Kits, my FE350 has been the beneficiary of plenty of Motorex TLC. These kits are a super-convenient, cost-effective way to grab all your bike’s oil and lube requirement in one cost-effective hit.

PREVENTATIVE MEASURES
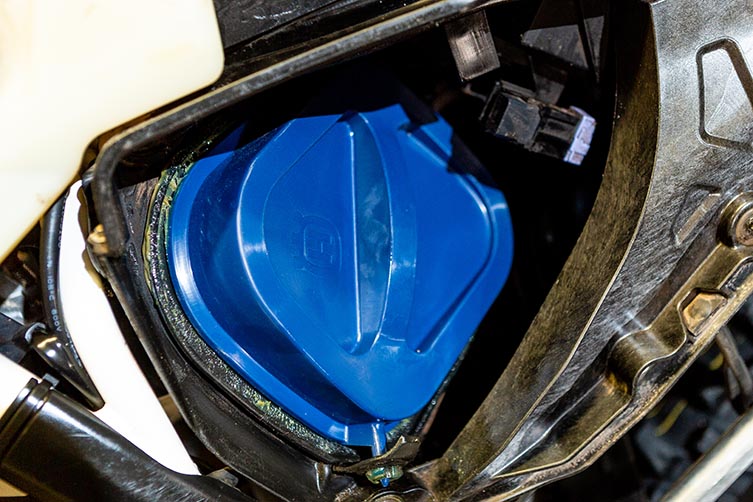
I invested in an Exhaust Plug and Airbox Dust Cover from the Husqvarna Accessories catalogue to safeguard against water and dust getting into where it shouldn’t when transporting and washing the FE350. Plus I religiously fit the fuel-line plugs (supplied in the bike’s parts kit) any time I remove the fuel tank (as this is where 95% of fuel contamination problems occur). Note also that I felt no need to fit accessory radiator guards to the bike as the standard radiator louvers (from the 2017 models and onwards) are ingeniously reinforced and offer great, lightweight protection against crash damage without compromising airflow.
OTHER CONSIDERATIONS…
RELIABILITY ISSUES
The two issues we identified back in 2017 (when we had a new-generation 2017 FE450s on our project bike fleet) now both appear to be problems of the past. Namely:
- Assembly inconsistencies with the Magura clutch’s slave cylinder caused seal wear and failures (which cost about $400 plus labour, as you had to buy a complete slave cylinder, rather than the seal itself). Thankfully, Husky dealers are reporting they aren’t seeing any such problem in the 2019 models; and
- To avoid the plastics melting where the muffler joins mid-section pipe, you needed to trim off the plastic lip where it runs too close to the exhaust. The addition of more heatproof tape and small tweaks to the plastic’s shape has sorted this problem.
THE DDS CLUTCH
Ever since the DDS (Diaphragm Damped Steel) clutch was first introduced to KTM’s landmark 2012 enduro models, it’s proved to be one of the most robust clutches to ever appear on a dirt bike (largely because the ingenious design means that, the more the clutch plates wear, the more pressure the diaphragm spring exerts on the plates). Even Pro riders who are notorious for flogging the shit out of their clutches refer to the DDS as bulletproof. All of which makes it a mystery how I managed to cook the clutch’s fibre plates after just 15 hours’ run-time (okay, there were reports that my FE350 was spotted getting unceremoniously flogged at the super-muddy Transmoto 8-Hour at Stroud late last year in the hands of a test rider who’ll remain nameless!). In any case, as soon as I noticed the clutch starting to slip, I removed the plates (which looked and smelled burnt) and measured the stack. Sure enough, the eight fibre plates measured 25.7mm in total, which is well below the 26.4mm minimum noted in the owner’s manual. After replacing only the fibres (as the steel plates didn’t appear discoloured or worn) and blackened engine oil, the FE350’s clutch has remained faultless. It is worth noting that dealers have suggested it would have been smarter to replace both fibre and steel plates in one hit, which is why Husqvarna now offers them in a cost-effective kit (in fact, as the Parts table below shows, the kit with steels and fibres is actually cheaper than a set of the fibres).

MISCELLANEOUS
- When re-fitting the airbox cover (which doubles as the LHS sideplate and radiator shroud on the FE), take a little extra time to make sure it’s perfectly seated (and picks up both locating lugs on the fuel tank) because I’ve lost the thing a couple of times during a ride (admittedly, after a flying-W or crash that’s evidently dislodged the fastening tabs).
- One annoying thing about the Magura front brake is that the throttle cables hinder access to the brake perch’s 8mm hex-head bolt (this is because its perch uses a pinch-clamp set-up with just one bolt, unlike a more conventional perch with two bolts). There’s no getting around the fact you need to loosen and twist the throttle housing to adjust the front brake perch.
- That said, you’ve got to like the fact the throttle assembly is now made from aluminium, not plastic, and much more crash-proof.
- Keep an eye on the two rubber grommets used for the muffler’s mounts because they tend to perish and/or split (especially if you over-tighten the muffler mount bolts). And even a slightly loose muffler can mess with the seal at its junction with the header pipe.
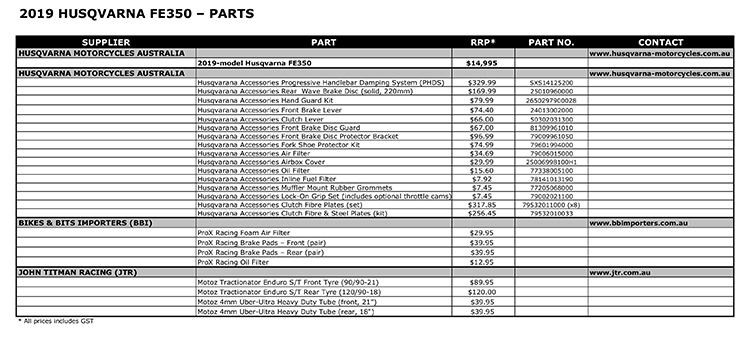
Parts Breakdown
*Click to expand the parts table.
Related Content
TESTED: HUSQVARNA’S 2019 MX RANGE
You might also like...

Boost Secures 2025 AUSX Naming Rights
The Australian Supercross Championship is set to launch into its biggest season yet.

TT Circuit Assen To Host 2027 MXoN
The 80th edition of the MXoN will see the legendary event return to Dutch soil in 2027.
First Look: Aus MXGP Battleground
The 2025 MXGP of Australia track design has been revealed.

Aussie Riders Join Aus Hall of Fame
Four new Aussie riders have been inducted into the Australian Motorsport Hall of Fame.

VIDEO: DAKAR RALLY 2025 – BIKE HIGHLIGHTS
Didn’t manage to keep up with the longest desert race in the world? We’ve got you covered.
FIVE REASONS TO RACE A 2025 TRANSMOTO EVENT
Need some convincing? We’ve got you covered.

2025 SMX World Championship Video Pass
SuperMotocross Video Pass season subscribers can enjoy 10 months of live event coverage, plus over 900 hours of archived Supercross & Pro Motocross races.

OCEANIA WOMEN’S MX CUP EXPANDS IN 2025
An expanded Oceania Women’s MX Cup promises to be real shot in the arm for female MX riders – in Oz and worldwide!
Be the first to comment...