10 Tips For A Bottom-End Rebuild
Many riders associate the need for a bottom end rebuild with a costly trip to the shop. However, saving on labour and parts isn’t out of the question with the help of ProX. We put together a list of 10 tips to help those who want to tackle the rebuild themselves.
Rebuilding the bottom end of your engine, whether two or four-stroke, can be a fun and rewarding job. Additionally, a considerable amount of money can be saved by taking on the work yourself versus tasking a shop to perform the work. These statements are only true, however, assuming the bottom end rebuild is performed correctly. This is a huge caveat, and for the average weekend warrior who doesn’t perform this task often, unfamiliarity with technique and componentry can lead to errors.
To help ensure your next bottom end rebuild is executed to a professional level, here’s 10 tips which will elevate your confidence and understanding as an amateur engine builder. The tips will be presented in chronological order. Let’s get started!
![]()
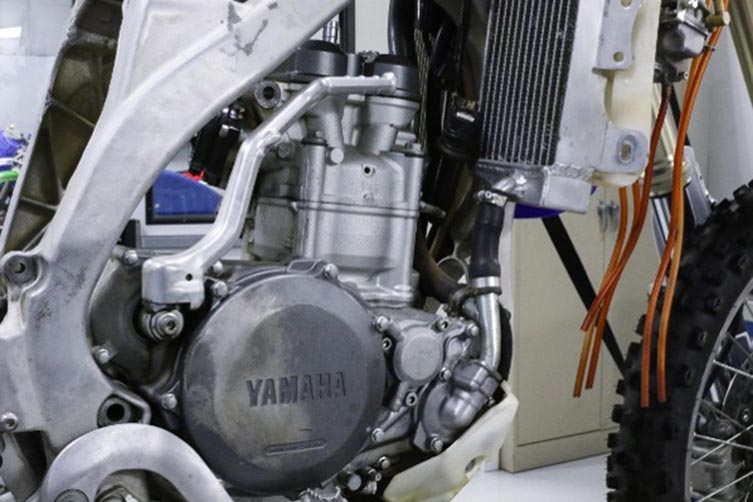
Rebuilding the bottom end yourself can be a daunting, yet rewarding, task. Just make sure you take the engine out of the frame first!
![]()
Correct Tools, Correct Diagnostics, Correct Expectations, Correct Replacement Components
Successfully rebuilding your bottom end starts with planning and preparation. Starting with tools, you’ll need a few specialty tools in conjunction with your standard sockets, wrenches, etc. Namely, the correct flywheel puller for your specific engine, a flywheel holding tool, a crankcase splitting tool, a blind bearing puller, and a crankshaft pulley. Using heat to assist in the removal/installation of the bearings and crankshaft is an effective method, so an oven and freezer are also noteworthy items.
You need to have a copy of the factory service manual or equivalent for your particular vehicle. I highly recommend reviewing the sequence of events and procedure in advance of executing the work.
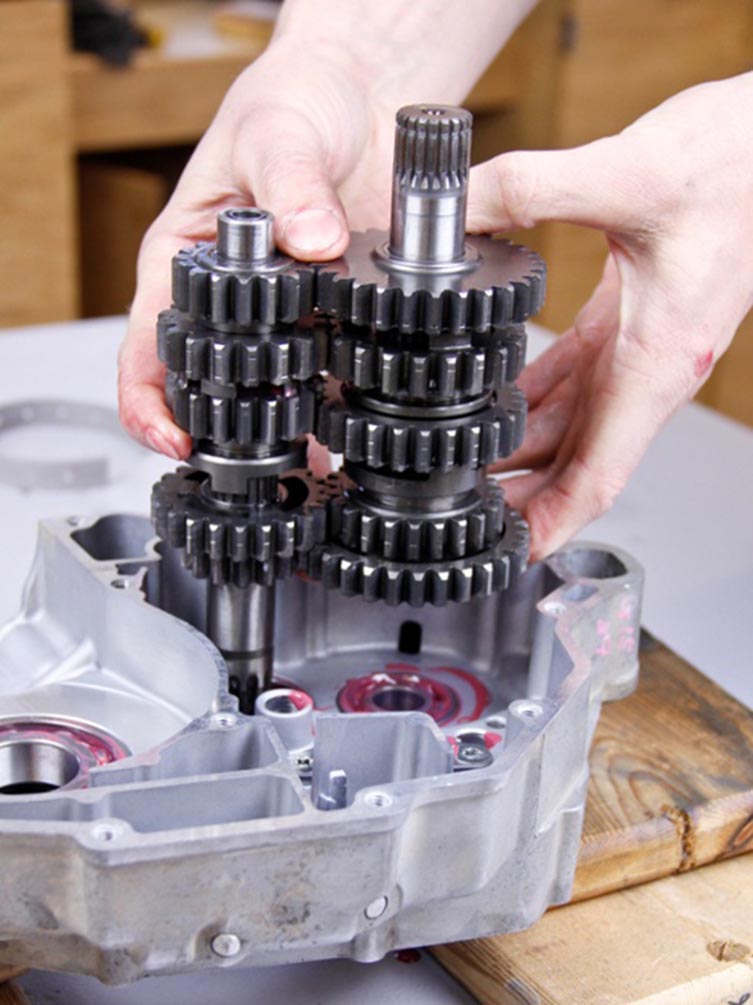
Bottom ends are taken apart for many different reasons. If a major failure occurred, the scrutiny of the rebuild will be at a much higher level than a bottom end that is merely being reconditioned. If any problems were persistent when the machine was operated, such as a poorly shifting gearbox, or leaks between the crankcases, the causation of these issues must be identified prior to reassembly.
![]()
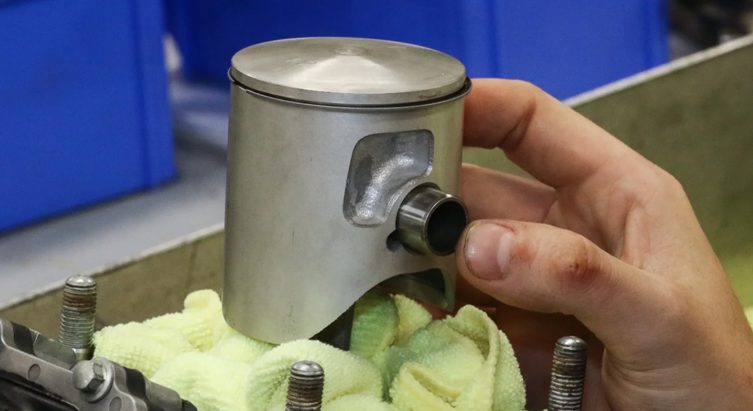
If you are rebuilding the bottom end because of a failure, be sure to inspect all components to identify the cause of the failure and determine what was damaged. This will ensure your rebuilt engine will not encounter the same problem.
![]()
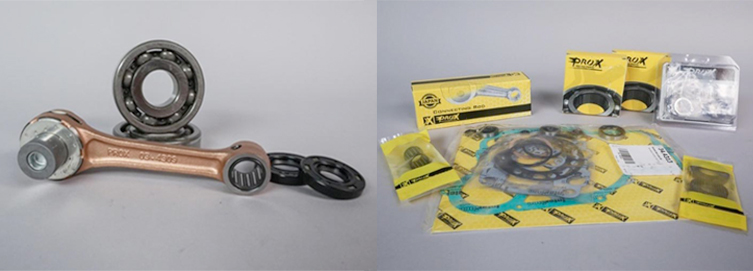
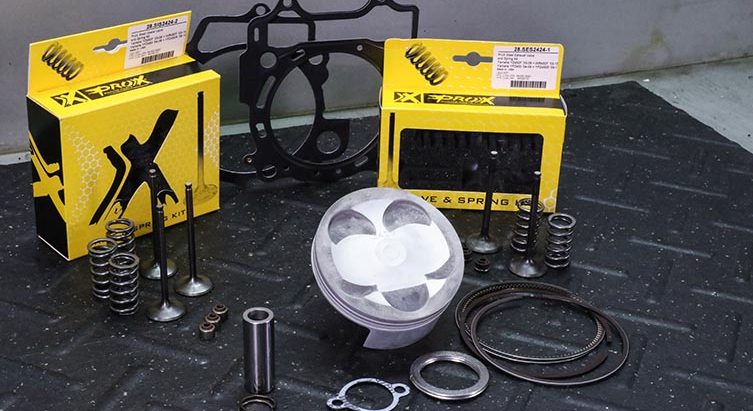
Replacement components are a major factor to consider, both in terms of cost and engine performance, when diving into a bottom end rebuild. Replacing bearings, seals, gaskets, and refurbishing the crankshaft either by rebuilding or replacing it is essential. It’s recommended to peruse your service manual or microfiches ahead of the rebuild to generate a list of replacement components.
Selection of components and sourcing them should also be planned out. In addition to OEM options, brands such as ProX offer OEM quality parts at more affordable prices. Within the ProX catalogue, bearings, seals, crankshaft, and many other components can be found for a wide variety of engine models that can make the rebuilding process easy and affordable. All ProX bottom end parts are made OE manufacturers and suppliers to OE standards, so your mind can rest easy that your rebuild can retain OEM quality and longevity.
![]()
ProX bottom end components are manufactured by OE suppliers to OE specifications. Connecting rods, gaskets, seals, and bearings are available to cover your bottom end rebuild with OEM reliability and performance.
![]()
Find all the OEM replacement parts you need for your bike here.
Keeping Track of Hardware
As the engine is torn apart, you will amass a significant number of components, bolts, nuts, and miscellaneous hardware. Properly keeping track of these items is critical. I prefer to lay sub-systems out on a large table, remove the bare minimum of components/hardware to get to the items I’m servicing, and stick bolts through cardboard in the pattern they were removed from components (think crankcases and covers). This methodology reduces the number of mixups that can occur and ensures bolts of varying length will be reinstalled in their original location. While my method is far from the only one, make sure you have a robust and sustainable system for keeping track of everything.
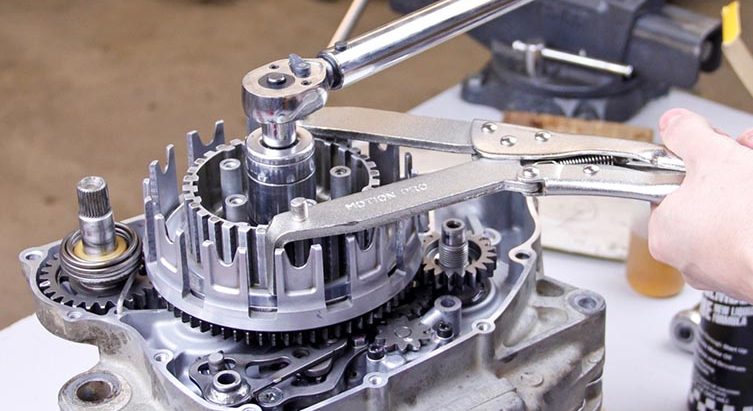
Flywheel Removal
Commonly, two specialty tools are required to remove the flywheel – a flywheel puller and a flywheel holder. It is imperative that both are utilized. Many rebuilds have gone awry because a flywheel holding tool was not used during the rebuild. Instead, the crankshaft was secured from the primary drive side when the flywheel nut was removed/installed. At face value, this may not seem like a big deal, however, when the flywheel is removed, or more importantly installed, in this fashion, a torque is exerted across the crankshaft. While it may seem implausible, the twisting force that is exerted can actually alter the trueness of the crankshaft.
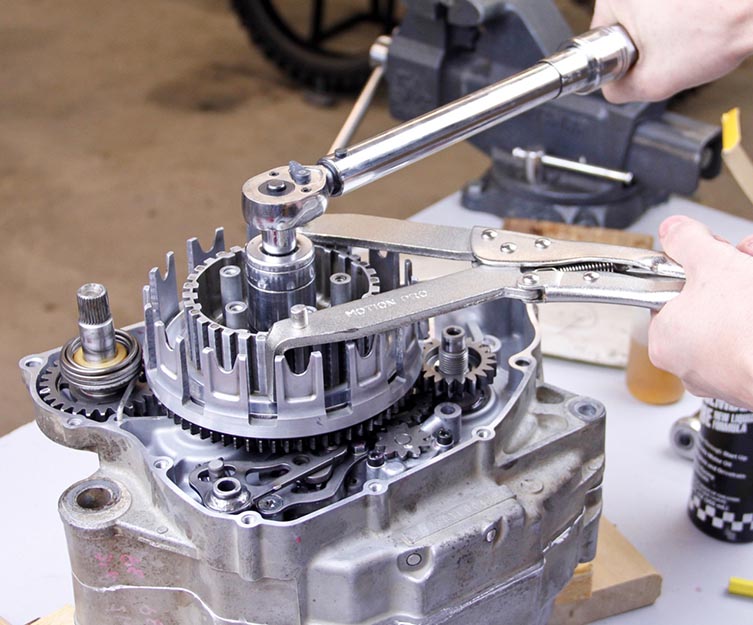
![]()
Using proper tools is critical. Pictured here is a clutch holder, used in aiding in clutch component removal, which also doubles as a flywheel holder. The small dowels on the back of the arms of the tool sit inside the recesses in the flywheel to hold it in place while removing the flywheel.
![]()
Crankcase Separation
There are a few noteworthy items to discuss when separating the crankcases. First off, I always recommend blocking the crankcases so that the split line lies horizontally, and confirming which side should be oriented face up. Doing this will reduce the likelihood of components falling out and ensure that subsequent removal of components goes smoothly.
When installing the crankcase splitter, make sure a protective cap is used to cover the end of the crankshaft. This applies to both two and four-strokes, but is especially critical on four-stroke engines that pass oil out the end of the crankshaft.
Be sure to position the crankcase splitter arms as close to equispaced from one another as possible. Also, ensure that the splitter studs utilize thread engagement at least 1.5 times the diameter of the bolt. For example, most crankcase bolt holes are 6mm, so the stud should be screwed down at least 9mm to ensure adequate thread engagement.
![]()
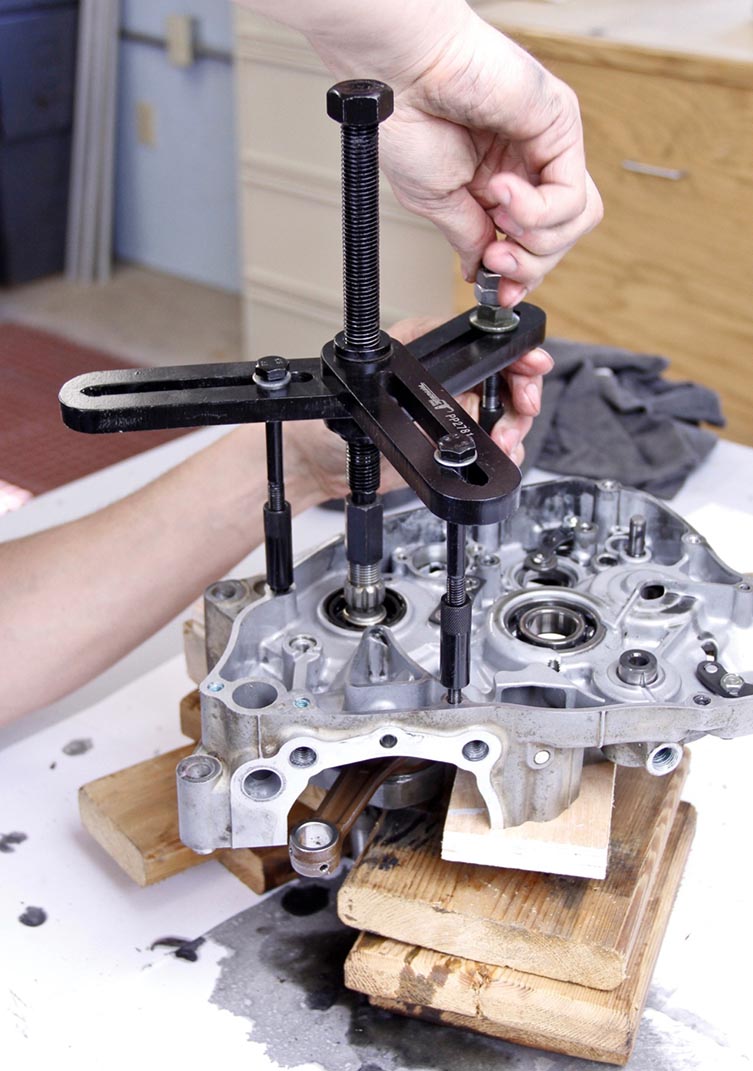
Removing the crank after the cases have been split is another critical job that requiring a special tool. We always recommend using a crank puller. The puller can also be used to install the crankshaft.
![]()
Once the crankcase splitter is set up, it is imperative that separation happens evenly around the periphery of the crankcases. Screwdrivers and the like should never be used to facilitate separation. Instead, a rubber mallet can be used to encourage separation.
Seal and Bearing Removal
The use of seal pullers to facilitate seal removal is not completely necessary, but is definitely recommended. Their use reduces the likelihood of bore damage during removal.
Bearing removal can be done with or without heat. However, the former seems to be a better method. Using heat to remove the crankcase bearings reduces bearing bore wear and work on part of the rebuilder. I do want to note that your heat source and surrounding area can become odorous due to the residual oils that become heated during the process. For this reason, it is advisable to thoroughly clean the crankcases prior to heating them up, as well as keeping ventilation in mind.

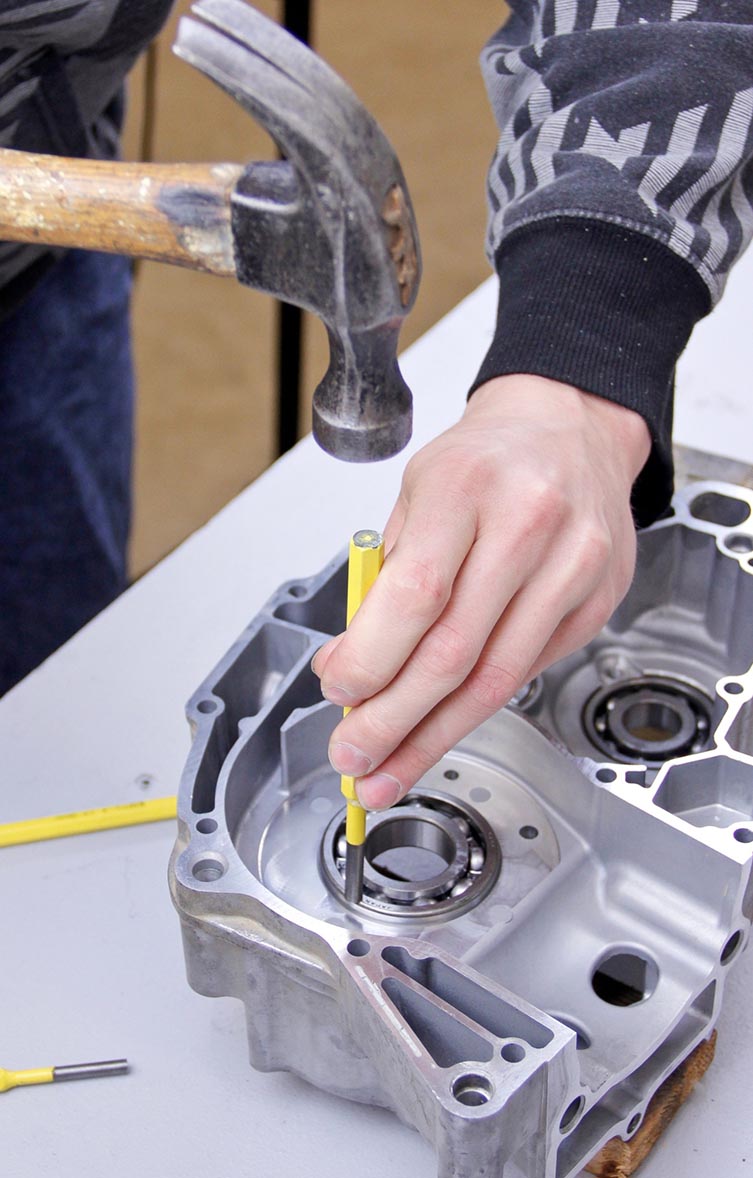
![]()
After heating the crankcase halves, use a hammer and punch to remove any bearings that did not come out on their own. Be careful not to damage the bearing bores when doing this.
![]()
To remove the bearings by heating the crankcase halves, position the crankcase halves split line down on a pair of trays. The trays will catch the bearings and any oil that did not get cleaned out. The oven, grill, or heat source should be set at 350 degrees Farenheit, and the crankcases should be heated for around half an hour. After, the majority of the crankcase bearings should fall out of their bores. Any bearings that did not drop out should be carefully tapped out with a punch and hammer. Bearings situated in blind bearing bores that did not fall out should be removed with the assistance of a blind bearing puller.
If you do not want to or can’t use the heating method to remove the bearings, an arbor or hydraulic press may be utilized to aid in removal. A blind bearing puller will also have to be heavily relied on to facilitate removal. Due to the unevenness of load distribution that can result from pounding the bearings out with a hammer, we caution against this as a primary form of removal without the aid of heat.
Cleaning, Case, and Component Inspection
At this point, it is my recommendation that all components that originated inside the crankcases be thoroughly cleaned. Clean components will ensure easy and accurate inspections. On four-stroke engines that have oil passages running through the crankcases, cylinder, and cylinder head, it is imperative that these are cleaned and blown out. This is especially true if the engine suffered a major failure where oil contamination was a resulting issue. Similarly, on two-strokes, the passages that lead to the crank bearings should be cleaned.
Component inspections should be conducted to assess the condition of the gearbox, crankcase bearing bores, and crankshaft. The crankshaft should either be rebuilt or replaced depending on the severity of wear and desires of the builder.

![]()
ProX connecting rods are double-forged, Japanese steel, and are heat treated and shot peened for strength and longevity.
![]()
Should you determine you’d like to rebuild your crank, ProX offers OEM quality connecting rod kits that can be used for a crankshaft rebuild. Unless you are experienced in this field and have the tools, crankshaft rebuilds should be trusted in the hands of a reputable shop.
Crankshaft Trueness
Regardless of whether a new or rebuilt crankshaft is utilized, the trueness of the crankshaft must be checked. This can be farmed out to a competent shop, machinist, or if properly equipped, performed in-house. While it should normally be expected that new or rebuilt cranks are within runout specifications, the trueness of the crankshaft is imperative to long-term durability. Checking is insurance that our postal system didn’t drop your crank, and that the factory or rebuilder did their job correctly.
Bearing Installation
Similar to removal, heat can also aid in bearing installation. The same heating recommendations apply, and once at temperature, the majority of the bearings should fall to the bottom of their bores without any input. The caveat to this is the bearing dropping into the bore cock-eyed. When this happens, a punch and hammer should be used be help square the bearing to its bore. Be sure to tap on the outer race of the bearing. To ensure the bearings are at the bottom of their bores, they should be tapped to confirm they are fully seated.
![]()
Bearings should be tapped on their outer races only to make sure they are completely and squarley seated in their bores.
![]()
Alternatively, if you don’t want to, or can’t use heat, an arbor or hydraulic press should be utilized to install the bearings. Be sure to load the bearings through their outer races when pressing them in place.
Seal Installation
Seals can be tapped into place with a seal driver or socket and hammer. Alternatively, a press can be used. The important checks to perform are to ensure the seals have been installed squarely in their respective bores, and at any prescribed depths outlined in the service manual. Any seals installed cock-eyed will wear out prematurely.
![]()
When installing new seals, make sure they are completely seated by using a seal driver or socket and hammer. Use caution and make sure the tools don’t come in contact with anything but the seal.
![]()
To prepare for the new bearing and seal installation, complete crankshaft bearing and seal kits are available through ProX. ProX uses reputable, OEM bearing and seal suppliers for all parts in order to maintain OEM quality. Ordering in kits creates less hassle and is a budget-friendly step in your rebuild.
Crankshaft Installation
Crankshafts that utilize an interference fit with their mating crank bearings can be installed two ways. Shrinking the crankshaft in place using a combination of heating and cooling of components works well. Alternatively, utilizing a crankshaft puller is another great way to install the crankshaft. Pounding or pressing the crankshaft into place should never be considered because the trueness of the crankshaft can be affected.
To shrink the crankshaft in place the crankshaft should be set in a freezer for about an hour, and the inner race of the crank bearing should be carefully heated with a torch. The cautionary point here is to use care when heating if the crank seals have already been installed. Inner race temperature can be gauged by applying a drop of water to the surface of the race. If the water droplet sizzles, the inner race is plenty hot. At this point, the cooled crankshaft can be dropped through the heated bearing. Once seated, work to button up the crankcase assembly should progress quickly, and the remaining inner race can be heated and the crankcase installed.
![]()
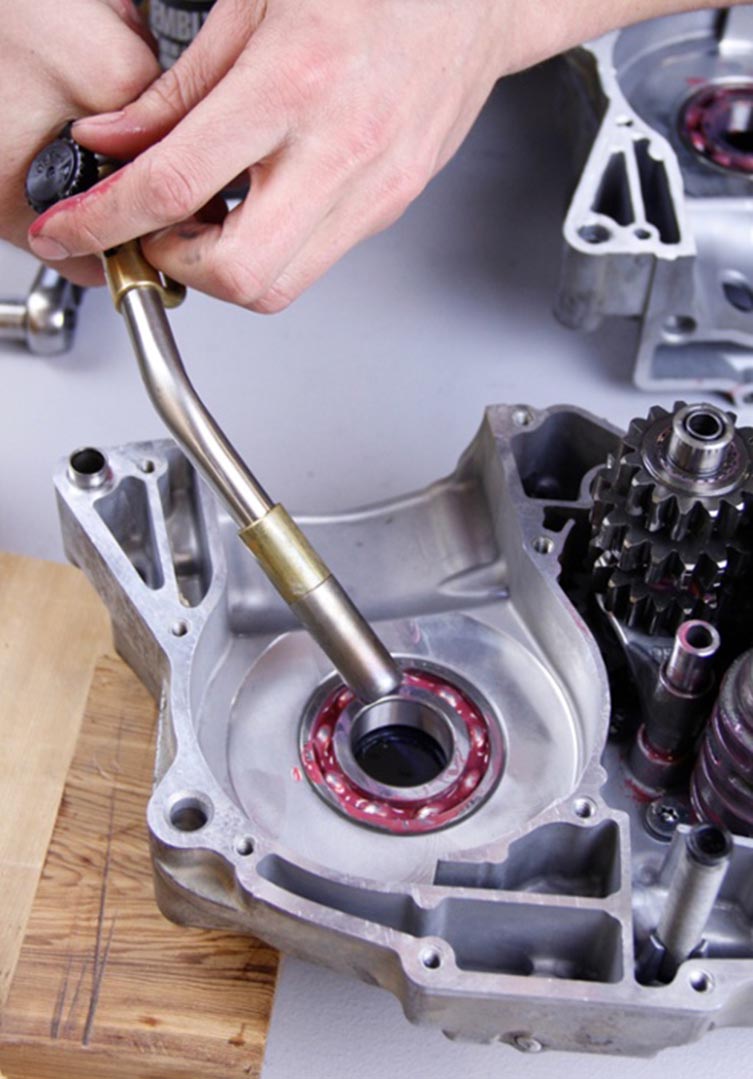
While your crankshaft cools in the freezer, carefully heat the inner race of the crank bearing, paying careful attention not to damage any new seals.
![]()
Using a crankshaft puller is an equally acceptable method and is incredibly straightforward. The puller is threaded and seats against the crank bearing or crankcase and attaches to the end of the crank via a nut or retaining ring. Once set up, the puller is tightened and the crankshaft is pulled through the bearing.
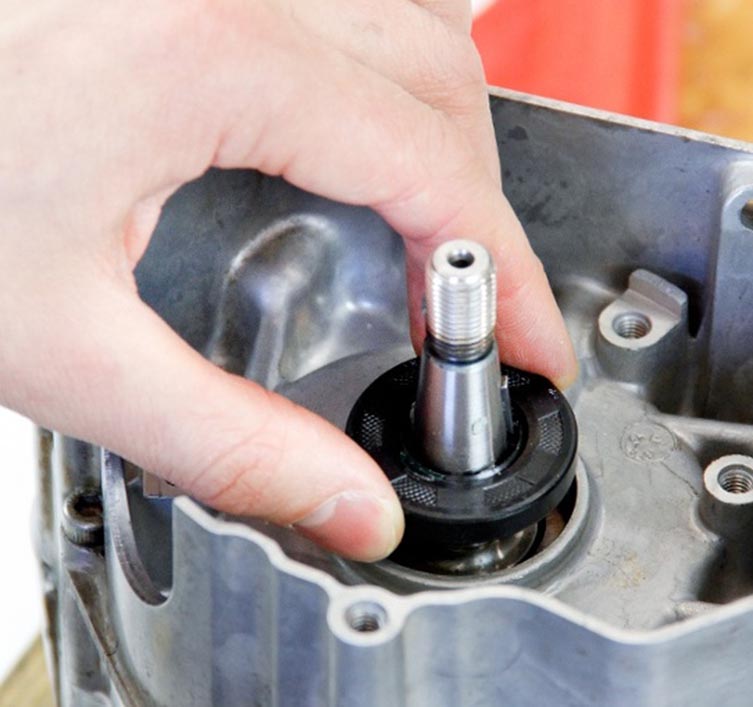
![]()
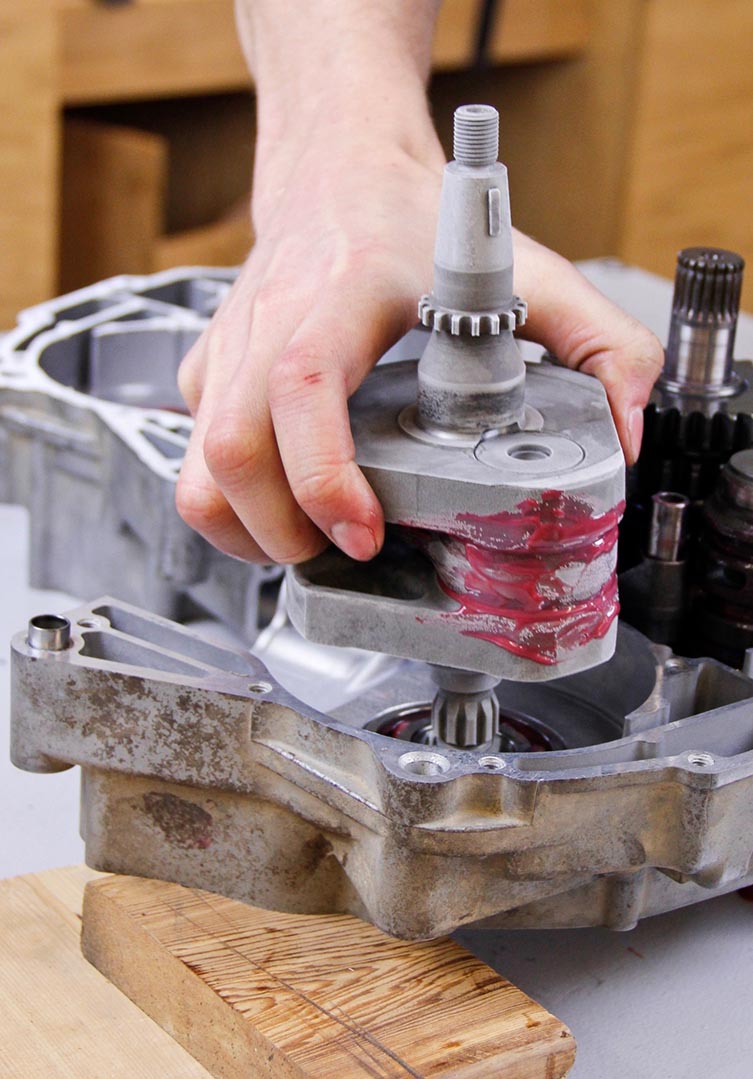
Your cooled crankshaft should fit through your heated bearing fairly easily. A crank puller can be used for installation to make sure everything is square. Also, be sure to use assembly lube in critical areas during assembly.
![]()
At this point, your crankcases should be buttoned up and you should be well on your way to rebuilding the rest of your engine. Upon installation of your flywheel, be sure to use a flywheel holding tool to secure it in place when torqueing the nut.
Related Content
HOW-TO: MAINTAIN YOUR FOUR-STROKE
HOW-TO: REBUILD A TWO-STROKE TOP-END
You might also like...

HIGHLIGHTS: 2026 TRANSMOTO 8-HOUR AT NARRABRI, POWERED BY KTM
Check out the highlights video from the 2026 Transmoto 8-Hour at Narrabri, NSW, powered by KTM.

2026 SMX WORLD CHAMPIONSHIP VIDEO PASS
The SMX Video Pass is back, and again providing live and on-demand access to all 31 rounds.

2026 ENDURO & CC MODELS: 7-BRAND PRICE COMPARO
A handy table of easy-to-compare prices for seven brands’ 2026 enduro and cross-country models.

HONDA CLAIMS EIGHTH AUSX TITLE
Dean Wilson sealed the deal for Honda with a dominant 2025 Australian Supercross season.
National Motorcycle Insurance
8 months ago
Ride Smart | Presented by National Motorcycle Insurance
Transmoto’s Simon Barratt covers some handy tips on how to protect your dirt bike, presented by National Motorcycle Insurance.
KTM
9 months ago
KTM DOMINATES 2025 AUSTRALIAN ENDURO CHAMPIONSHIP
The KTM DM31 Racing Team wrapped up four titles at the weekend’s AusEnduro season finale.

Boost Secures 2025 AUSX Naming Rights
The Australian Supercross Championship is set to launch into its biggest season yet.

TT Circuit Assen To Host 2027 MXoN
The 80th edition of the MXoN will see the legendary event return to Dutch soil in 2027.
Be the first to comment...