How-To: Change A Timing Chain
This article originally appeared in Transmoto’s 2013 November Issue (#37).
Replacing a timing chain isn’t a sexy job. It doesn’t offer you any extra power to thank you for your efforts, and it’s not like fitting a shiny alloy part where everyone in the pit paddock can admire your bling handiwork. However, the job is absolutely critical, as a broken or loose chain that causes your camshafts to skip a tooth could see the likes of the Chernobyl disaster replicated between your legs – costing upwards of $2500 to fix. Basically, it’s mechanical insurance.
A timing chain (naturally only found on a four-stroke) has the important job of keeping the camshaft – and therefore the opening and closing of the inlet and exhaust valves – turning in exact unison with the crankshaft. Old-school donks had foolproof gears turning the camshaft with pushrods transferring the force to the valves, however the lighter and more powerful overhead cam technology has seen those gears replaced with a chain.
Timing chains are pretty hardy these days and rarely need replacement, but it’s better to be safe than sorry. It’s a good idea to stick to your manufacturer’s replacement recommendations. Also, check the slack in the chain whenever you check your valve clearances by pulling the chain at the top of the camshaft sprocket and seeing how much play there is – any more than half-a-tooth
of slop and it’s time to replace her. Teknik’s Nick Dole explains how it’s done right.
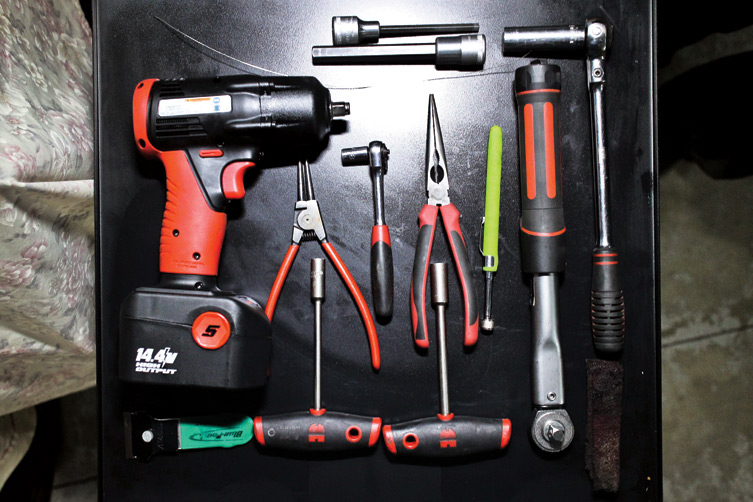
Tools You’ll Need
- Spanners, T-bars & socket set
- Allen keys
- Tie-wire
- Pliers
- Magnet
- Vernier calipers
- Circlip pliers
- Impact gun
- Torque wrench
- Flywheel puller
What It’ll Cost Ya
- Labour: 1.5 hours
- Timing chain: $60
1. Strip & Remove The Cams
Before you begin, give your bike a thorough wash to avoid getting grit and sand into your engine. Remove the seat and tank, and then follow the steps in the valve clearance adjustment story from two months ago (click here to view) to pull off the camshafts. There’s no need to remove the buckets and shims if the valves have already been adjusted.
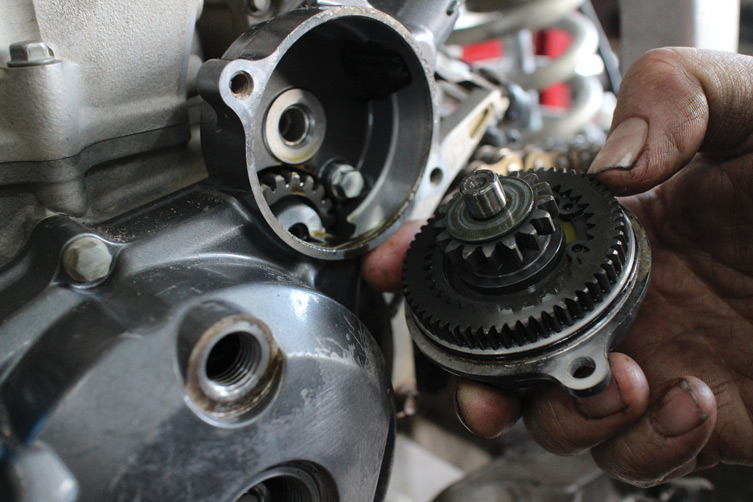
2. Remove Starter Motor Throw-Out Gear
Most timing chains are a single loop, and are never broken or joined. Instead, they’re replaced as a whole unit from around the crank sprocket (behind the flywheel). To gain access, bikes with starter motors will need the throw-out gear removed, and possibly even the starter motor itself – if the seal with the flywheel cover is stiff.
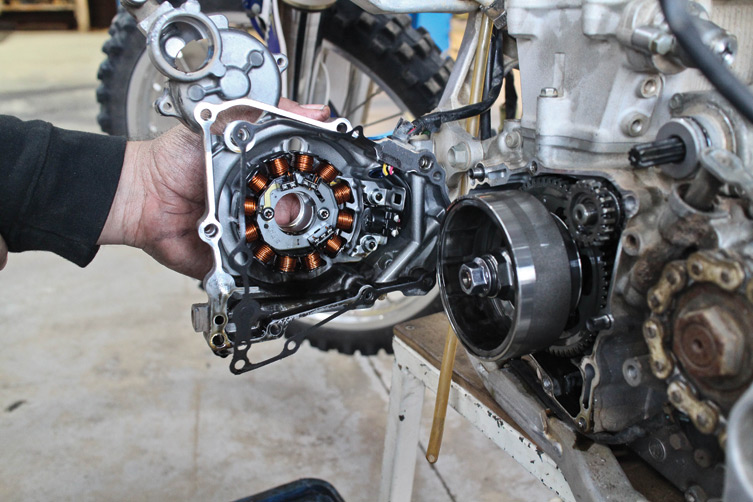
3. Pull Off The Flywheel Cover
With the starter motor and throw-out gear removed, gently pull off the flywheel cover, stator and gasket. Keep track of where the bolts belong as they’re often different lengths around the cover. Don’t lever the cover off from just one point as it may crack. Instead, carefully work your way around with a small screwdriver.
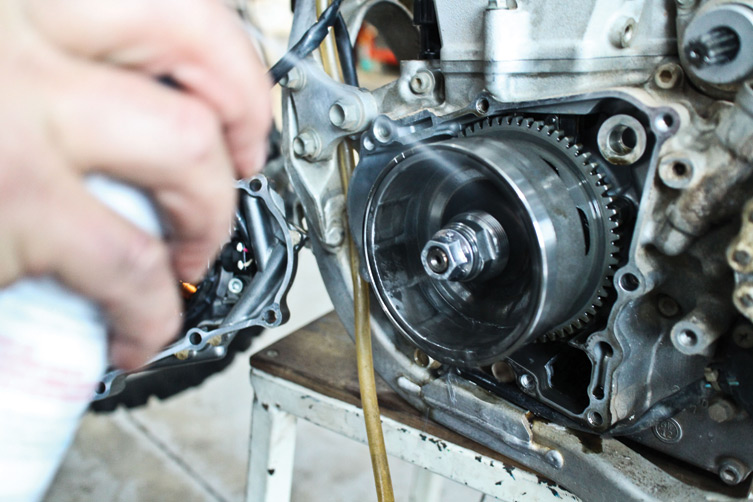
4. Clean The Flywheel & Moving Parts
With clear access to the left side of the engine, now’s a great time to give the accessible parts a thorough clean. Even though different oils have better detergent qualities than others, even the best quality oils will see some soot and grime build-up over time and use. Hit what you can with a degreaser spray and a brush if necessary.
5. Remove The Flywheel Nut
The flywheel nut is one of the tightest fasteners on your bike. While it is possible to lock the engine up to prevent the flywheel from turning and then undo the nut with a spanner, the stress on the engine and the chance of bending something, means this isn’t the ideal method. Instead, a pneumatic or electric rattle gun is definitely the way to go here.
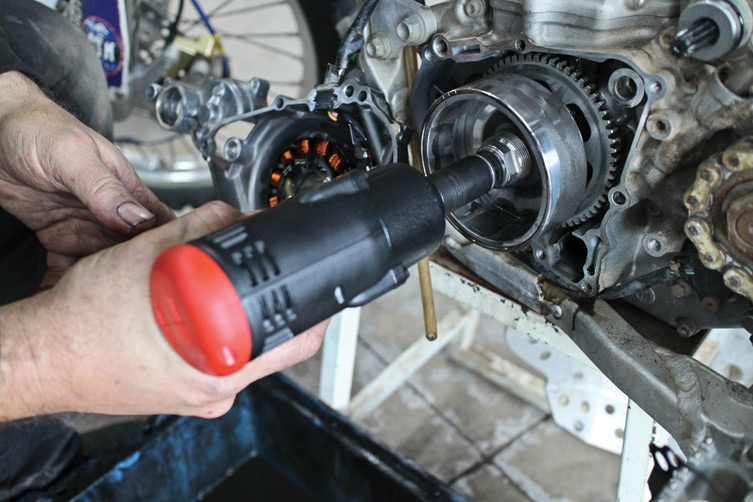
6. Pull Off The Flywheel
The only special tool required for this job is a flywheel puller, designed to remove the flywheel from the tapered end of the crankshaft. Simply screw the nut attachment onto the end of the flywheel, then the main puller body onto the flywheel itself. As you tighten the bolt on the puller, the flywheel will be pulled off the end of the crankshaft.

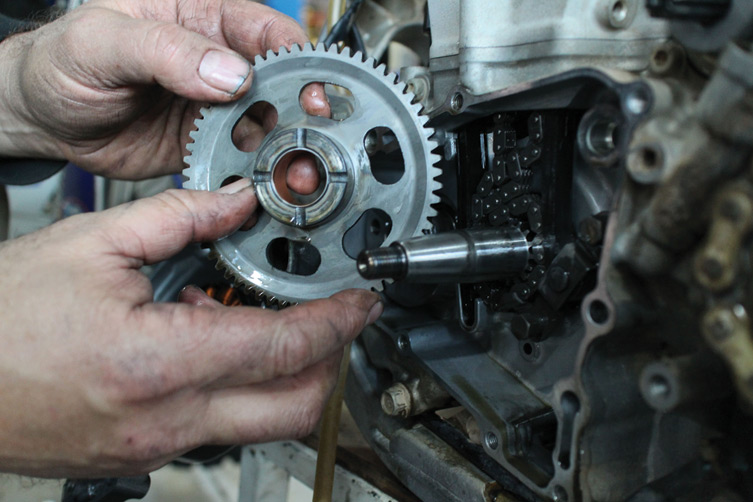
7. Remove Starter Motor Gear
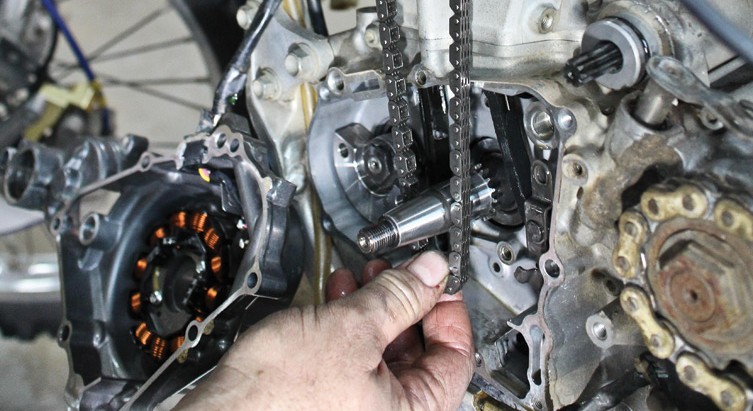
As you pull the flywheel off, be sure to grab the woodruff key (a semi-circular metal disc that locks the two components together) from the groove on the crankshaft. Then, remove the large starter motor gear on the crankshaft to reveal the timing chain.
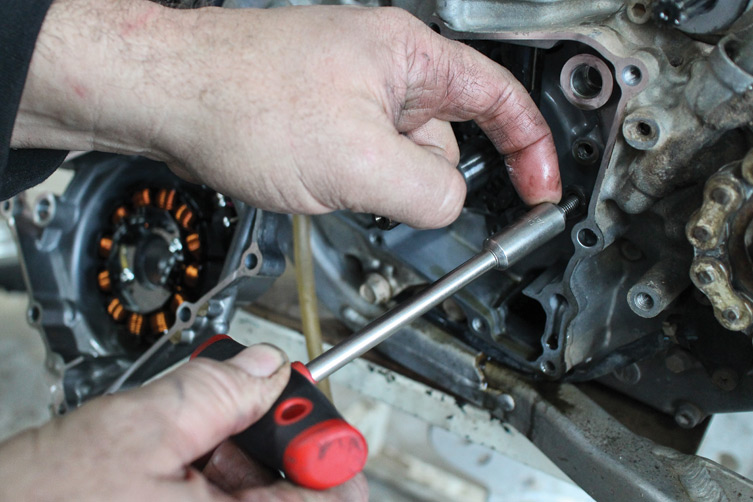
8. Remove The Timing Chain Guide
The final step before removing the chain is to pull off the timing chain guide. This is where the bottom end of the rear-side timing chain slider mounts, and is designed to hold the chain onto the correct tooth on the crank gear so you don’t risk skipping a tooth as you adjust the valve clearances. Simply remove the two bolts holding it in place.
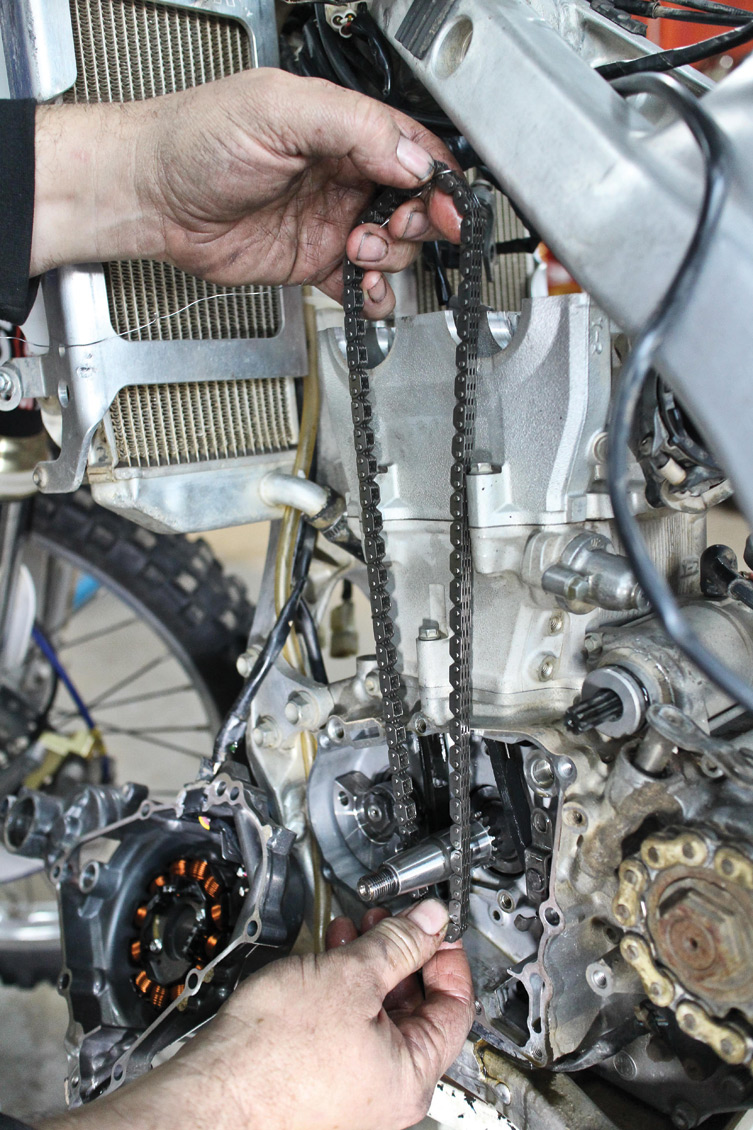
9. Replace The Chain
With everything removed, simply let the chain drop and pull it out as a single loop from around the crankshaft. To put the new chain on, tie a piece of tie wire around the chain and poke it up through the cases, allowing you to pull the chain up from the top. This photo shows the new chain before it gets fed into the engine’s cases.
10. Reassemble The Engine
With the new chain in place, reassembly is in the reverse order, including the steps from the previous valve adjustment story. The critical aspect of the reassembly is getting the correct torque on the flywheel nut. If you’re using a rattle gun and are not confident, ask a mechanic or a mate who knows what they’re doing to help.
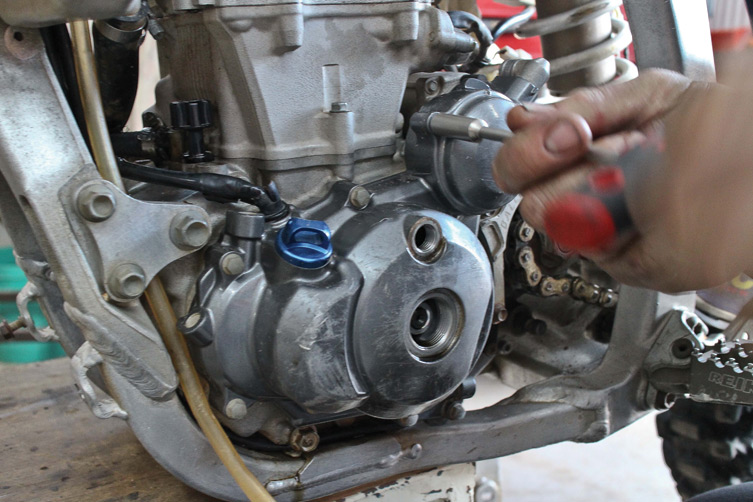
Timing Chain Tensioner
As the name suggests, an automatic timing chain tensioner automatically applies the correct tension on a timing chain by pushing on the rear timing chain slider. That in turn takes up any slack as the chain naturally stretches and loosens. To take the tension off the chain, simply remove the cover bolt on the back of the tensioner, then unscrew the bolt until you feel a click, whereby the tensioner will automatically loosen off. When re-tensioning the chain, wind the bolt in until you feel a similar click, and the tensioner will automatically adjust to the correct tension.
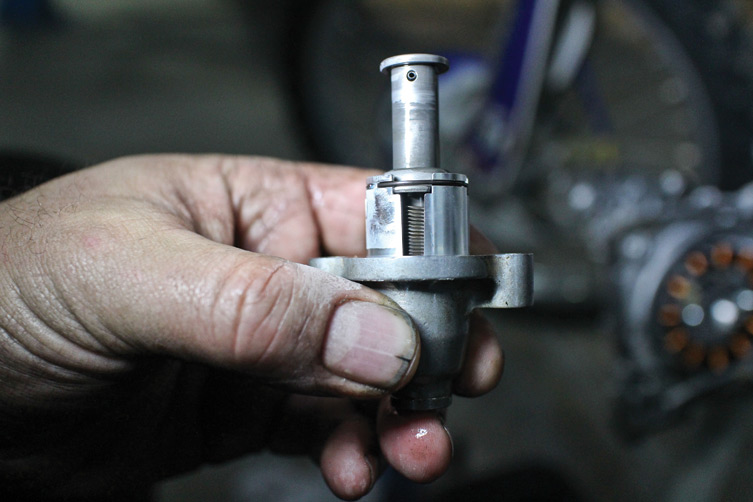
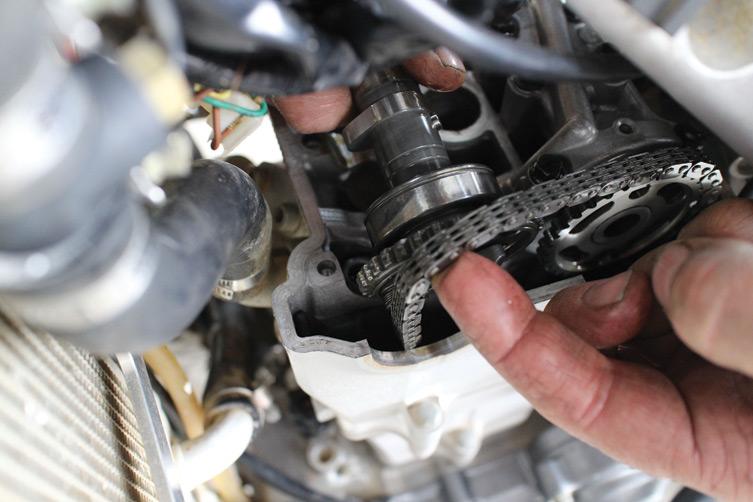
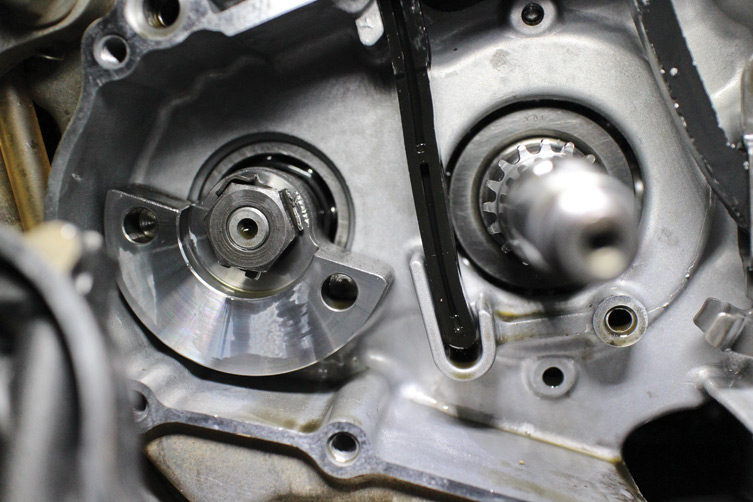
Timing Chain Slider
While there’s no need to remove the front slider when replacing the timing chain, you do when you pull the head off to replace a piston. The trick then becomes getting the slider to seat correctly when reinstalling it. This photo shows the bucket seat that the lower end of the front slider sits in, as well as the counter-balancer (semi-circular device) used on most modern thumpers to reduce vibration from the engine.
—
Want to view this article in magazine form? Grab yourself a print or digital edition of Transmoto’s 2013 November Issue (#37).
You might also like...
Ducati
3 days ago
2026 Ducati Xpeditions Takes On Flinders
The six-day, 1800km adventure will take on the South Australian outback for Multistrada and DesertX riders.

2026 SMX WORLD CHAMPIONSHIP VIDEO PASS
The SMX Video Pass is back, and again providing live and on-demand access to all 31 rounds.

2026 ENDURO & CC MODELS: 7-BRAND PRICE COMPARO
A handy table of easy-to-compare prices for seven brands’ 2026 enduro and cross-country models.

HONDA CLAIMS EIGHTH AUSX TITLE
Dean Wilson sealed the deal for Honda with a dominant 2025 Australian Supercross season.
National Motorcycle Insurance
4 months ago
Ride Smart | Presented by National Motorcycle Insurance
Transmoto’s Simon Barratt covers some handy tips on how to protect your dirt bike, presented by National Motorcycle Insurance.
KTM
5 months ago
KTM DOMINATES 2025 AUSTRALIAN ENDURO CHAMPIONSHIP
The KTM DM31 Racing Team wrapped up four titles at the weekend’s AusEnduro season finale.

Boost Secures 2025 AUSX Naming Rights
The Australian Supercross Championship is set to launch into its biggest season yet.

TT Circuit Assen To Host 2027 MXoN
The 80th edition of the MXoN will see the legendary event return to Dutch soil in 2027.
Be the first to comment...